How to Update VX Software
Scope
This article explains how to update the software of any VX:
- VX Enterprise
- VX Prime+
- VX (legacy)
- VX Prime (legacy)
This process is very simple. The screenshots below reflect a VX Enterprise, but the process is nearly identical for other VX versions.
Procedure
- Download the latest firmware from the Telos Alliance website, or from a link provided by Telos Alliance Support. If you are not certain what version to use, please contact us.
- Navigate to the VX web UI and click the Backup/Restore link. Log in if prompted.
- Click Backup Settings to download a backup configuration file. This contains all settings and data on your VX.
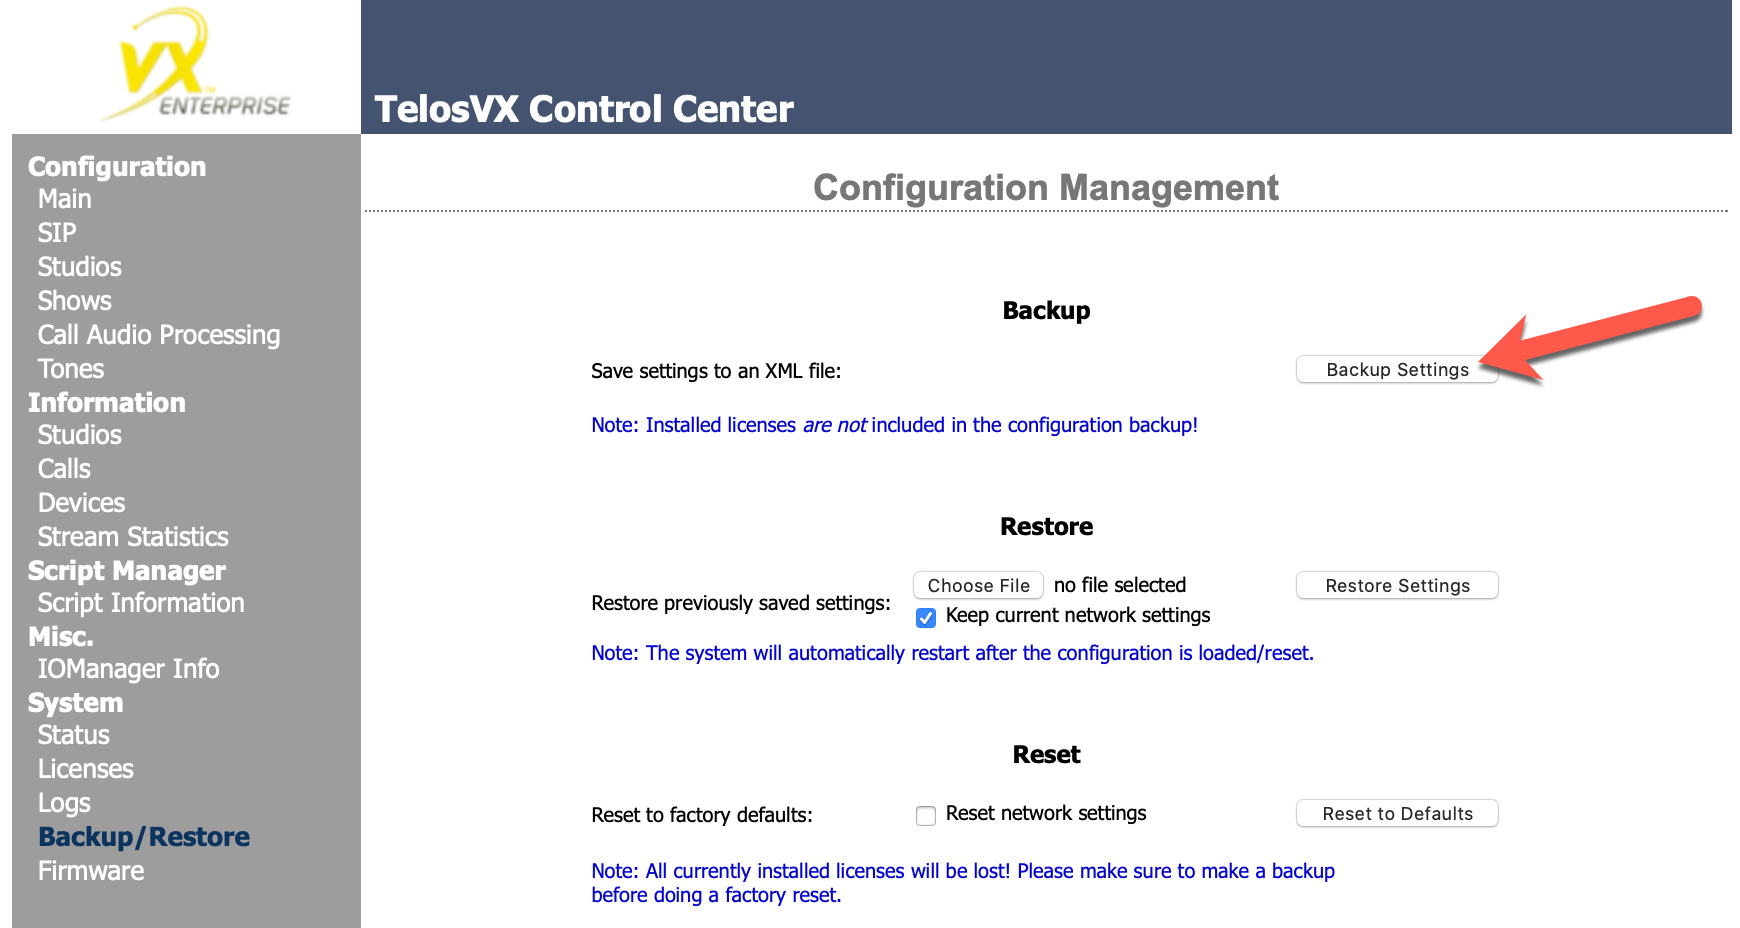
- If you have a VX Enterprise, also navigate to the Licenses page and click Backup to download a copy of your license(s). If you do not have a VX Enterprise, skip this step.

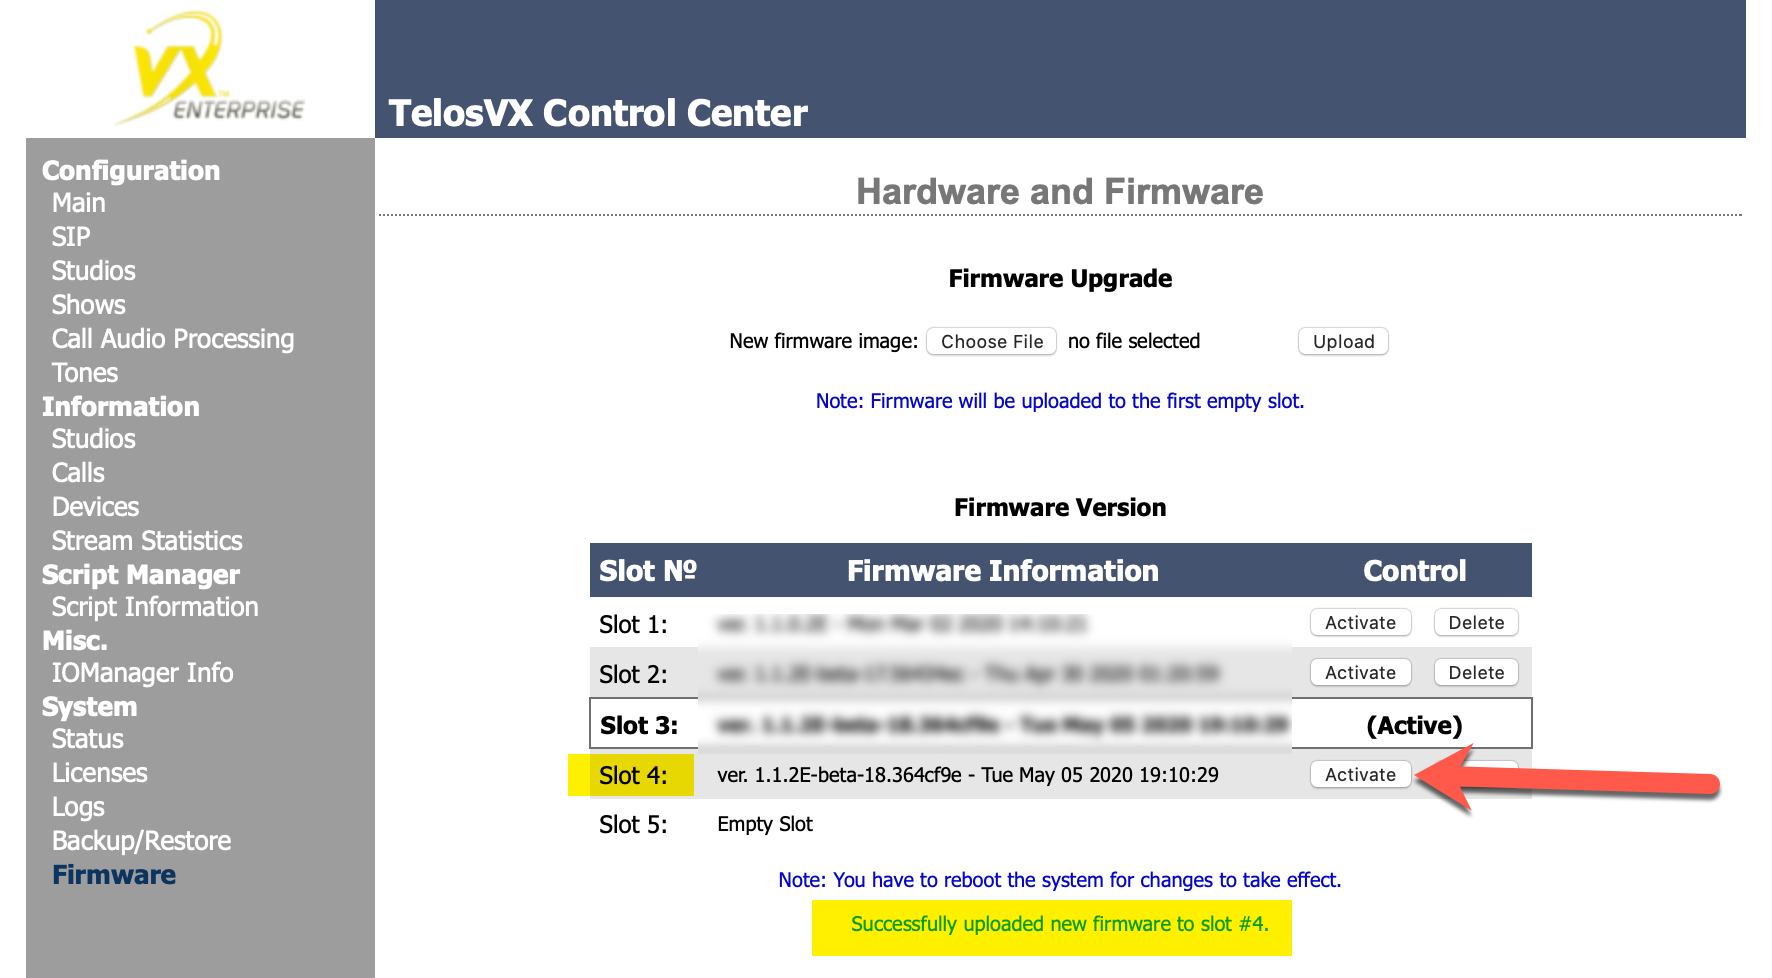
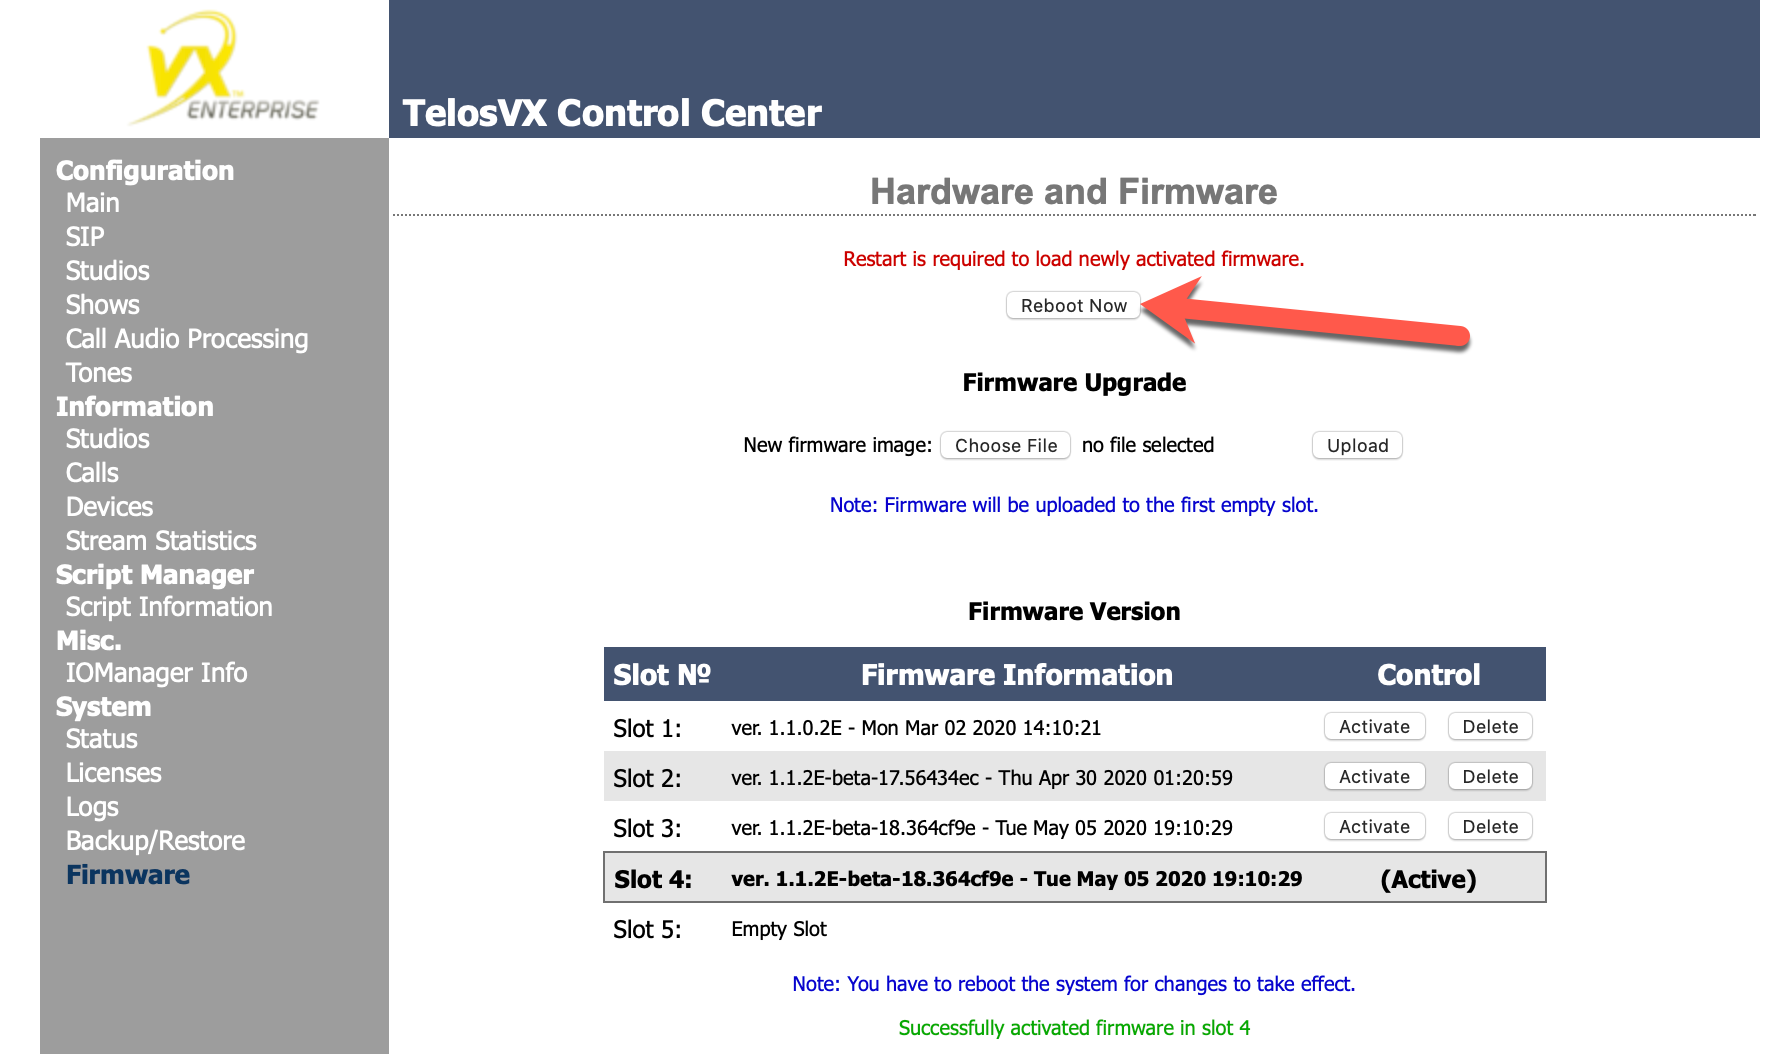
- Navigate to the Firmware page.
Click Browse, select your VX software file update file, then click Upload.
- When the upload finishes, you will see the green text "Successfully uploaded new firmware to slot #X."
Click the Activate button in the slot row listed in the green message.
- The message "Restart is required to load newly activated firmware" will appear, along with a Reboot Now button. Click it. A pop-up will appear to confirm your request to reboot the VX.This will drop all calls and close all connections on the VX. The system takes about 1 minute to reboot, and peripherals (such as VSets) will take up to 1 minute to reconnect once the VX has fully booted.
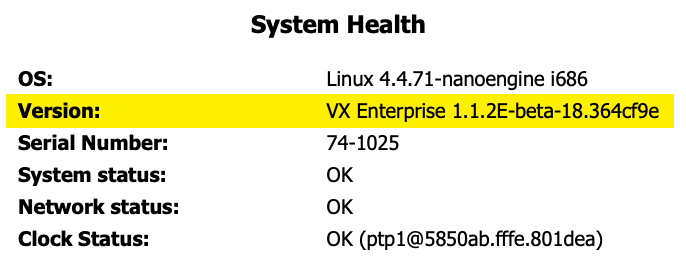
- Wait 2 minutes for the VX to reboot and peripherals to connect, then navigate to the Status page to observe the software version that is now active.
Let us know how we can help
If you have further questions on this topic or have ideas about how we can improve this document, please contact us.