Calibrating Quasar Four-Fader Modules
 Updated
by
Bryan Jones
Updated
by
Bryan Jones
Scope
This document covers the fader calibration procedure for the Quasar XR-4FAD module (Part number 2001-00569). Version 1.2 or higher of the XR-4FAD module is required.
For information on downloading and installing XR Fader version 1.2 please click here.
Description
Software v1.2 of the XR-4FAD Module introduces a new function: Fader Calibration.
Fader calibration is useful for aligning some faders' position, which, because of different manufacturing tolerances, do not behave exactly like the others when moving to a preset position. Fader calibration is a manual procedure to equalize each fader's gain curve; however, not all faders require calibration. The quickest way to calibrate the faders is to recall a fixed position and calibrate only those faders with a visible difference.
Fader Calibration
- Make sure the Fader Module is updated to SW version 1.2
- Set all faders to 0 dB
- Hold the MON OPT button for 5 seconds
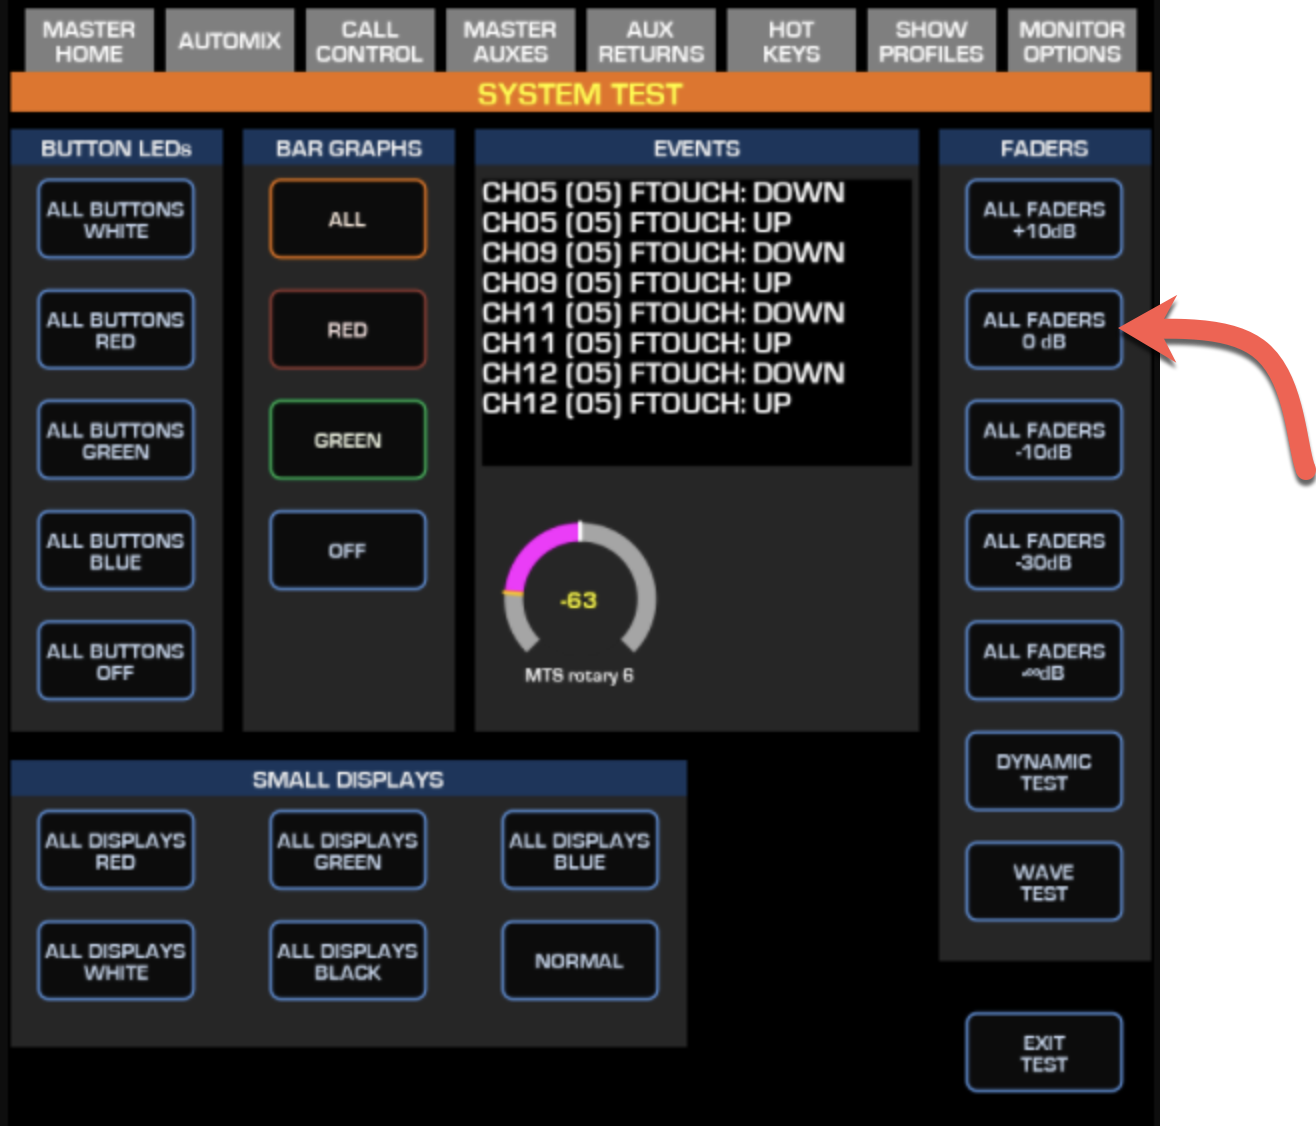
- Select System Test
- Tap the ALL FADERS 0 dB button
- Using a Web Browser, navigate to the Fader Module's Web GUI and select Fader Calibration from the left column menu. The following page will appear:
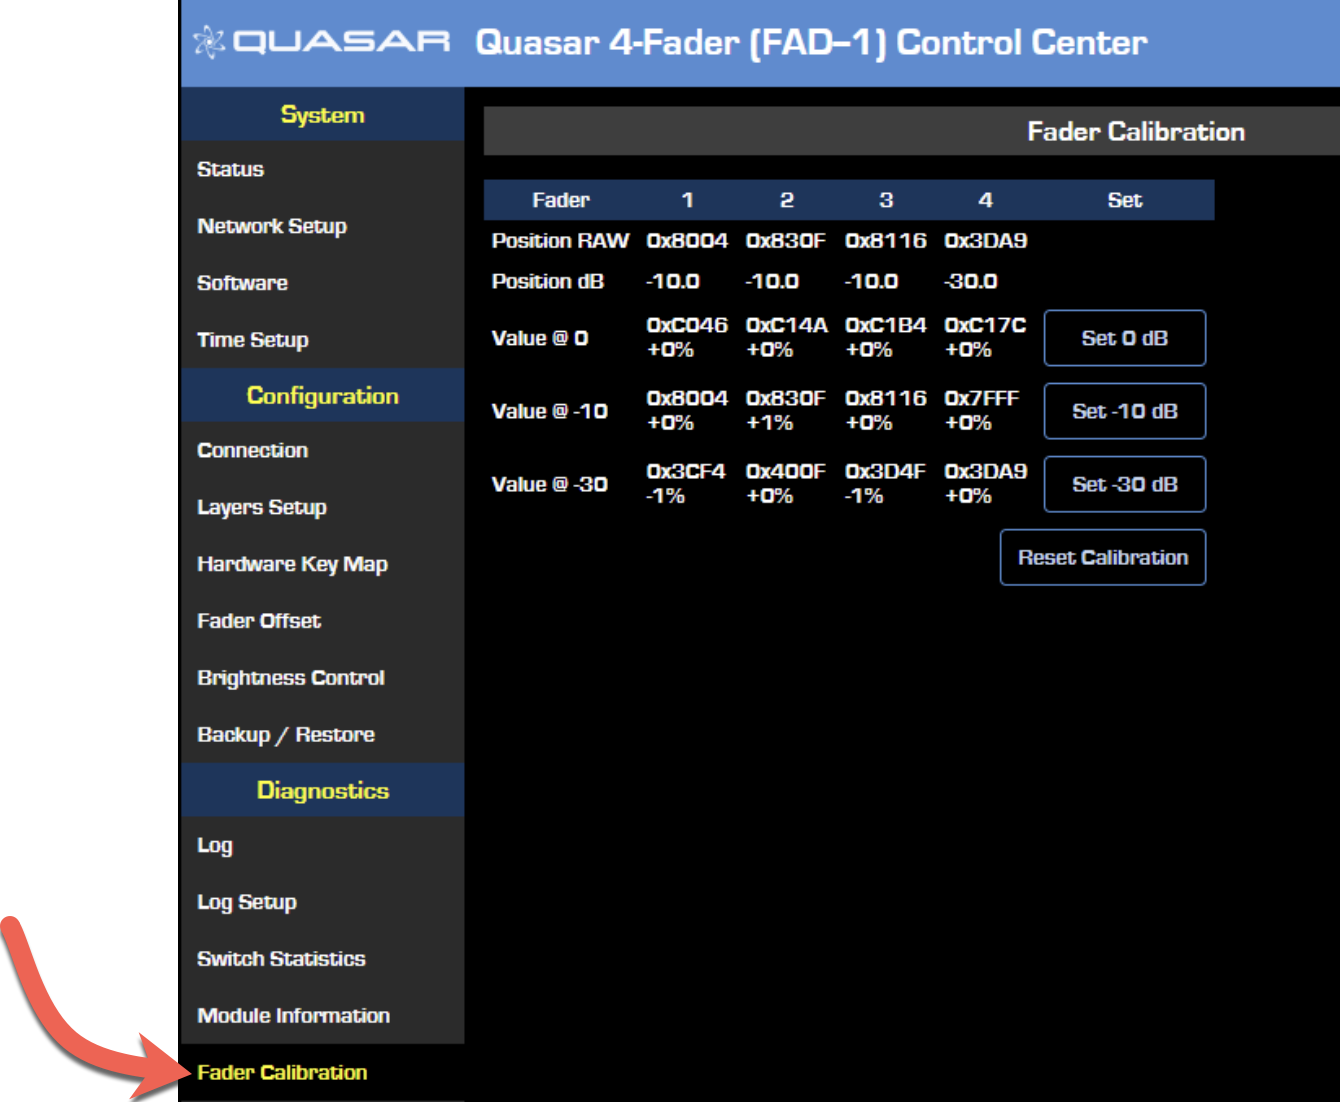
- Align all faders manually to 0dB (precise calibration), OR adjust only those that are not right in your opinion.
- Push the "SET 0dB" button on each fader module web UI page.
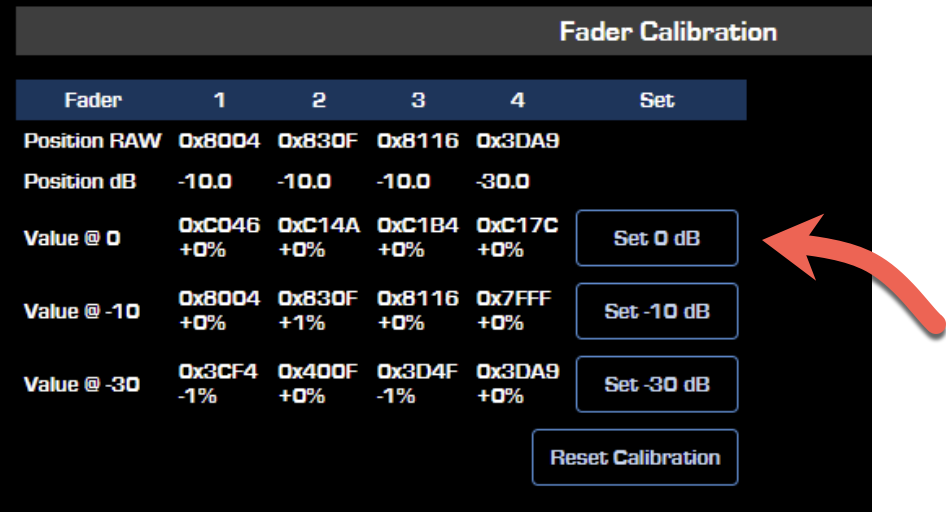
- Repeat Steps 2C to 5 for -10dB and -30dB positions using the Master Touch screen to move all faders to the calibration position.
- Double-check everything by recalling all the 5 position presets (+10dB, 0db, -10dB, -30dB, and ~dB) from the System Test screen. In case you are not 100% happy with the results, repeat any of the calibration steps, and the game is done!
Some additional notes regarding calibration
Note #1: When adjusting minimal deviations, like +/- 1mm, ensure that the display above the fader changes the value. The fader has a movement tolerance of +/- 0.5mm, so it might not track the change.
Note #2: If you need to align all faders perfectly, we suggest using a steel ruler (must be conductive as the faders are touch-sensitive, therefore anodized aluminum or plastic won’t work). Move all faders down to -30dB. Insert the ruler under the fader posts and push them all up to 0dB. If all faders register touch during this operation, you will see both yellow arrows lighting up on all faders. Once in position, calibrate for 0dB. Now place the ruler above the fader posts. Push the faders down to the -10dB position. Calibrate for -10dB. Repeat this operation for calibrating -30dB.
Let us know how we can help
If you have further questions on this topic or have ideas about how we can improve this document, please contact us.