Licensing and Configuring µMPX Encoder
 Updated
by
Jake Alderman
Updated
by
Jake Alderman
Scope
This article describes how to license and configure an Omnia.9 MKII FM processor to use µMPX.
Description
Whether you are replacing an existing STL, adding a backup link, or moving your processor back to the studio, the embedded µMPX encoder in the Omnia.9 turns your processor into the front end of an STL. This solution makes your Omnia.9 capable of reliably sending composite FM and RDS data across IP links at rates as low as 320 kbps to one or many Omnia MPX Nodes or other µMPX decoders.
The following topics are covered in this article
- Enabling µMPX
- Initial configuration
Enabling µMPX
Omnia 9 MKII units running software version 3.20.04 or later come with a µMPX demo mode that allows users to stream µMPX composite to an MPX Node decoder. This demo is useful for off-air evaluation purposes, but note that random sweep tones are injected into the stream until the unit is properly licensed. This demo mode can be found at on your Omnia.9 at Home/System/IO Options/uMPX.
To install a licensed version of µMPX, first license needs to be added to the system.
Requirements
- Omnia 9 MKII platform base
- version 3.20.04 of Omnia 9 software is installed. Click here to upgrade
- version 3.20.04 of NfRemote installed on a Windows PC that can connect to the Omnia.9
- PDF with the license key for µMPX
- Open NfRemote.
- Type the IP address of the Omnia.9 in the IP field.
- Type the password for the Omnia.9 in the Password field.
- Set the control mode to Local Mouse or Touchpad.
- Click the Connect button.
- Once connected, open the System menu.
- Next click on System Config.
- Click on the Upgrades button.
- Open the PDF with the µMPX license key.
- Copy the license key.
- Paste the license key into the MPX/IP field in the Omnia.9.
- Click the Apply Config button.
- Ensure the MPX/IP field shows the text "Installed". If so, µMPX has been successfully installed on your Omnia.9.
Initial Configuration
Once the µMPX feature is licensed there are few more steps to start sending µMPX to decoders.
Requirements
- Have the public static IP or Multicast address the µMPX decoder is using
- Know the port number that is forwarded through the firewall
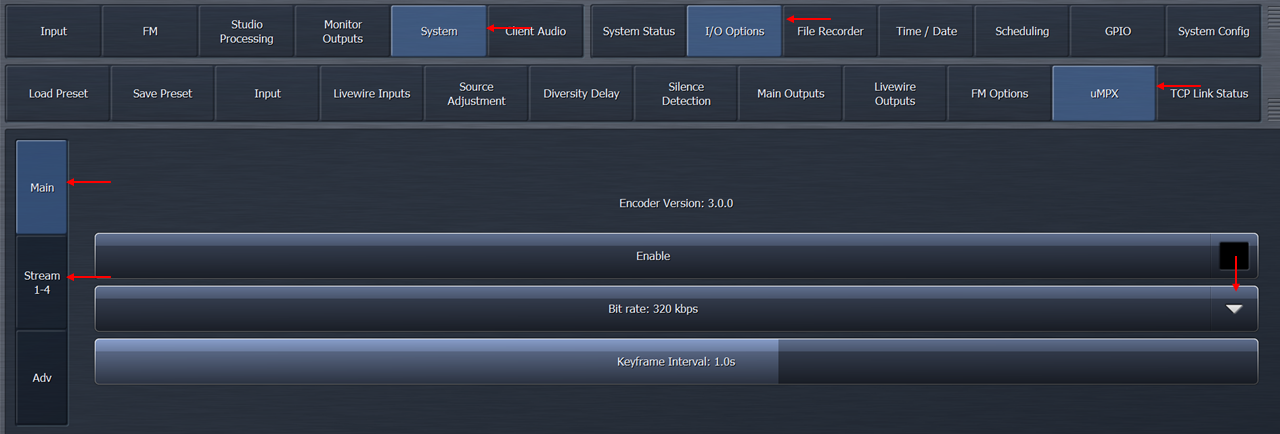
- Open the system menu.
- Click I/O options.
- Click µMPX.
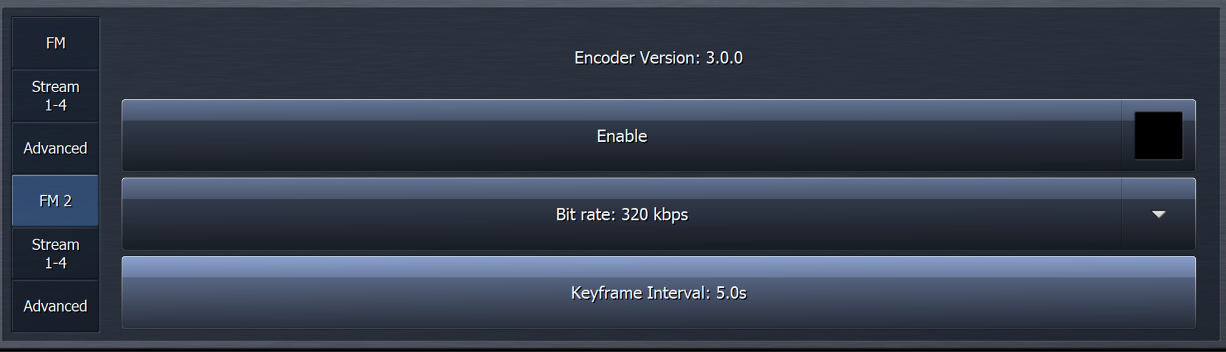
- On the main page select the appropriate Bit Rate for the lowest bandwidth network connection you'll be using to stream µMPX.
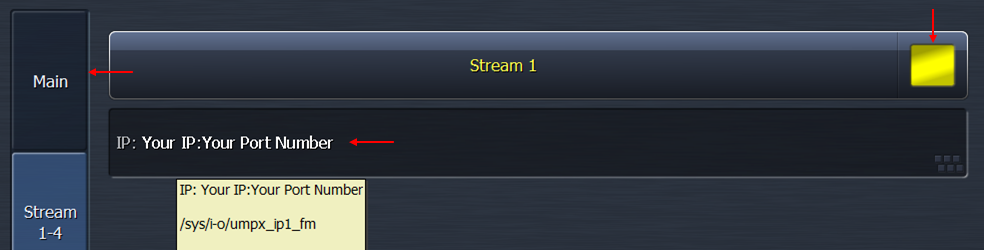
- Click the Stream 1-4 button.
- Click on the IP box for the first stream.
- Type the IP address and port of the µMPX Decoder or Multicast address the µMPX Decoders will subscribe to.
- Type a : in followed by the port number.
- Click the Stream 1 button to start streaming.
- Click the Main button.
- Click the enable button.
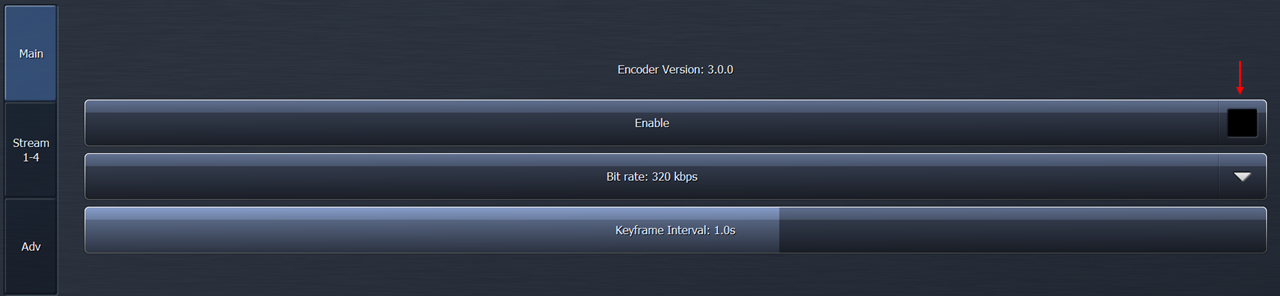
The encoder is now streaming from the WAN port of the Omnia 9. Connect to the decoder and verify the stream is being received.