Activating Skimming in iProfiler
 Updated
by
Bryan Jones
Updated
by
Bryan Jones
Scope
This document will cover the steps needed to activate the archive "skimming" feature in iProfiler.
Description
Back in the good-old-days skimming used to be accomplished using a cassette recorder, and your console would provide some relay to that recorder. For PR&E users, you needed a PRE#99-410 Casette skimmer interface, which would let you program up to four mics that would trigger a Cassette recorder. Today this is much easier, and there are many more options. Most of which don't require the use of physical relays.
iProfiler can record (skim) in many different scenarios. The most common is to have skimming "follow" the On-Air light. When the light is on, usually so are the mics, and so it starts recording.
In this document, we'll use the Control Room Monitor logic port to control skimming. The Control Room Monitor logic port is where the "relay" originates that controls the On-Air light.
For specific information on finding the channel number assigned to the logic or how to configure it, if it's not already, see this article Setting up an On-Air light.
Configuration
Configure the IP Driver
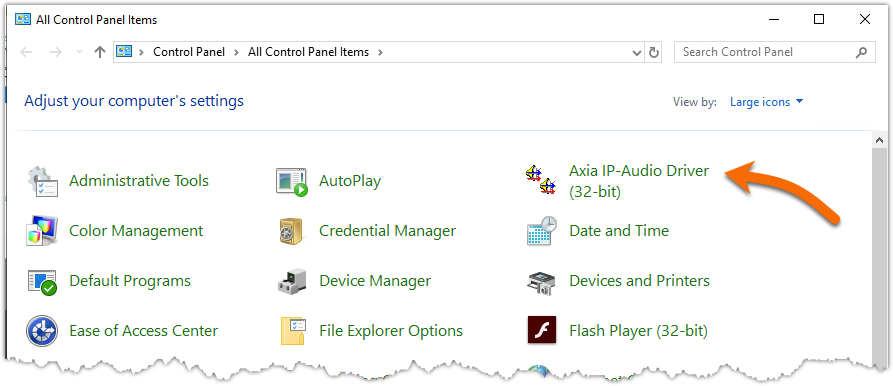
- In the Windows Control Panel, open the Axia IP-Audio Driver configuration.
- Place the Control Room Monitor Logic port channel in one of the unused GPIO ports. In this example, the Control Room Monitor logic channel from our console is 6099.
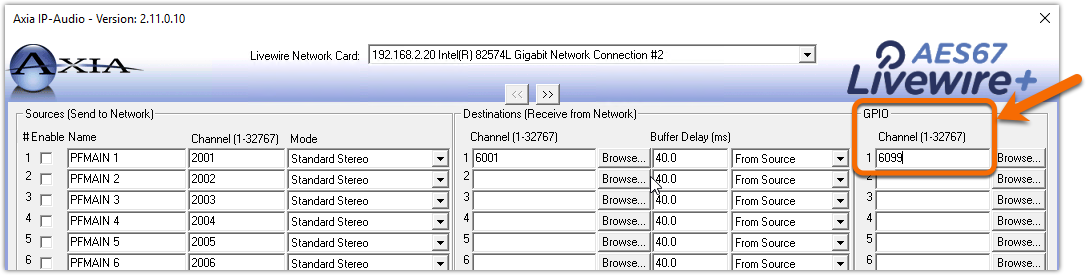
- Click OK to apply the settings and close the configuration application.
Configure iProfiler GPIO
Each Audio Source has its own Skim Inputs and must be configured individually.
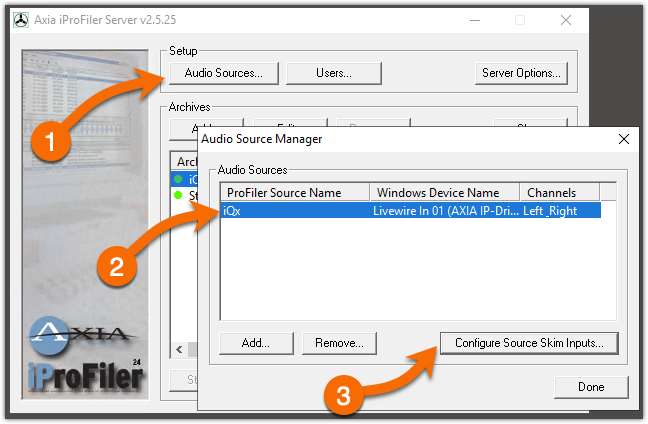
- From the main iProfiler Server screen, click the Audio Sources button under Setup.
- Select Audio Source you want to configure.
- Click the Configure Source Skim Inputs button.
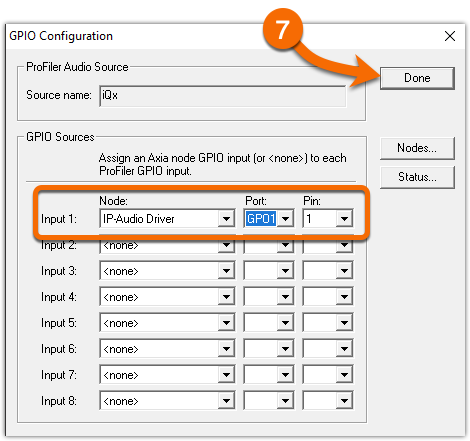
The GPIO Configuration window will appear. The local Axia IP-Audio driver is pre-configured as a GPIO node in iProfiler. Additional nodes can be added. That process is covered in the manual and is out of the scope of this document.
- For Skim Input 1 - Select IP-Audio Driver for the Node
- We added the CR Monitor channel to Port 1 of the Axia IP-Audio driver, so pick GPO1 for the Port (not GPI).
- The On-Air light is on PIN 1 of the GPO on PORT 1. Pick 1 for the Pin.
- Click Done
Configure the Archive
- From the main iProfiler Server application, click to select the archive to be configured, click Edit, or click Add to create a new one.
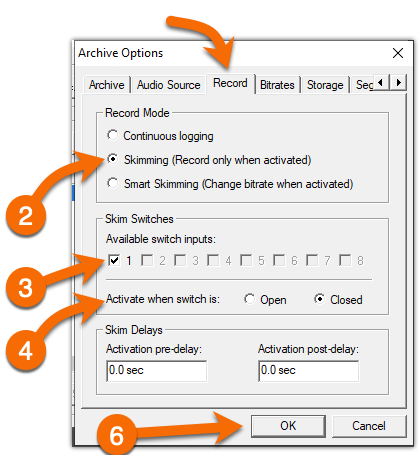
- On the Record tab, select Skimming (record only when activated)
- From the Available Switch inputs, check the box next to 1. (this is the "Input 1" that we configured in the previous step.
- Select Activate when the switch is... Closed.
- Add any required Skim Delays. You can add time either before or after the relay changes. For example, you might want to add a few seconds to be beginning or end to not stop the recording so close to the light's activation.
- Click OK.
Check your work
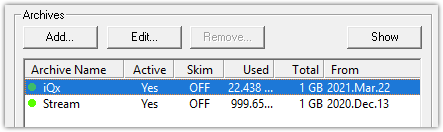
After clicking OK, you need to Start your archive again by clicking the start button. In this case, you can see that our Archive named iQx shows Active YES, and Skim NO. NO is the normal state when it's NOT skimming.
When you activate the On-Air light, the Skim column will change to ON if you have done everything correctly, indicating that Skim is active.
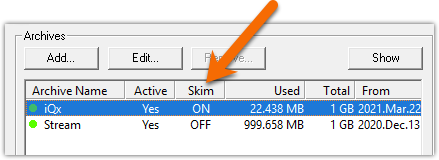
When the On-Air light turns off, Skim will return to OFF.
Congrats! You are now skimming.
Let us know how we can help
If you have further questions on this topic or have ideas about improving this document, please contact us.