How to Backup/Restore my Settings of an Omnia.9 Audio Processor
 Updated
by
Werner Gabel
Updated
by
Werner Gabel
Scope
This document explains the process to back up your settings of an Omnia.9 Audio Processor to your local workstation.
Description
There will be a need for you to back up the settings of your Omnia.9 Audio Processor to your local workstation.
Backup Menu
The Backup Menu appears as an additional System Config item only when you are connected to Omnia.9 via the NfRemote software, not when viewing the front panel display, and allows the entire configuration of the unit to be saved to your PC in a single .zip file.
It also allows a previously saved configuration to be uploaded to the Omnia.9.
HOME - SYSTEM - SYSTEM CONFIG - BACKUP

This configuration “profile” includes factory and user-created processing, Undo, I/O presets and all other configuration information. It also includes logs, crash dumps, and a full human-readable configuration dump that shows the value of every single Omnia.9 parameters inside an automatically generated HTML file, so that you can explore the contents of a backup file on your computer without actually applying it.
Should you wish to “clone” your Omnia.9 you can do so simply by uploading the file to the second unit instead of configuring each parameter individually, rather like the concept of creating an “image” in computer terms. This is also handy if you (or someone else) accidentally change something and aren't sure of the original settings, as uploading a known good configuration can immediately get things back to normal similar to using a “restore point” in PC terms.
Backup your settings
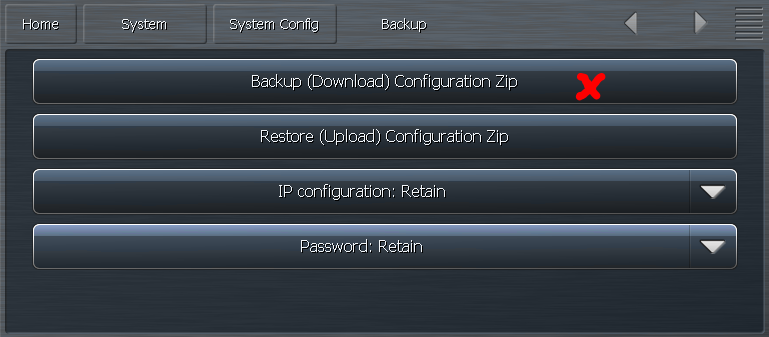
The Backup (Download) Configuration button saves the current configuration to your computer. Selecting it opens up a Windows Explorer window allowing you to name and choose the location of the saved file.
Restore your settings
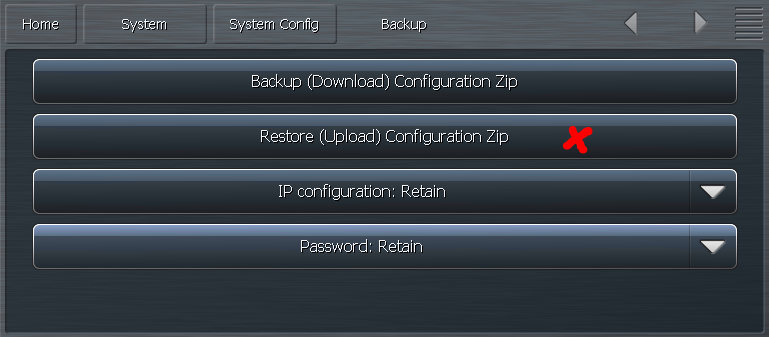
The Restore (Upload) Configuration button uploads a previously saved configuration to Omnia.9. Selecting it opens up a Windows Explorer window allowing you to navigate to the file on your computer and select it. A confirmation message will appear asking you to verify the upload.
General Settings

The IP configuration and Password drop-down menus determine what to do with the IP configuration and the Password stored in the backup when restoring an backup. The default is to Retain the current configuration in the Omnia.9, thus ignoring what’s in the backup, as it would be easy to lock yourself out or cause an IP address conflict on your network if they were set to Override by default.
Selecting “Override” will take the IP configuration and the Password stored in the backup file and apply them as part of the restoration process.