Setting Up a Low-Delay Studio Processing Output
Scope
This document explains how to route the low-delay studio processing audio to an output of the Omnia.9.
Description
Unlike most of the other processing cores in the Omnia.9, the Studio Processing core does not appear as a direct selection in the "Source:" dropdown list of the"Main Outputs" menu. So one of the 3 monitor outputs must be used instead. The below procedure will walk you through the setup for this.
In this example, we'll use the "Speaker Out" monitor output and feed the studio processing audio to Livewire output 5 in a MkII Omnia.9.
Setup
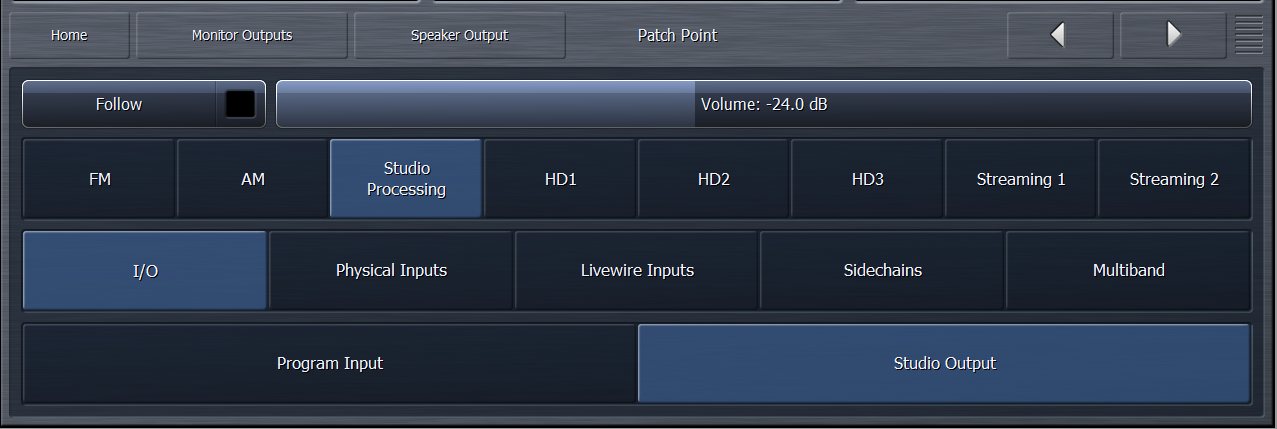
- Start by navigating to Monitor Outputs / Speaker Output / Patch Point and select Studio Processing / I/O / Studio Output. Note that the "Volume:" (output) level is set here as well:

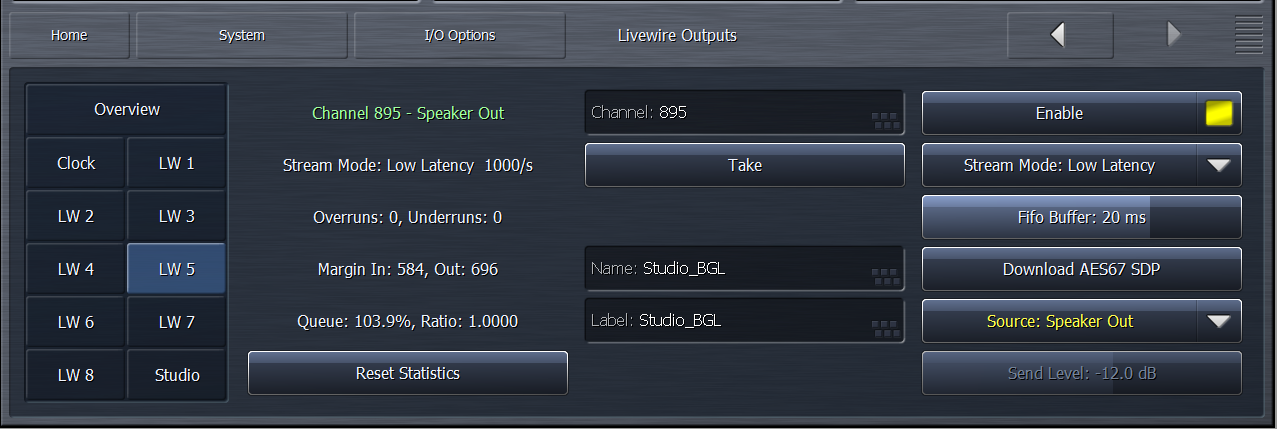
- Navigate to the desired output in System / I/O Options / Livewire Outputs. Select "Speaker Out" from the "Source:" dropdown list. Ensure that the Stream Mode is set to "Low Latency", assign a channel number, click "Enable" and finally, click the "Take" button:
 Now the studio processing audio should be feeding the LW 5 output. Note that using Livewire out will add a few ms of additional delay so YMMV but you should be able to get it below 10ms overall if you use Low Latency streams at both ends. Here I have the buffer slider set to 6.5ms which seems to be OK on our LW network. If you set it too low you'll get a warning to the left where the Overruns/Underrruns indicator will turn red and you may start to hear dropouts. If you can't get it low enough, you'll need to use one of the physical outs.
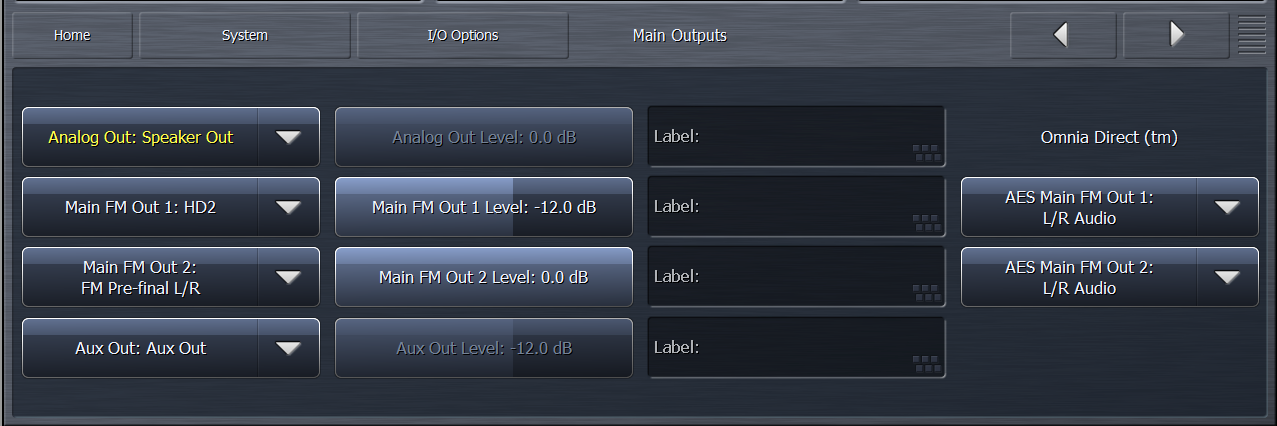
 - If using a physical output, in this case, the analog XLR outputs, in System / I/O Options / Main Outputs simply set "Analog Out:" to "Speaker Out". You'll notice that the Analog Out Level slider is grayed out. This is because the output level (volume) is set in the patch point menu (see 1 above).

Let us know how we can help
If you have further questions on this topic or have ideas about how we can improve this document, please contact us.
