Controlling the 25-Seven Profanity Delay Manager (PDM) with Fusion user buttons
 Updated
by
Bryan Jones
Updated
by
Bryan Jones
Scope
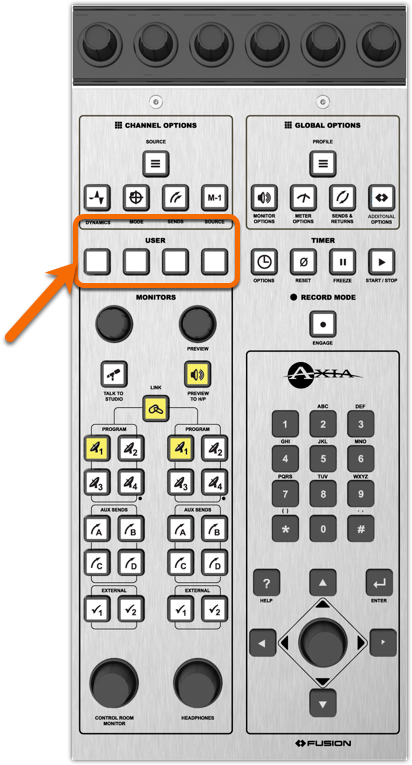
The Fusion Expert Monitor Module has four user-programmable buttons. This module is often called a "Full" Monitor module. Fusion also has what is referred to as a "Two-fader" Monitor module; characterized by the fact that it includes two faders as well as the monitor controls. The two-fader module does not have these user-programmable buttons. The Expert module looks like this. The user buttons are circled.
Fusion Configuration
- Using a Web Browser, navigate to the Control Center for your Fusion console
- Under the Console heading on the left side menu, click Shows
- Click the Show profile you want to edit
- Click the Monitor Section section option
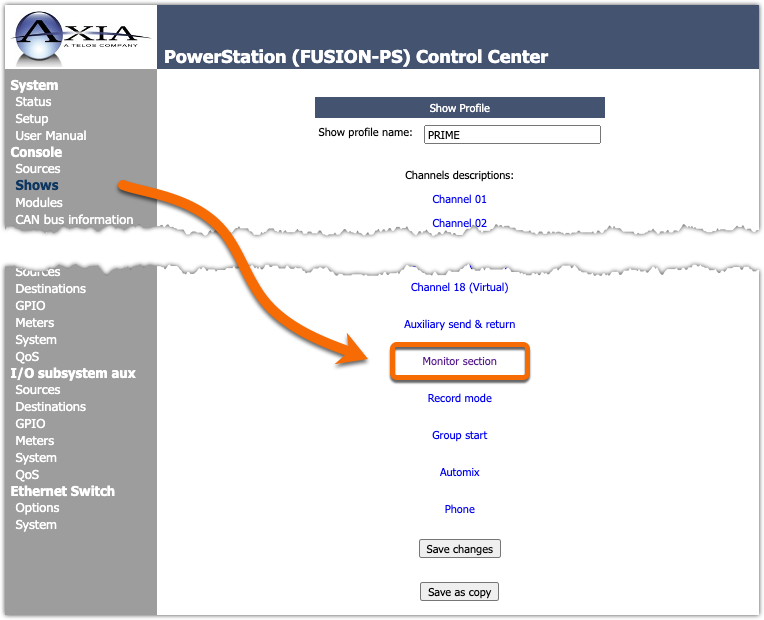
- Under the General Monitor Settings section, locate the User buttons GPIO channel

- Enter a free Livewire channel. This Livewire channel is used to commuicate button status and control to the PDM (or GPIO node). In this example, 20025 is used for a channel number.
- Save the Show profile.
- Repeat these steps for any other Shows reqiring this same control.
Configuration of the PDM
One, Fusion can be configured to use this GPIO to control a basic GPIO node. While we're referenceing the GPIO port on a PDM, it could easily be a GPIO node instead.
Two, the PDM must have Livewire mode enabled to use Livewire GPIO. If your PDM is set for Analog audio, you will not have the Livewire GPIO options.
- Using a Web Browser log in to the configuration page for your PDM
- Click on the CONFIGURATION heading
- Scroll down to locate the Livewire GPIO section
- Make sure the Livewire GPIO Enabled box is checked
- Enter desired Livewire channel used for GPIO (in this example 20025)
- Set the Inputs and Outputs as shown here
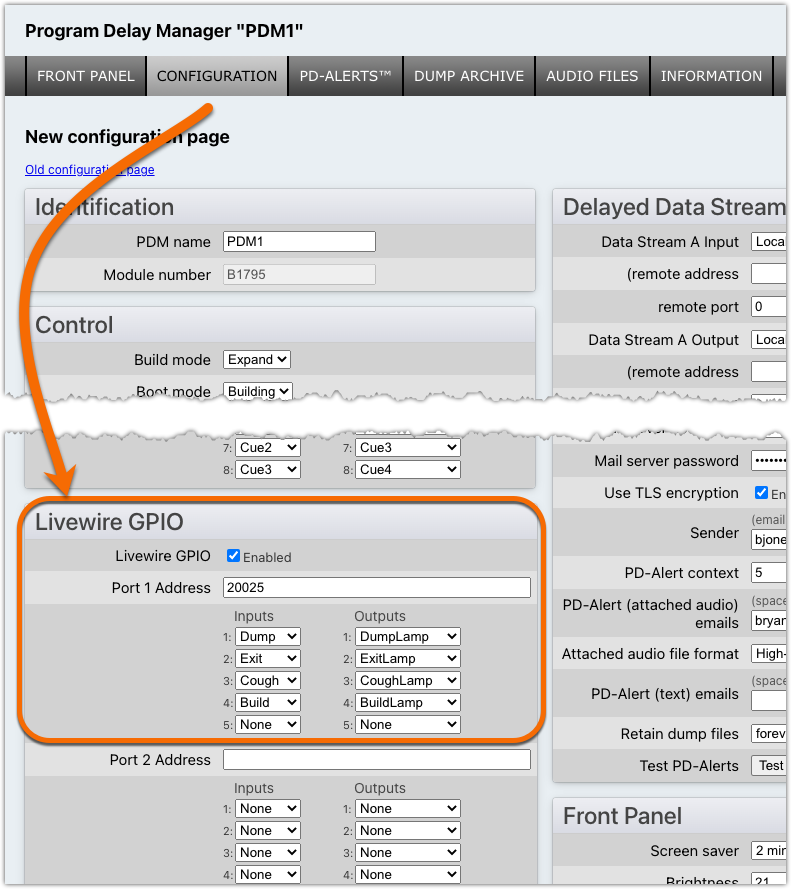
- Click Save on the configuration page.
The User Buttons are now programmed (from left to righ) for Dump, Exit, Cough, and Build. Funtions can be added or removed simply by changing the Input and Output assignments on the PDM.
If you are using a GPIO Node
If you don't have a 25-Seven Program Delay Manger, fear not (we would love to fix that for you by the way). You can still use any device you want by adding the channel number used in the console Show Profile above to a GPIO port on an Axia Node.
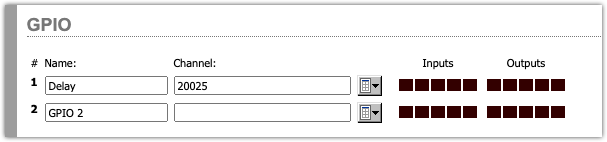
In this case, Input #1 turns on the user-button 1 lamp, Input #2, turns on user-button 2, etc. Pressing user-button 1 activates Output 1 on the node. Accordingly, user-button 2 activates output 2, etc.
Let us know how we can help
If you have further questions on this topic or have ideas about improving this document, please contact us.