Replacing the OLED of an xSelector
 Updated
by
Johnny Goldsmith
Updated
by
Johnny Goldsmith
Scope
This document explains the process of swapping out the OLED from the front panel board of an xSelector.
The Problem
We are occasionally asked if an xSelector OLED is field-replaceable. The short answer is yes, however, we do strongly suggest sending the xSelector in for inspection to ensure that the issues you might be experiencing aren't deeper than the OLED.
If you wish to order a new OLED, contact customer support and ask for the price and availability of part # 1171-00045.
If you would like to request an RA to send the xSelector to our factory, you can do so by clicking here.
The Process
- Power off the unit.
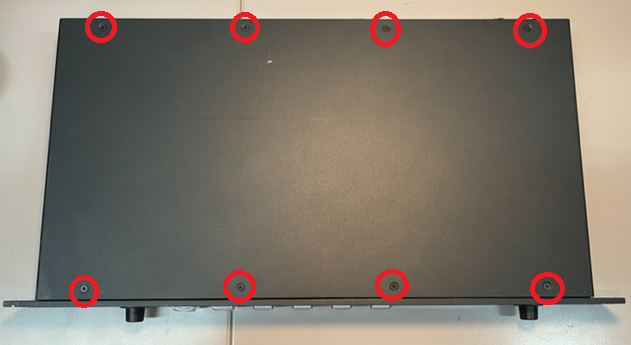
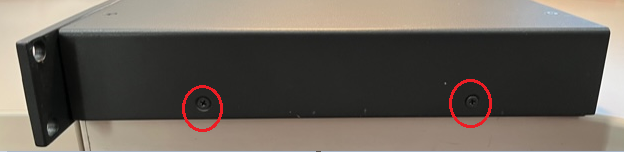
- Remove the top panel of the unit by unscrewing the 12 Phillips screws that hold the top panel to the frame. There are 8 screws on the top and two on each of the sides.
- Remove the front panel by unscrewing the four hex screws holding it in place.

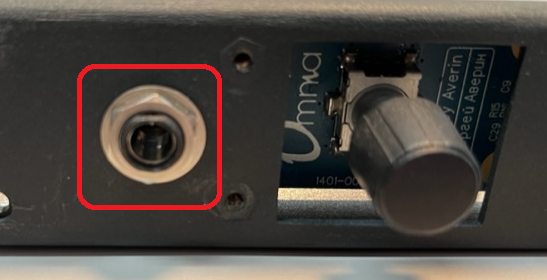
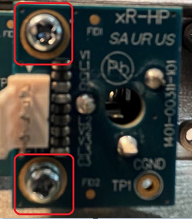
- Remove the nut and washer securing the headphone jack to the front chassis.
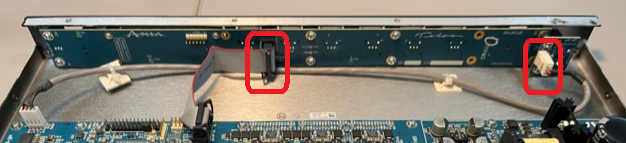
- Disconnect the two connectors from the back of the front panel and headphone jack boards.
- Unscrew the two screws holding the headphone board to the front panel board, allowing you to remove the headphone jack assembly.
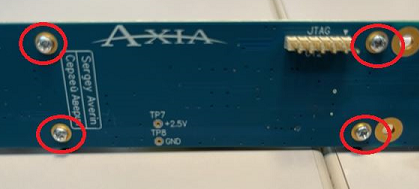
- Unscrew the six screws and two stand-off screws holding the front panel board to the front of the chassis.

- Remove the front panel board from the chassis and unscrew the four screws on the back of the front panel board that secure the OLED mounts.
- Flip open the ribbon connector to remove the OLED.
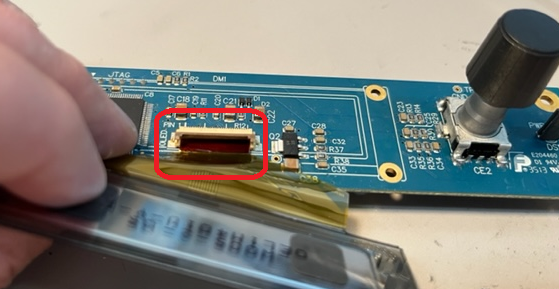
- Insert the new OLED in and flip the ribbon connector down to securely connect the OLED to the front panel board.
- Screw one of the OLED mounts back onto the front panel board and carefully secure the OLED to the two mounts, screwing the second mount back onto the front panel board.
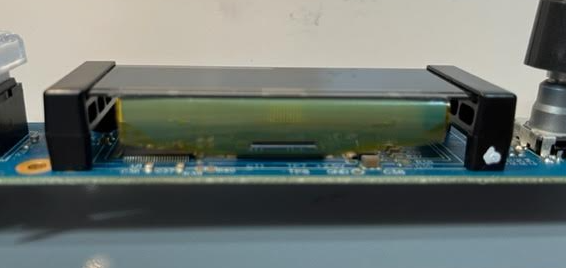
When the new OLED is installed, it should look like this:
- Reattach the front panel and headphone boards. Reattach the two connectors from the xSelector mainboard to the front panel and headphone boards. Reattach the top cover and lastly, reaffix the front panel to the front of the unit.
- Power on the unit and confirm the new OLED is working.
Let us know how we can help
If you have further questions on this topic or have ideas about improving this document, please contact us.