Disassemble and clean a Radius or iQ console
 Updated
by
Bryan Jones
Updated
by
Bryan Jones
Radius and iQ Console
Disassembly for Cleaning
Disconnect Fader Cables
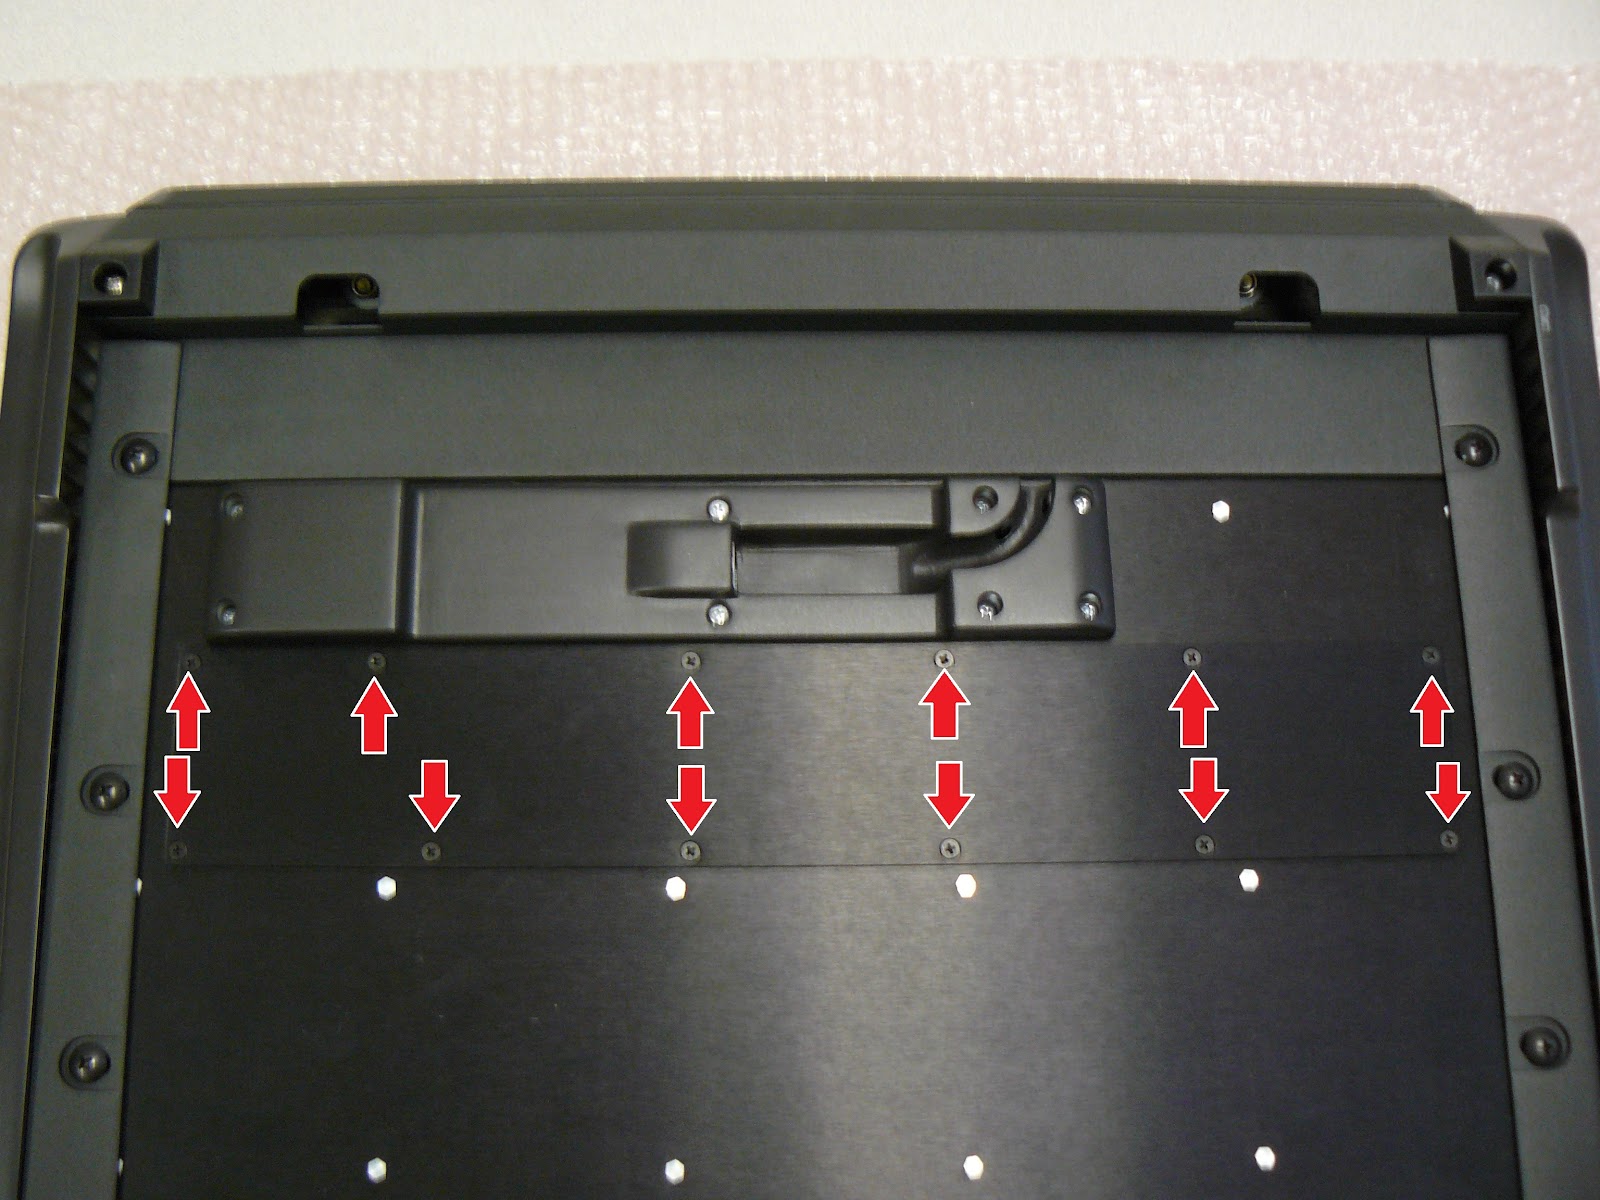
Begin by removing the 12 Philips screws holding the metal panel to the underside of the unit:
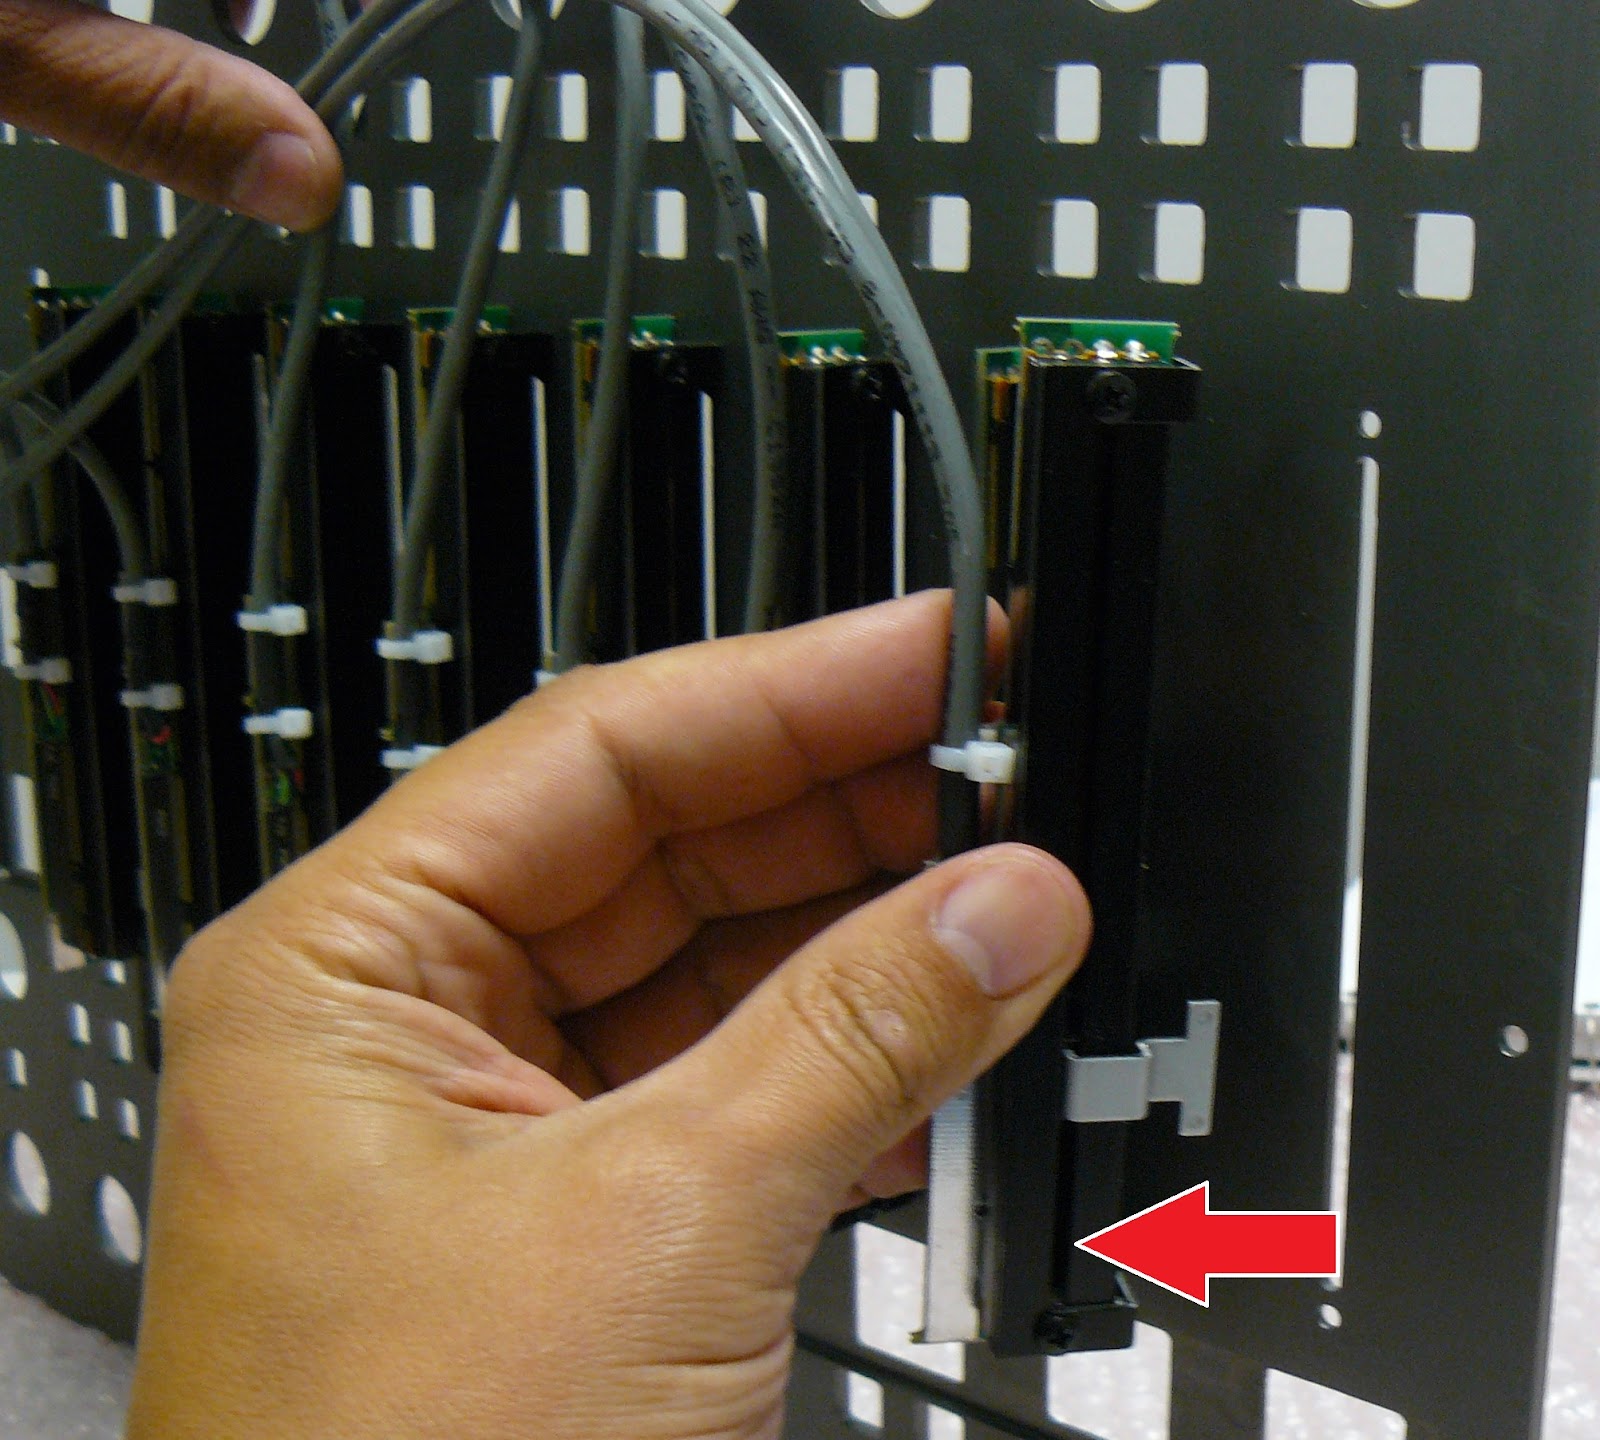
Remove the panel to reveal the fader connections. They appear in sequence the same way the faders are oriented in the console. I.E. With the console upside down, Fader 1 is all the way to the right, so the cable for fader 1 will be all the way to the right, and so on. Disconnect these cables from the CPU board. Be careful not to break the connectors or their connections to the board. Note the way the cables are routed through the openings in the front panel PCB. Making note of this now will help you later when reassembling the unit.
Remove Top Panel
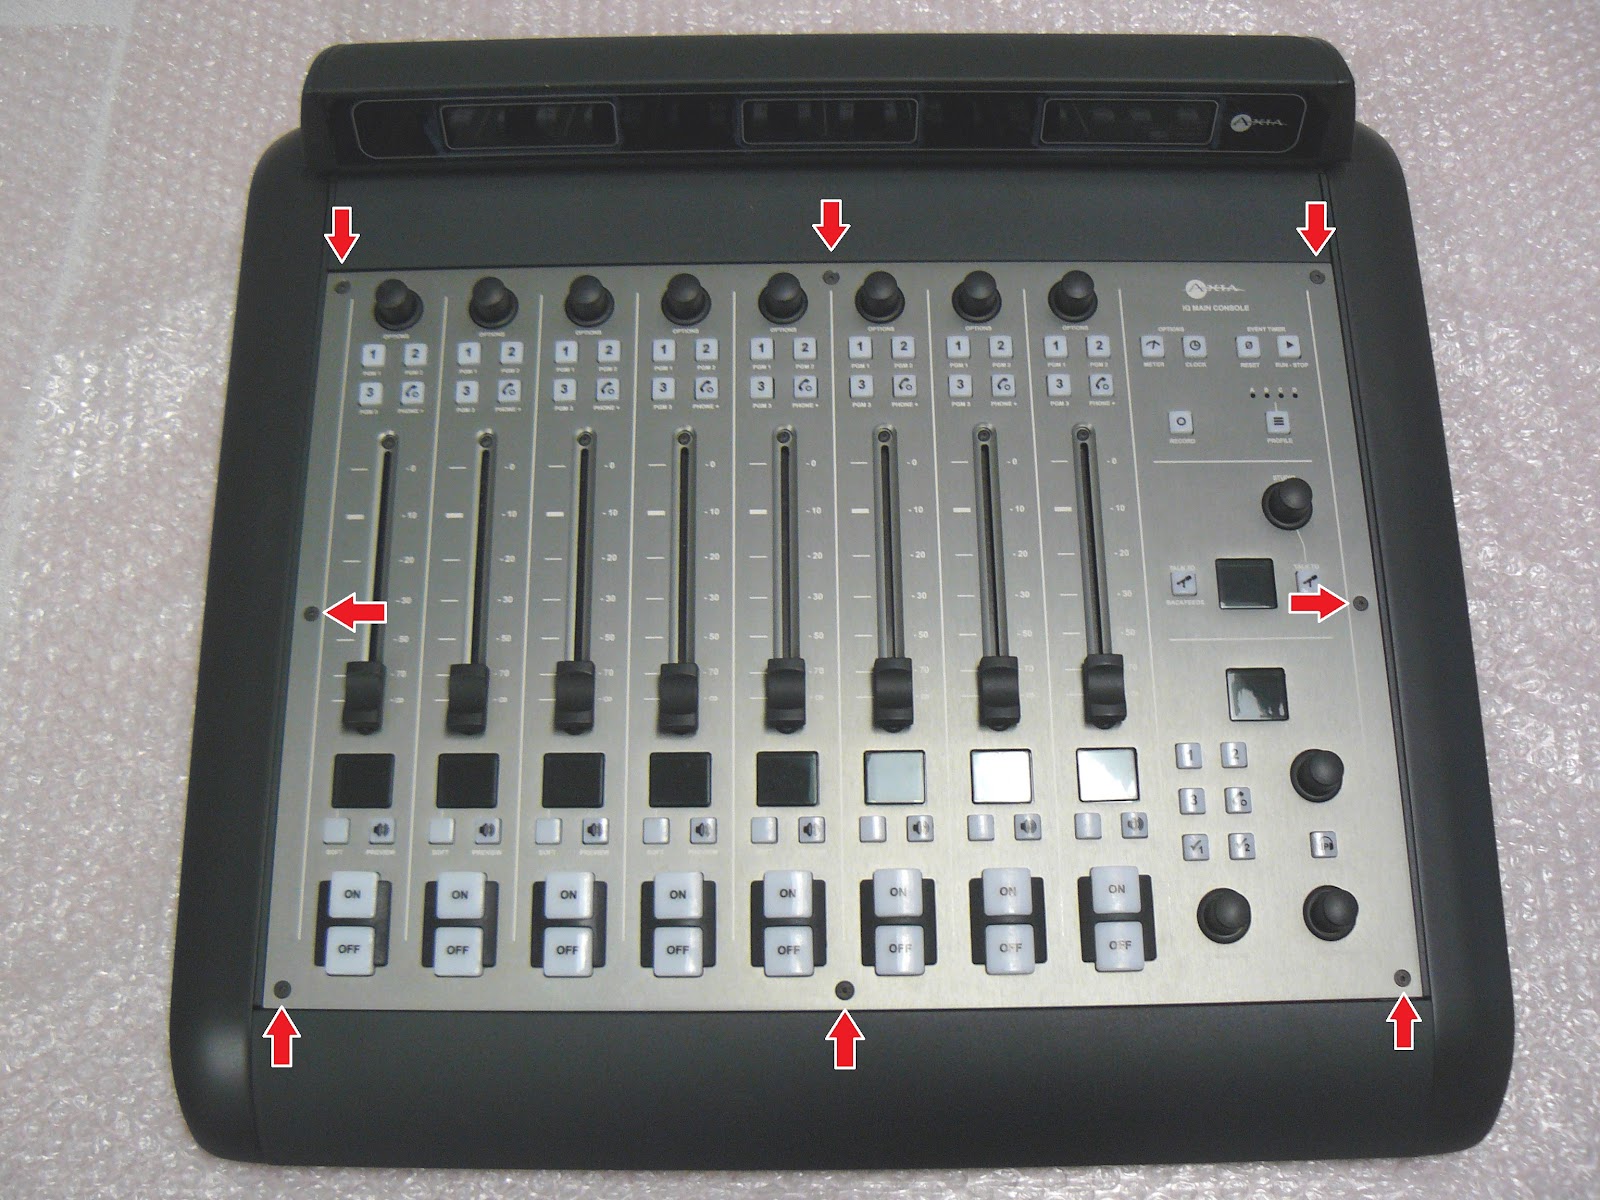
Once the fader cables have been disconnected, the top panel can be removed from the unit. Start by removing the 8 hex screws on the top panel. When these screws have been removed, the top panel will be free to come off the console. The faders will still be attached to the top panel, so be careful out feeding the cables.
Cleaning
Once the top panel is removed, you can inspect the board for any environmental intrusions, dirt, etc. Using a can of compressed air, remove any dust from the chassis.
The Faders should not need to be removed from the top panel for general cleaning. Using a can of compressed air, blow any dust out of the fader through the opening on the side of the fader. The photo to the right shows you where the slot is.
The metalwork and related casework can be cleaned with a mild detergent such as a diluted window cleaner. When you are ready, reassemble the console by reversing the disassembly procedure.