Converting iQ and Radius Consoles to Rack-mount Operation
 Updated
by
Tim Chimes
Updated
by
Tim Chimes
Scope
This document will show you how to convert the iQ and Radius consoles for use in a standard 19" equipment rack.
Disassembly
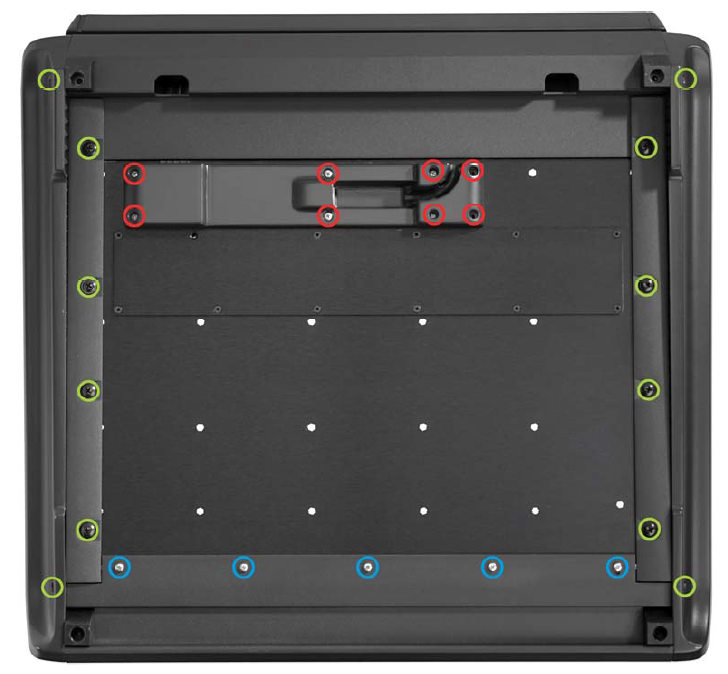
Turn your console over and place it gently on a soft surface to avoid damaging any displays or painted parts.
- Remove the plastic Connection Panel cover on the bottom of the console (circled in red). Once removed, release the ribbon cable that connects the meter bridge to the console electronics. Place the plastic cover to the for later re-installation.
- Remove the four rack screws and two side self-threading screws from each side bumper (circled in green). Take care when doing this, as removing these parts allows for the meter bridge to come free from the console.
- Remove the wrist bumper by removing the five screws at the bottom edge of the assembly (circled in blue). This part is not needed for the rack-mount operation. Be sure to store it in a safe place should you decide to return the console to counter configuration.
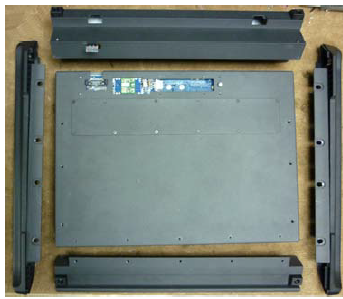
Once the fasteners are removed, your console will be in five separate parts.

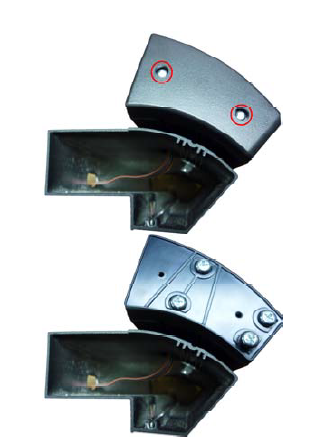
Take one of the side bumpers and remove the three self-threading screws. Separate the rack ear from the side bumper. Repeat with the other bumper. Retain the rack ears. Store the bumpers and screws in a safe place should you need them in the future.
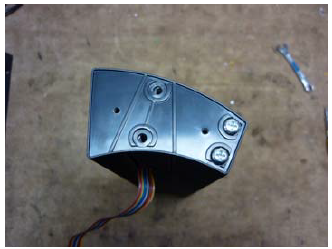
Remove the two screws which hold each meter bridge side cover in place. Remove the covers and set aside.
Removing the meter bridge end caps reveals four screws and the side mount to the meter bridge. Remove the four screws and the plastic mounts. Keep these parts nearby.
Two bolts hold the meter bridge to its extruded mounting. Using a wrench inside the meter bridge to hold the bolt, insert a nut driver through the access window below to loosen each nut.
With the two sets of bolts and nuts removed, carefully pass the ribbon cable through the access holes of the meter bridge base, and separate the two assemblies. Store the meter bridge base, bolts, and plastic standoffs in a safe place for future use.
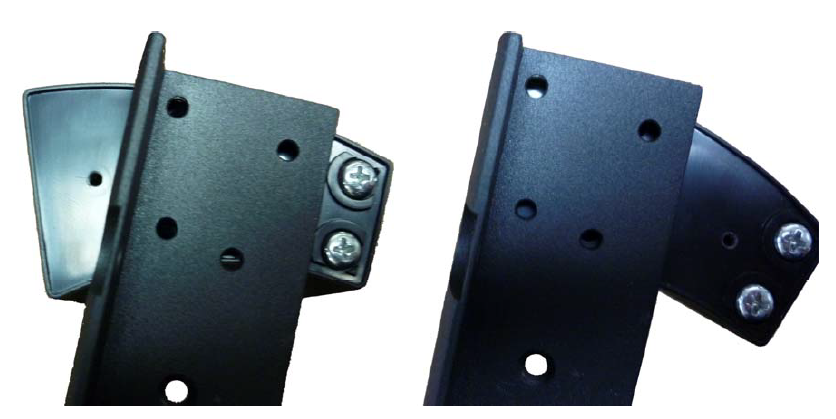
Re-install the meter bridge side mounts using only the two rear screws as shown in the below picture:
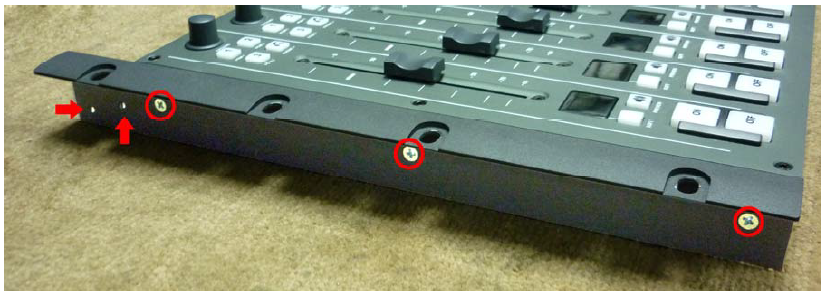
Secure the two rack ears to the console using the six 4x8 mm machine screws included in your console's documentation package. Note the orientation of the rack ears -- the two offset screw holes (red arrows in the below picture) must be at the upper end of the console.
Slide the meter bridge into the space created between the tops of the rack ears. The meter bridge can be fastened in two different positions. Choose whichever works best for your application, and secure with the screws you had previously set aside.
Turn the console over and connect the meter bridge ribbon cable into its socket. Secure the plastic Connection Panel cover to the underside of the console.
And you're done!
Let us know how we can help
If you have further questions on this topic or have ideas about how we can improve this document, please contact us.