Create a GPIO "pin" router in Pathfinder CorePro
 Updated
by
Brett Patram
Updated
by
Brett Patram
Scope
In the previous Pathfinder PC Server, it was possible to create a GPIO Pin router. This router allowed the user to route individual GPI pins to any GPO pin.
CorePro does not have a specific router type just for GPIO pin routing. Instead, there is a router type called "Sap Property Router". This router type will allow pin-to-pin routing to take place.
If you are needing to get the same functionality as the Pathfinder PC Server GPIO Pin Router had, this doc will show you how to do it in CorePro
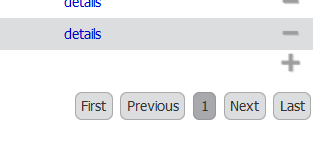
Adding a new Sap Property Router
 |
 |
 |
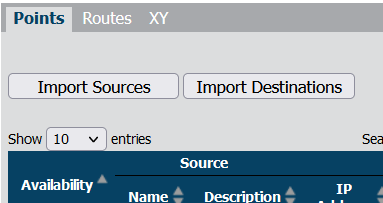
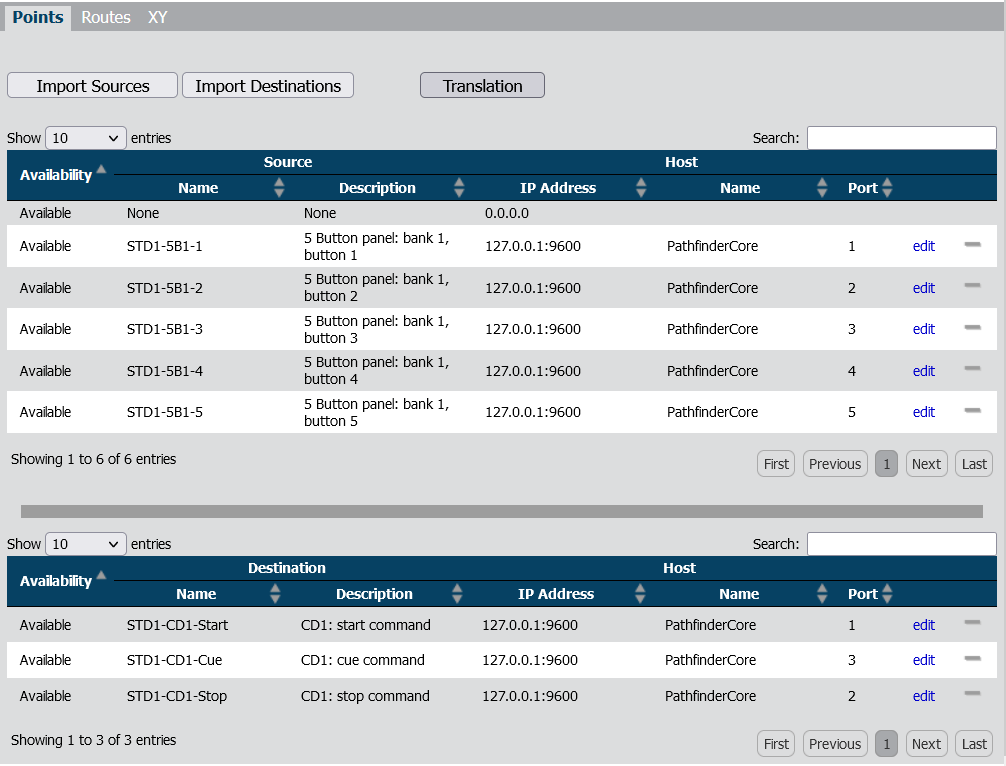
Add GPI pins as router Sources
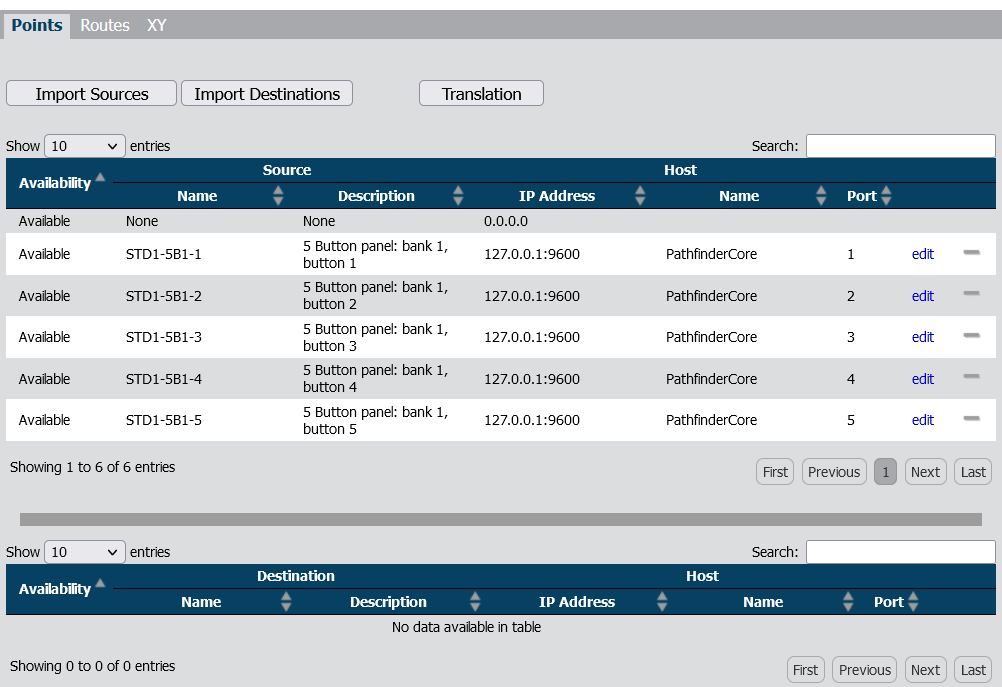
The newly created Sap Property Router will be empty. We need to first add our GPI pins as Sources in the router.
 |
GPIO -> GPIO Device Name -> GPIO Port Name -> GPI Pin # ->PinState 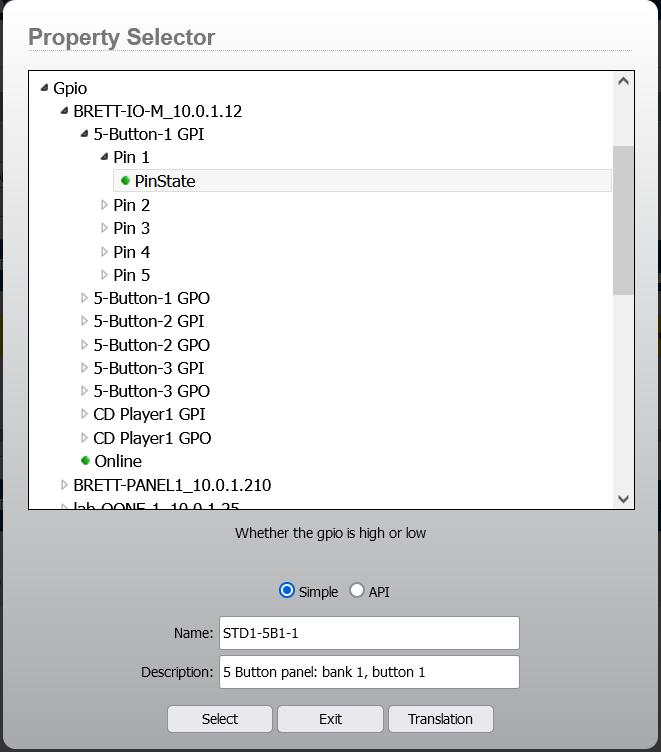
 |
Add GPO Pins as Router destinations
Similar to the previous section. Now we need to add our GPO pins as Destinations in the router.
 |
GPIO -> GPIO Device Name -> GPIO Port Name -> GPO Pin # ->PinState 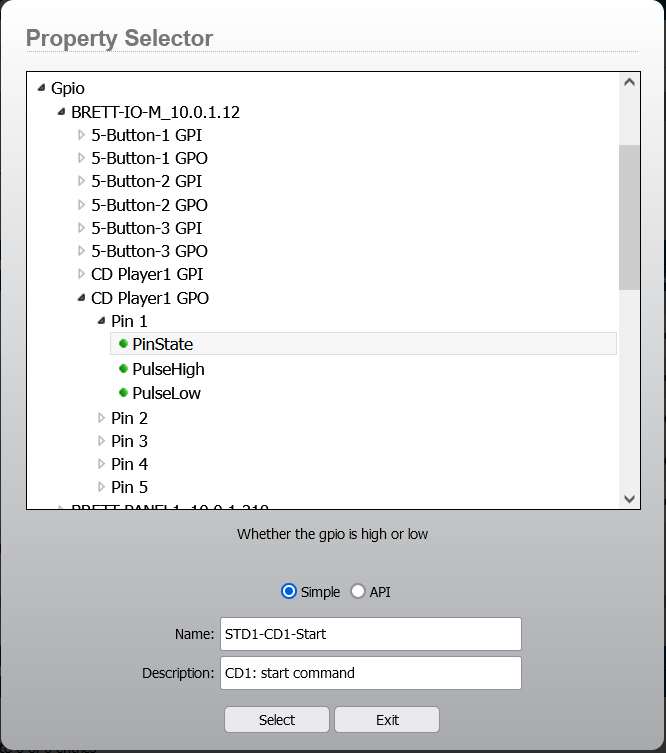
 |
Set or view routes with XY tab
Click on the XY tab to see the XY router view To set a route simply click at the cross-section between the X(source/GPI pin) and the Y(destination/GPO pin) and then click the Take button  Here we have the "GPI" pin states from a button panel mapped to GPO pin states that will control a CD deck  |
Set or view routes with Routes tab
The Routes tab offers a table-based view of current routes in the place. This view is especially helpful as it makes the "direction" of the routed signal clear to see. Click on any of the currently set routes and click Change Route to modify, or Clear Route to disconnect 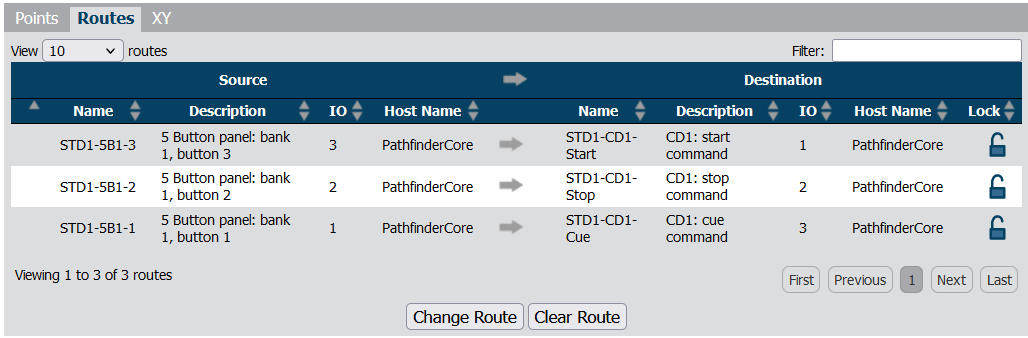 |
Additional thoughts and resources
- The Sap Property Router has many more uses beyond simple pin routing. See Pathfinder CorePro documentation here
- It is possible to route a GPO pin to another GPO pin, if you include GPO pins for your router Sources. In some cases it is also possible to route a GPI pin to another GPI pin, if you include GPI pins for your router destinations. However GPI to GPI will only be allowed when the Destination GPI pin is a software based GPIO port (Axia IP Driver, CorePro GPIO Node). A hardware GPI Pin can only be set by a physical wired connection to the pin. A software GPI pin can be set regardless
- You may create multiple routers for specific pin routing tasks
- For GPO pins, instead of selecting PinState you may also use PulseLow or PulseHigh to translate the GPI pin state into a predefined pulse to control the length of Low to High state transition of the GPO Pin
- Like all routers, routes can be set via logic flows or user panel interactions
- Utilizing "Scenes" in CorePro can let you recall preset routing matrices for the pin router. See Pathfinder CorePro documentation here
Let us know how we can help
If you have further questions on this topic or have ideas about improving this document, please contact us.