Creating New, Editing and Managing Processing Presets in Z/IPStream R/1
Scope
This document covers the process of modifying audio processing presets in the Z/IPStream R/1
Description
The Z/IPStream R/1 ships with a number of ready-to-use processing presets to get you going quickly. These presets are only a starting point. You can choose to create new presets or modify the existing ones.
The suggestion is to first, make a copy of an existing one, and then make modifications to that. We will cover that process here.
Editing Presets
Using the Preset Editor, it is possible to customize the chosen preset to suit your own aural requirements.
1. We suggest that you first make a copy of a factory preset to work on. From the Main menu, select Omnia Processing and then click on Manage Presets. Choose one of the factory presets listed there and click "Copy". Give the preset a new name and click the "Copy" button there. You'll receive a confirmation that it was copied. Click "OK".
2. Click on Omnia Processing at the top, choose your newly created preset copy from the dropdown list and then click the "edit" link nest to the dropdown list.
Listen to the post-processed audio, ideally through the codec to be used, then adjust, and listen again. Aural evaluation should occur over time, not in short moments.
For a full tutorial of the processing adjustment screens, see the user manual starting on Page 53: Z/IPStream R/1 User Manual
Managing Presets
This is where you can copy, rename and delete processing presets.
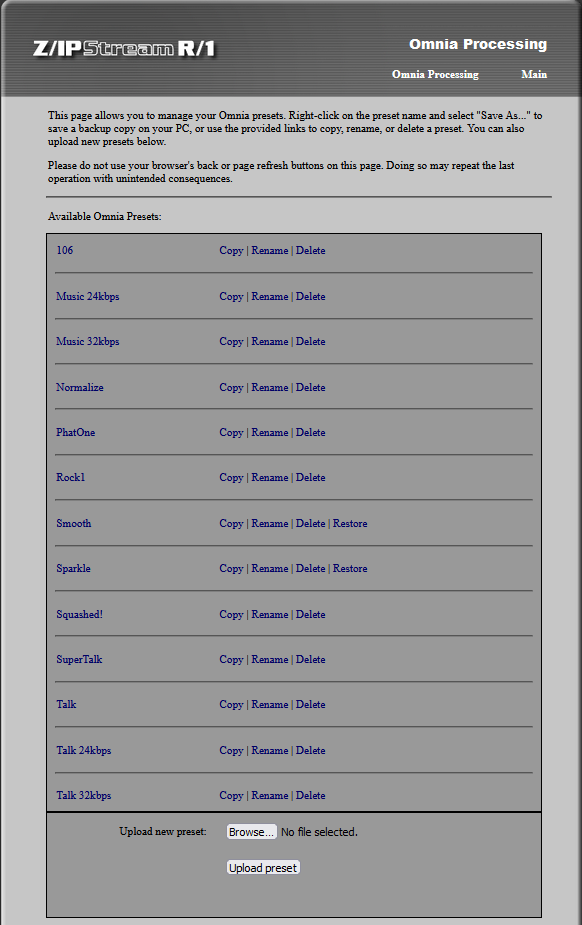
From the Omnia Processing menu, click Manage Presets to open the preset management window:

In the example shown here, we made some changes to the Smooth and Sparkle presets in the preset editor and and then clicked “Save”.
Now, here in the Manage Presets window you will see that the line for these two presets has an additional choice: “Restore”. If we were to click on “Restore” now, before saving a copy, the original factory preset will be restored and the changes we made would be lost.
So if you do make some changes to a preset and save them, it would be a good idea to click “Copy” to save the preset with your changes to a new name. This will create a user preset with that name. We suggest yo do this first before editing a preset.
Once that is done, you can Restore the factory preset and can compare it to the new user preset that contains the changes you made from the original.
Let us know how we can help
If you have further questions on this topic or have ideas about improving this document, please contact us.
