Radius/iQ Console - Disassembly for Cleaning
Before we begin
Disconnect all cabling and power from the unit before servicing. Please take the time to read through this document before starting any work. You will be exposing sensitive components to the outside world, so please take special care to work in a static and moisture-free environment. Field upgrades and repairs are performed at your own risk. If you would prefer to send the unit to us for Factory for service, please request a Return Authorization.
Disconnect Fader Cables:
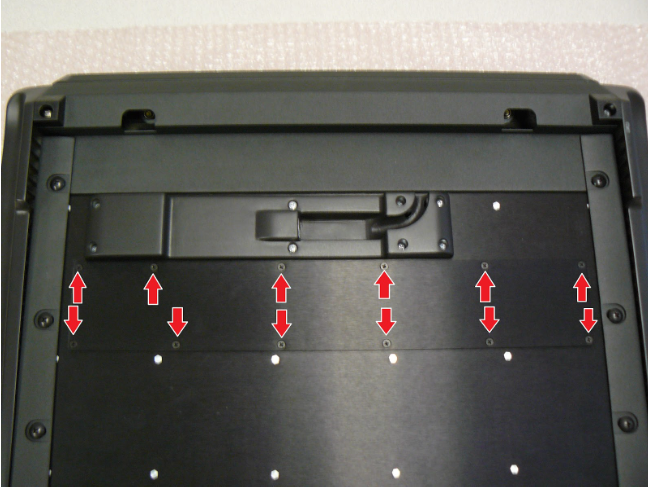
Begin by removing the 12 Philips screws holding the metal panel to the underside of the unit:
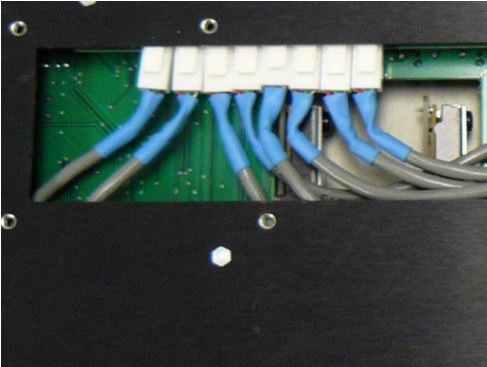
Remove the panel to reveal the fader connections. They appear in sequence the same way the faders are oriented. I.E., With the console upside down, Fader 1 is to the right, so the cable for Fader 1 will be to the right, and so on. Carefully disconnect these cables from the CPU board.
Remove Top Panel
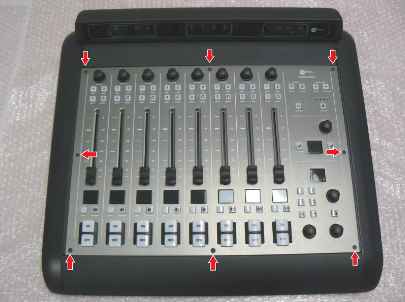
Once the fader cables have been disconnected, the top panel can be removed from the unit. Start by removing the eight hex screws on the top panel. Once removed, the top panel will be free to come off the console.
Cleaning:
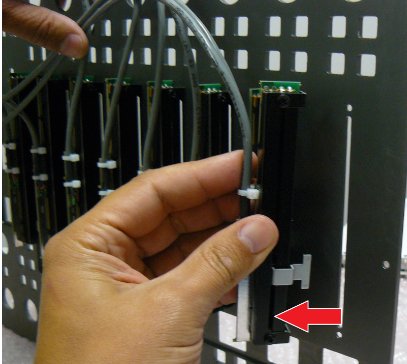
Inspect the board for any environmental intrusions, dirt, etc. Using a can of compressed air, blow any dust from the chassis and Faders. Blow air through the opening on the side of each fader as shown in the photo.
The metalwork and related casework can be cleaned with a mild detergent, such as a diluted window cleaner. When you are ready, reassemble the console by reversing the disassembly procedure.
A Note About Liquid Intrusion
Many hardware abnormalities can be directly related to liquid spills or some other type of moisture intrusion. These faults include lamps and controls that don’t work or seem to operate without operator intervention. If you experience this, carefully inspect the unit’s front panel PCB board. Liquid intrusion is very easy to spot. Components, solder joints, and traces will begin to erode, and the PCB will start changing colors in the affected area. If you notice this after a failure has presented, it is likely too late to save these components. Damage of this nature is not covered under Axia’s standard product warranty. Most often, we will not repair this type of damage as we cannot do so with any guarantee. The liquid intrudes the through-holes and vias on the board will continue to erode. Often, a replacement is the only option.