Creating Custom Source Pictures for Quasar
 Updated
by
Bryan Jones
Updated
by
Bryan Jones
Scope
This document applies only to the Axia Quasar console and covers the steps needed to create custom source pictures for use on the channel strips.
Icon Size
The file size of any image uploaded to your Quasar Console must be 8k or smaller to upload at all. If you attempt to upload a file that is larger than 8k from the web interface it will appear to not work.
The size of the picture should be 192 x 192 pixels. This accounts for the fader position and source type color coding that is at the bottom of the display. The native display on your Quasar is 240 x 240 pixels. Feel free to play with the size of your graphic but note it must be under 8k file size.
Graphics are not scaled. If you were to upload a in image that is oversize the image will be centered and the edges cropped.
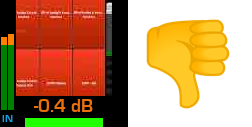
Here's an example. This image is 300 x 168 pixels but is less than 8k so it will upload with no problems.
When uploaded it displays on the fader like this.
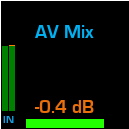
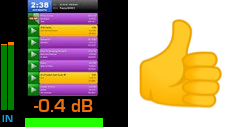
If we edit that graphic to be 192 x 192 it is displayed correctly.
Uploading Icons
Icons are uploaded as part of the Source profile creation. See our quick-start document on creating source profiles.
- From a web browser, enter the IP address of your Quasar Console.
- Click on Sources listed under the Profiles section of the menu.
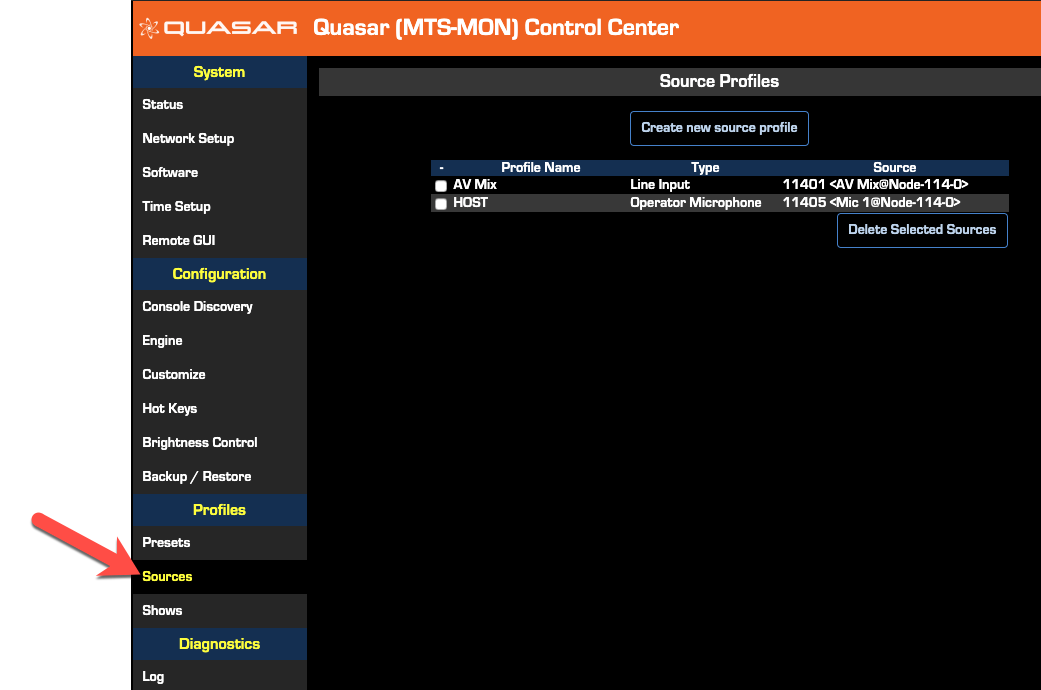
- Click on the Profile Name of the profile you want edit. In this case, our profile is named AV Mix.
Source profile parameters are displayed. The Source Picture upload is at the top of the page.
- Click the Choose File button.

- In the dialog that opens, locate and chose the file to use for the picture.
The name of the file will be displayed next to the Choose File button.

- Click the Upload button.
The result will be shown on the screen.
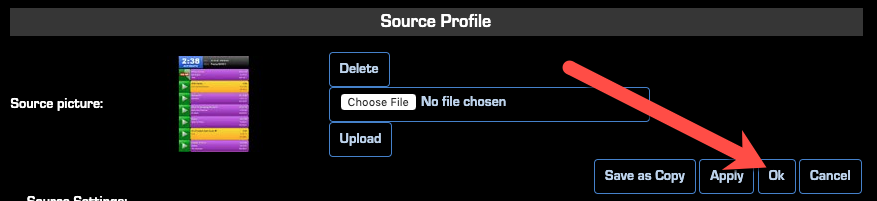
- Click the Ok button.
Deleting a Custom Source Picture
To remove a custom source picture,
- Return to the source profile.C
- lick the Delete button next to the picture.
- Save the profile.
- Reload it on the fader.
The display will return to showing the Name that you assigned to the source.