Replacing Fusion Button Caps
 Updated
by
Johnny Goldsmith
Updated
by
Johnny Goldsmith
Scope
This document covers replacing the blank and icon translucent button caps on all Fusion modules, including Accessory modules:
- 2001-00328-000 Fusion Monitor/Navigation Module
- 2001-00329-000 Fusion 4-Fader Module (S)
- 2001-00330-000 Fusion Motorized 4-Fader Module (S)
- 2001-00331-000 Fusion Call Controller + 2-Fader Phone Module
- 2001-00332-000 Fusion Motorized Call Controller + 2-Fader Phone Module
- 2001-00379-000 Fusion Monitor + 2-Fader Module
- 2001-00380-000 Fusion Motorized Monitor + 2-Fader Module
- 2001-00419-000 Fusion Fader Panel
- 2001-00433-000 Fusion Mic Control/Headphone Selector Panel
- 2001-00434-000 Fusion Headphone Selector Panel
- 2001-00435-000 Fusion Producer's Mic Control Panel
- 2001-00436-000 Fusion Mic Control Panel
- 2001-00477-000 Fusion 4-Fader Module (T)
- 2001-00478-000 Fusion Motorized 4-Fader Module (T)
The Caps
Over time, the button caps can become cracked or broken from excessive (or aggressive) use. The good news is that they are field-replaceable.
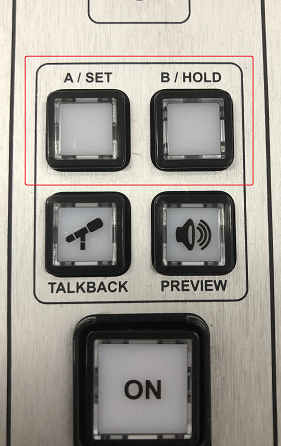
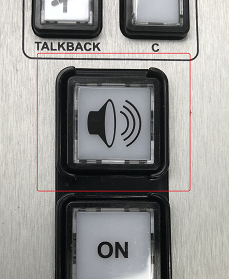
The same button caps are used on all of the Fusion modules.
If a cap needs to be replaced, contact customer support and ask for pricing and availability using the below part numbers.
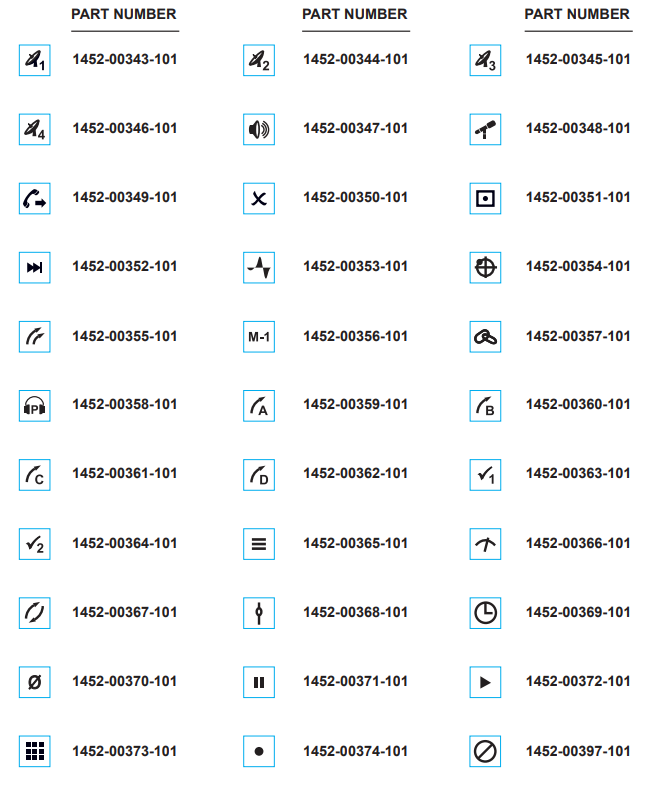
For a blank cap, inquire about part number 1453-00144-101.
For an OFF cap, ask about part number 1452-00375-101. For an ON Cap, use part number 1452-00376-101.
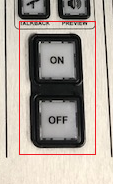
The Fusion Motorized 4-Fader Module (T) doesn't have an OFF cap, since the On switch is actually a toggle On/Off switch. Instead, it features a larger Preview cap.
This part number is 1452-00427-101.
Replacing the Caps
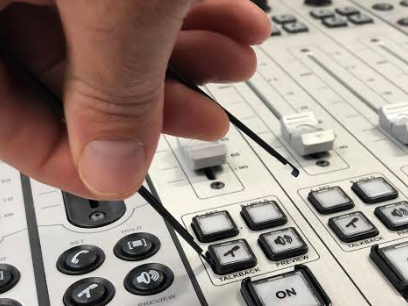
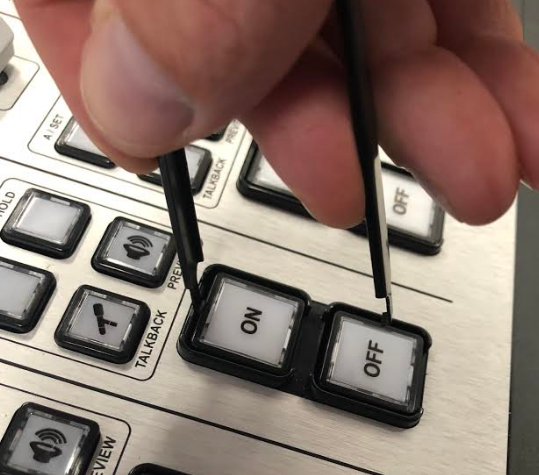
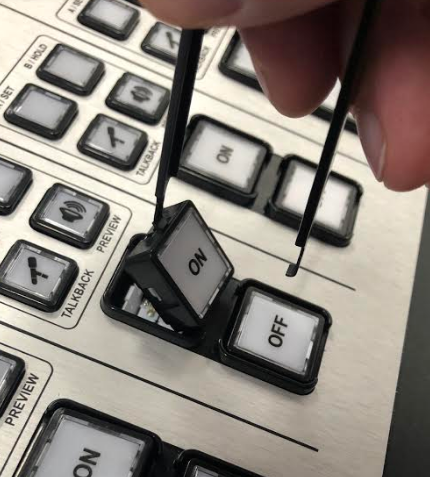
The caps can be pulled out using an IC extractor tool.
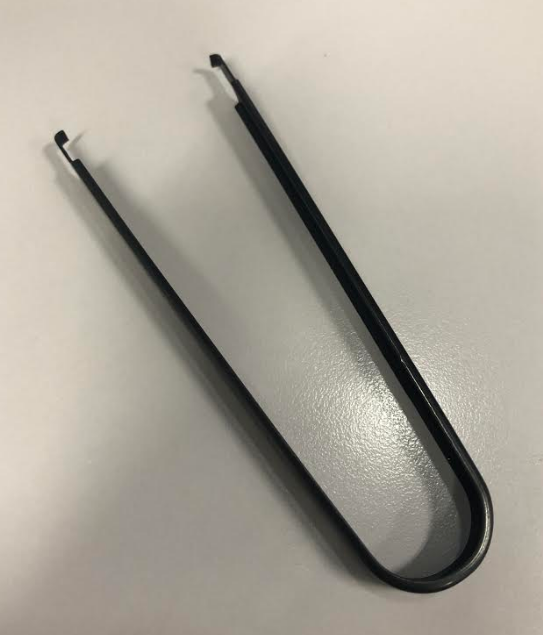
To remove, GENTLY pry the button cap out using one side of the IC tool.
To install a new cap, simply press it firmly onto the switch. You will hear a click when it locks into place.
Let us know how we can help
If you have further questions on this topic or have ideas about improving this document, please contact us.