Adding metadata filters to the Z/IPStream R/1
 Updated
by
Bryan Jones
Updated
by
Bryan Jones
Scope
This document describes how to add filters to the Z/IPStream R/1 (formerly call ProStream) for parsing metadata and applies ONLY to the Z/IPStream R/1. Other products use similar filters; however, the process varies for each.
Description
The Z/IPStream R/1 uses filters written in the Lua programming language to accurately parse metadata from your automation system and send that Now Playing information to your stream.
These filters are generally specific to your automation system. There are pre-loaded filters in the Z/IPStream as examples. Feel free to review these samples and change the output of your automation system's data output.
If you have received a custom filter, use the following steps to add it to the Z/IPStream and apply it to your stream.
Adding a new filter
Filters are plain text files that have the extension .lua and are uploaded using a web browser.
- Using a Web Browser, connect to and log in to your Z/IPStream R/1.
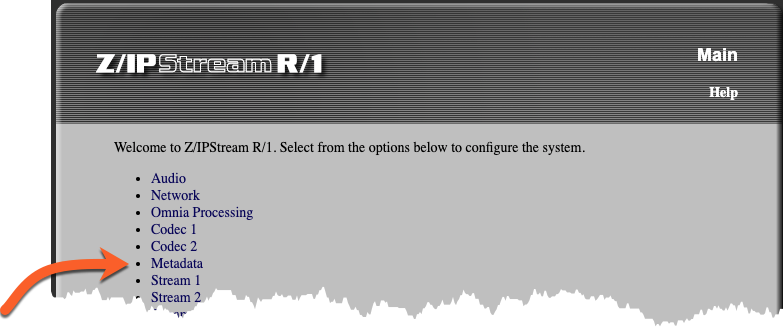
- From the Main menu, click on the Metadata link.
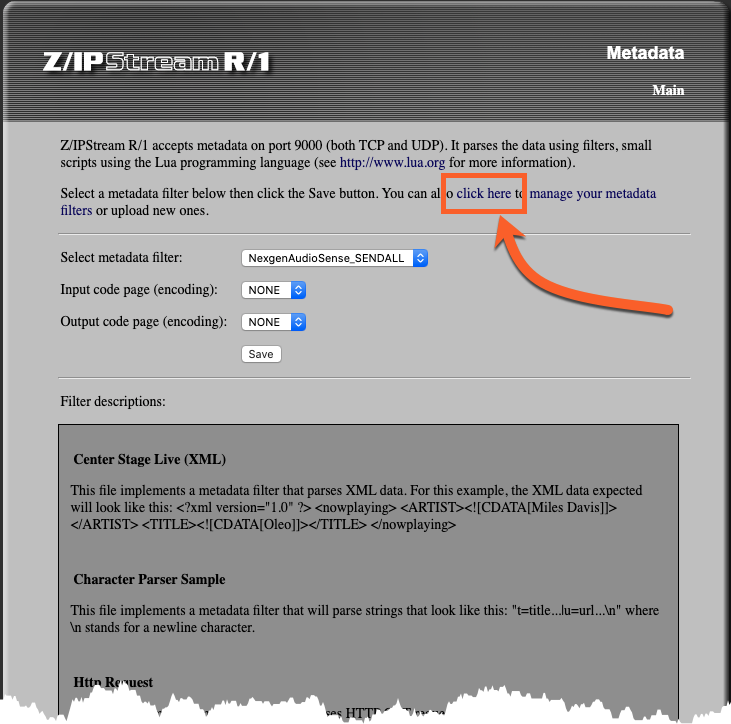
- On the Metadata page, click on the words "click here" (shown in the red box below) to manage metadata filters.
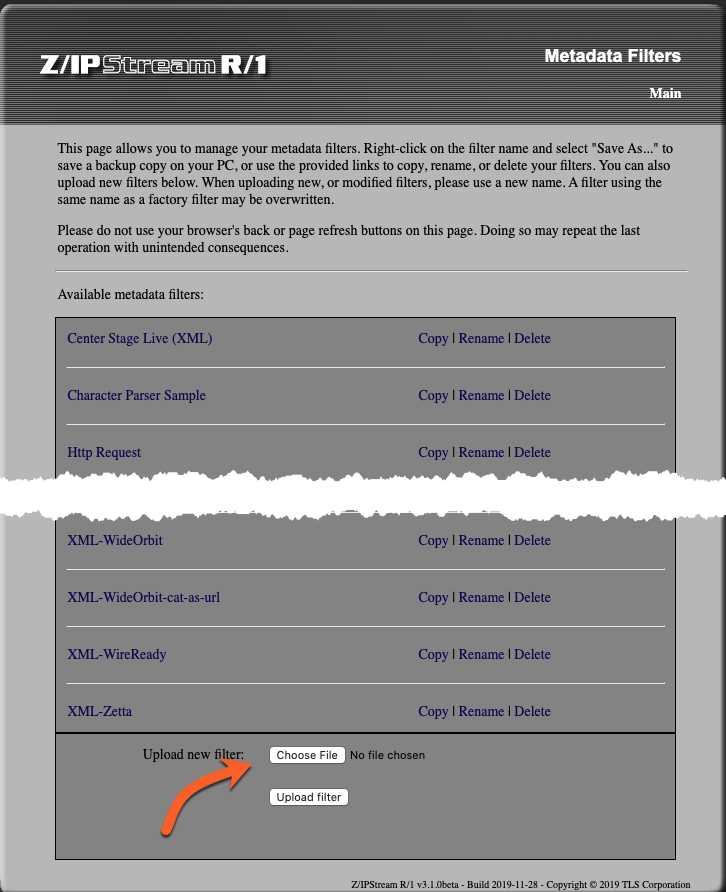
- On the Metadata filters page, scroll to the bottom of the page.
- Click Choose file.
- Browse for and locate the lua filter provided to you.
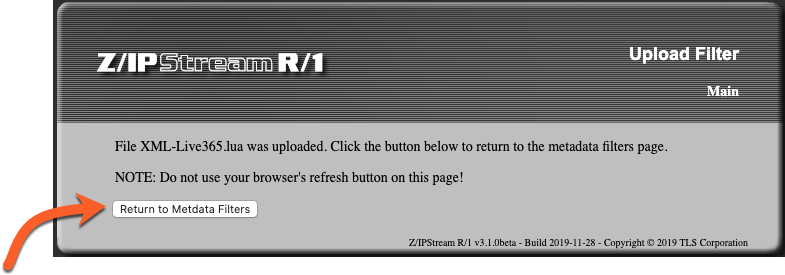
- Click Upload filter.
- When the confirmation box appears, click the button that says "Return to metadata filters." Do not use the back button in your browser, or the upload will be lost.
Once you return to the Metadata Filters page, you should see your newly uploaded filter in the list.
Applying the new Metadata Filter to your stream
- From the Main Metadata menu, click the dropdown list of available filters and select your previously uploaded filter.
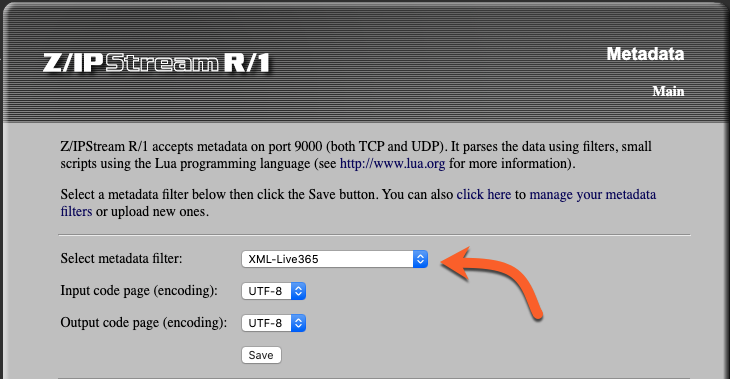
- Unless instructed otherwise, set the Input and Output code page to UTF-8.
- Click the Save button.
Your new metadata filter will automatically be applied. You do not need to reboot the Z/IPStream.
Confirming proper receive and send of metadata
Often you can view your stream directly to see if Now Playing information is working. It may be necessary to look at the log files if there are problems.
To view the log files
- From the Main menu, click on the Advanced Options link.
- In Advanced Options, click on the Logs and Date/Time link.
- Scroll to the bottom of the log.
There are two items you can look for, shown here in red.
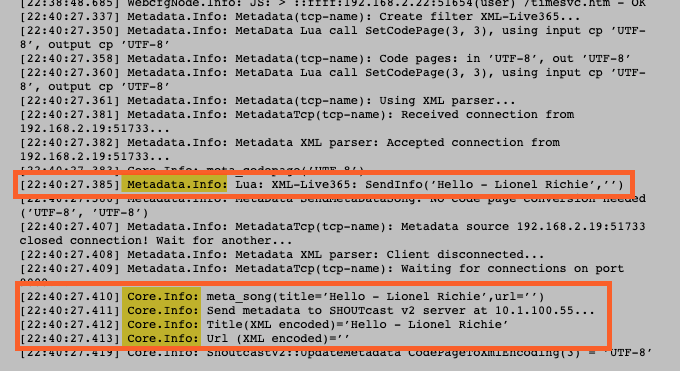
The Metadata.Info: information is written to the log by the filter. The logs shown here tell you that the data was received and parsed correctly. It also shows the title and artist information.
The Core.Info: information shows the exact data sent to (in this case) the SHOUTcast server.
Let us know how we can help
If you have further questions on this topic or have ideas about how we can improve this document, please contact us.