Removing a CAN Bus distribution board from an Element console
 Updated
by
Bryan Jones
Updated
by
Bryan Jones
Scope
This document shows the removal of the right-hand console end components parts; however, you may choose either end to remove.
Description
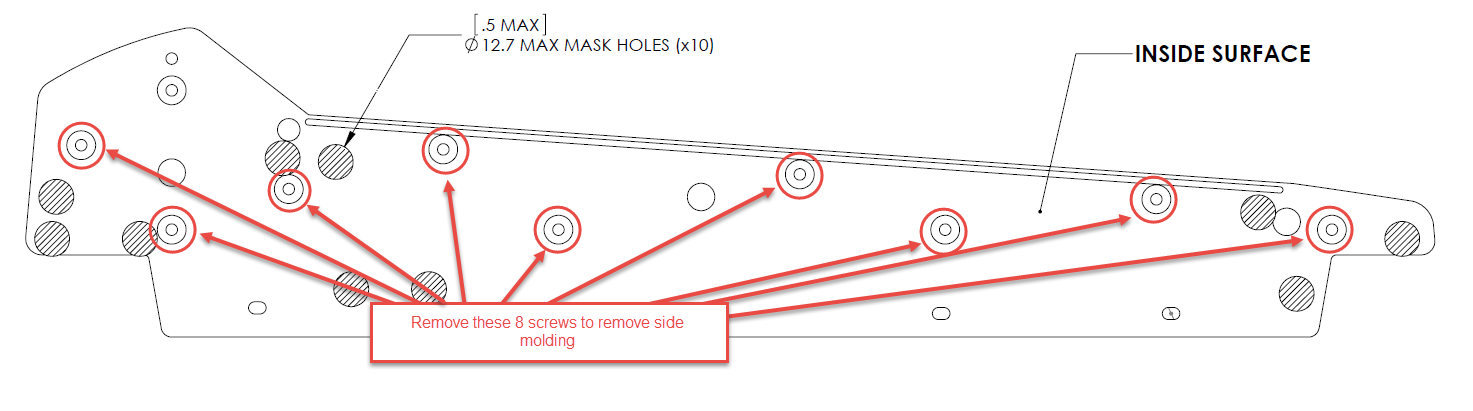
The end molding must be removed first. It is attached with 8 or 9 screws as shown in the illustration below. You will need to remove the modules from the console to access the screws to remove the molding. Once the molding is removed, the aluminum side panel is removed, after which the existing board can be removed and new parts installed.
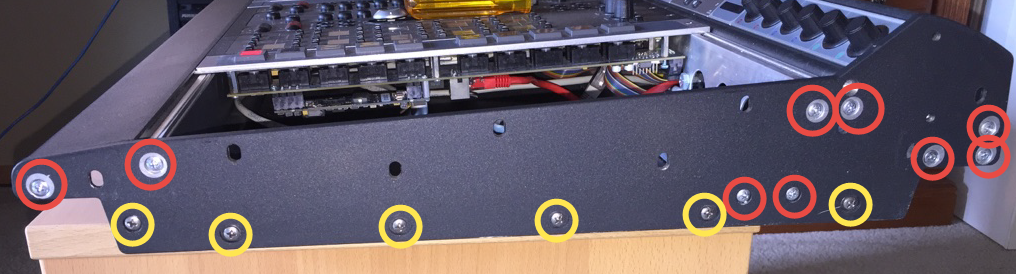
Location of the attaching screws
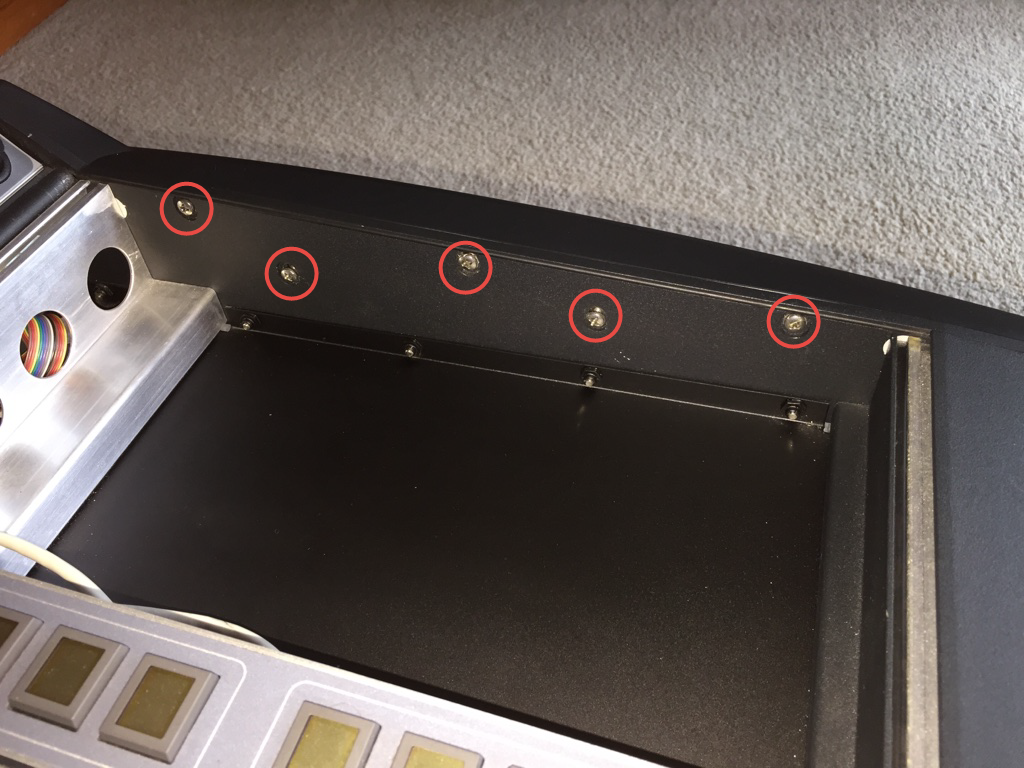
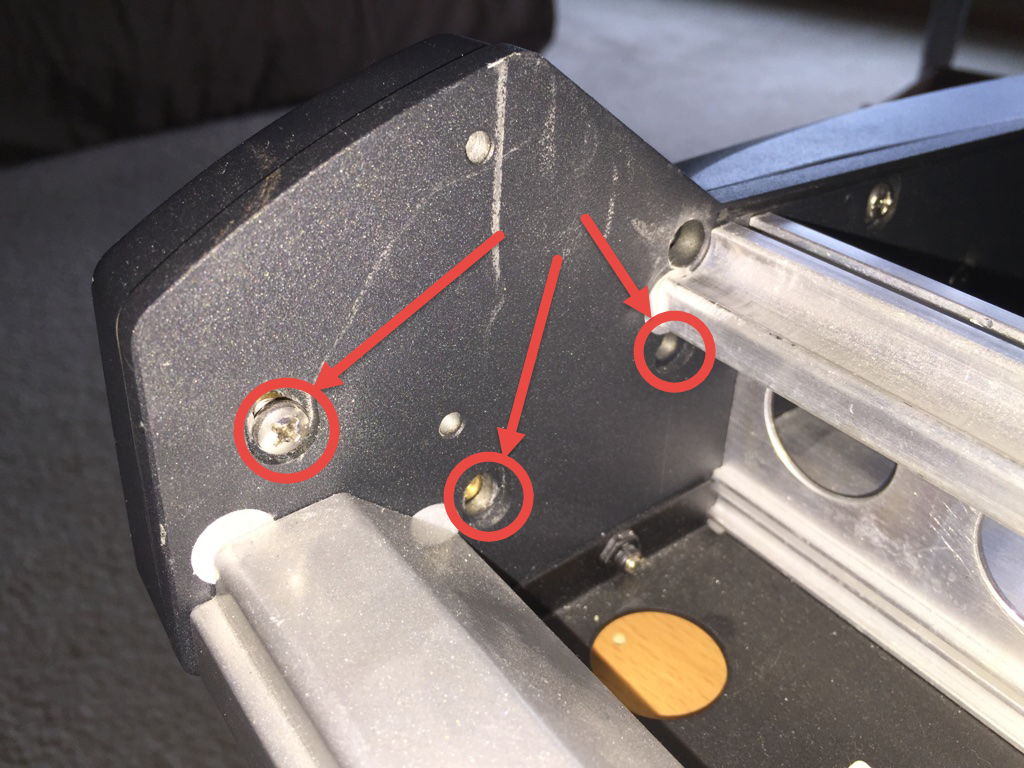
Exposing the side plate
- One screw is accessed from under the front palm rest, as shown here.

- Five screws are accessed from the inside of the console frame as shown here.
- Three screws are accessed from under the overbridge as shown here.
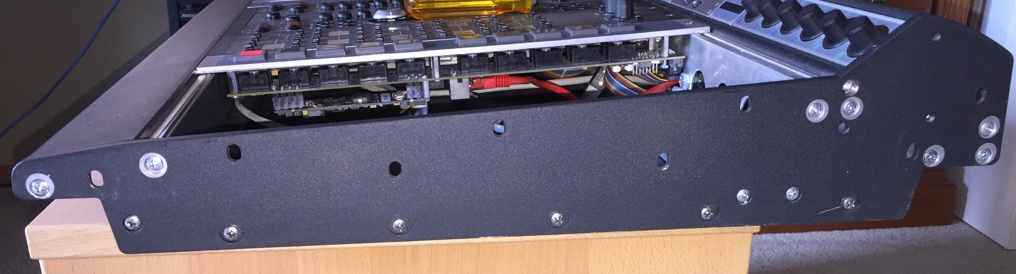
Removing the side plate
- Remove 15 screws holding the side plate to the other parts.
Removing the CanBus distribution board
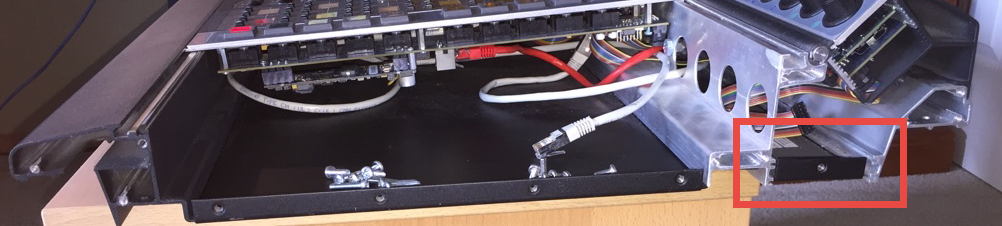
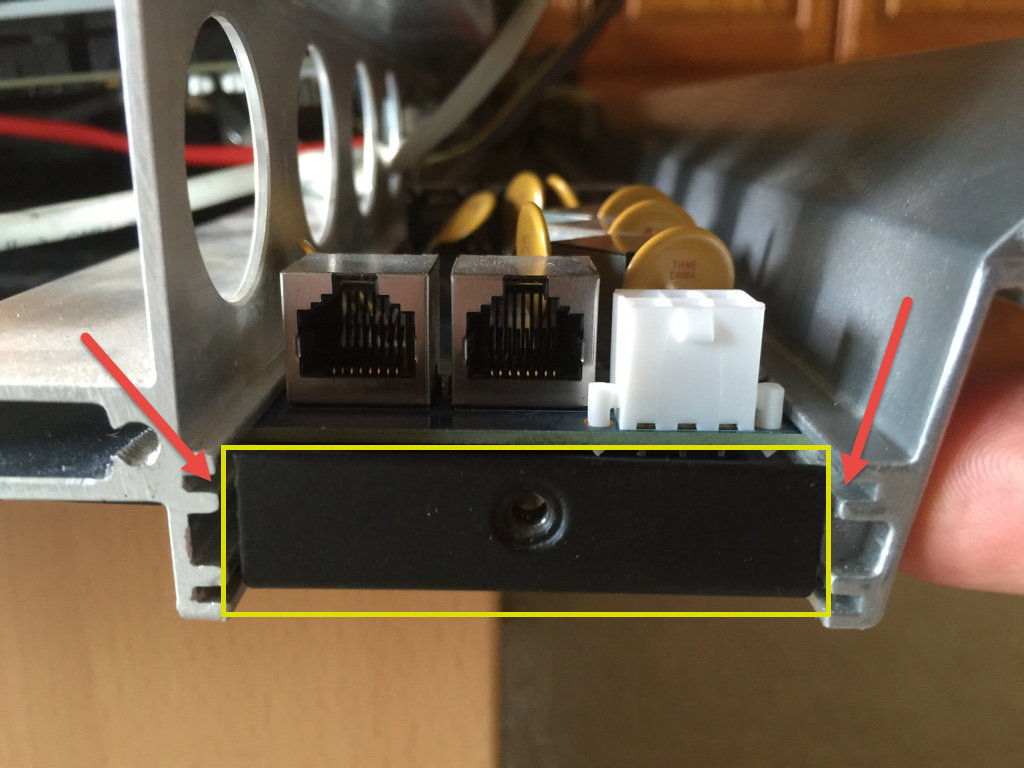
The photo below shows a close-up of the rear channel where the boards are mounted. The existing board is mounted in two slots (marked with red arrows). The bottom metal, enclosed in the yellow rectangle, prevents the CANBus board from being slid out of that channel.
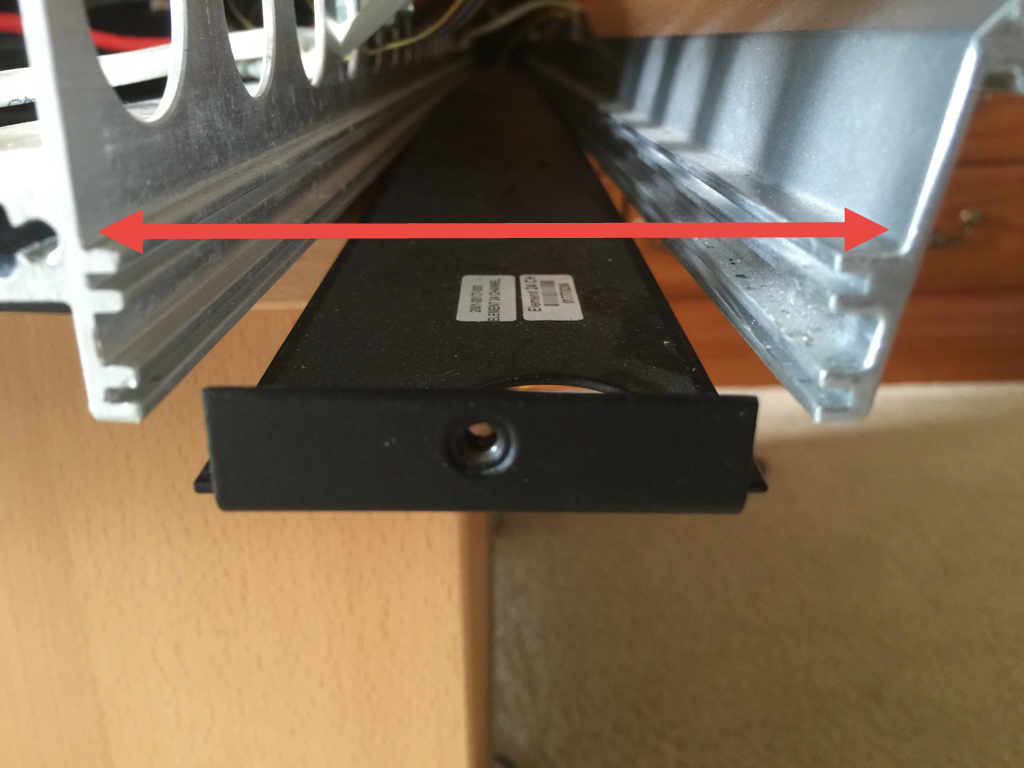
In order to remove the existing board, separate the two extruded aluminum pieces slightly, allowing the bottom piece to fall away, as shown in the picture below.
Install the new board
If you installing a replacement CanBus Distribution Board you are finished. Reassemble the console in the reverse direction.
If you are UPGRADING to an ETH4CAN board, proceed to the next steps in the instructions.
Let us know how we can help
If you have further questions on this topic or have ideas about how we can improve this document, please contact us.