Supermicro Hardware IPMI Instructions
 Updated
by
Bryan Jones
Updated
by
Bryan Jones
First, a word of caution
Scope
This procedure describes logging in to the IPMI interface of VX Enterprise, VX Prime Plus, and other products built upon the 1RU Supermicro Server platform. It does not cover engines on the 2RU fanless platform. As of this writing, products built on this platform are;
- Telos VX Enterprise
- Telos VX Prime +
- Telos iPort High Density
- Telos Z/IPStream R/2
- Axia Quasar Engine
- Axia Pathfinder Core Pro
- Telos Infinity VIP Server
Description
The Intelligent Platform Management Interface (IPMI) is a set of computer interface specifications for an autonomous computer subsystem that provides management and monitoring capabilities independently of the host system's CPU, firmware, and operating system. IPMI defines a set of interfaces used by system administrators for out-of-band management of computer systems and monitoring of their operation. For example, IPMI provides a way to manage a computer that may be powered off or otherwise unresponsive by using a network connection to the hardware rather than to an operating system or login shell. (source: Wikipedia)
Configuration
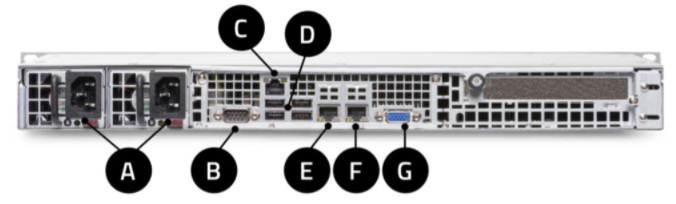
The IPMI interface is a dedicated network management interface located above the two left-most USB ports when looking at the rear. Shown as "C" in this image.
The interface is configured for DHCP by default. A static IP can be assigned by using the BIOS configuration or from the actual IPMI browser interface.
If your network is configured for DHCP
- Connect a VGA display (Item G above)
- Apply power to the device
- The DHCP address is displayed briefly when the unit boots. Take note of the IP adrress.

- Proceed to the Logging into the IPMI Interface section below
Configuring the IPMI network IP address from the BIOS
- Connect a VGA display to the VGA port
- Connect a USB keyboard to a USB port
- Boot the unit by applying power to both power supplies on the rear of the unit
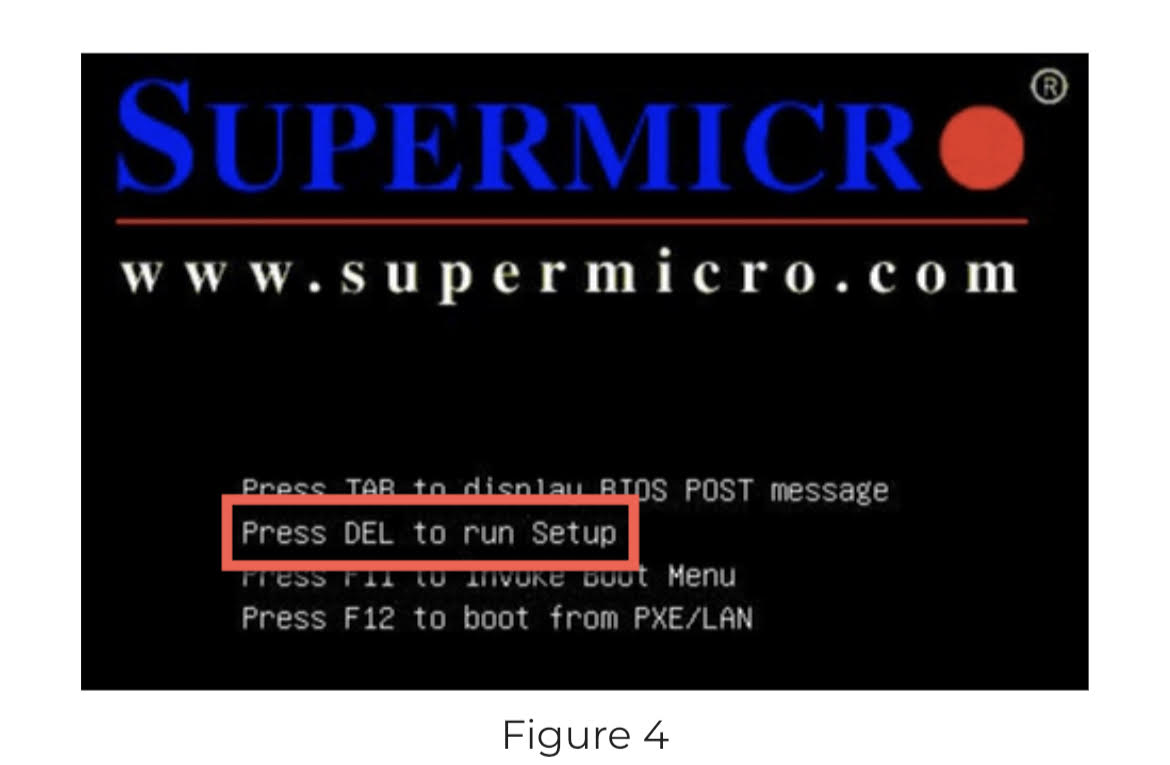
- When prompted on the VGA display, press the Delete key on the keyboard to enter the BIOS Setup.
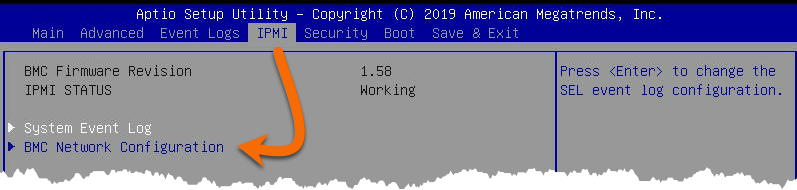
- From the BIOS Setup, navigate to the IPMI tab
- Choose BMC Network Configuration
To change the IP Address to a static address;
- Select Update IPMI LAN Configuration and set this parameter to Yes
- Select Configuration Address Source and set this parameter to Static
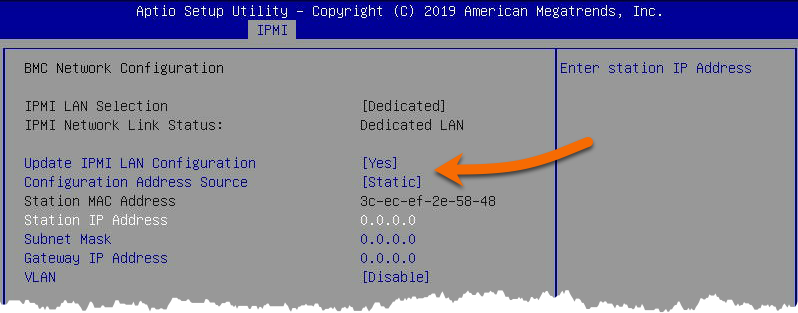
- Using the keyboard, set any of the following parameters;
- Station IP Address
- Subnet Mask
- Gateway IP Address (optional if required)
- VLAN (optional if required)
- Press the ESC key to exit the configuration
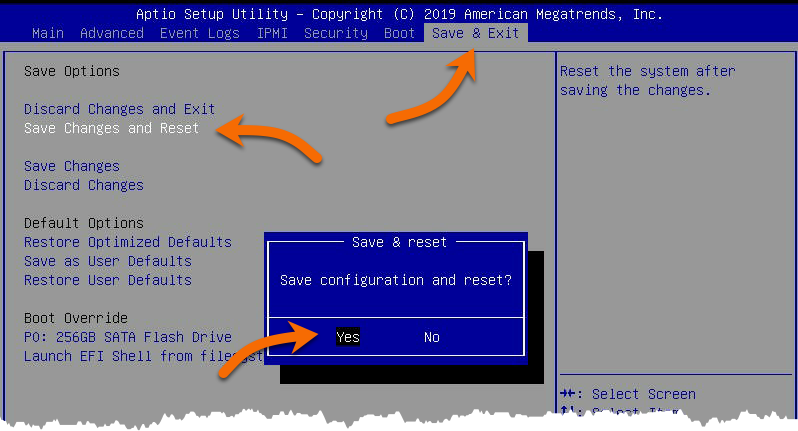
- Select the Save & Exit tab
- Select Save Changes and Reset (reset in this context is a reboot, it does not reset any configuration). Answer Yes to the confirmation.
Accessing the IPMI web page
You will first need to know the password for your IPMI interface. There are two possibilities; If the front panel of your unit has an LCD display and navigation controls (like this);

The login for your unit is;
- Username: ADMIN (all caps)
- Password: ADMIN (all caps)
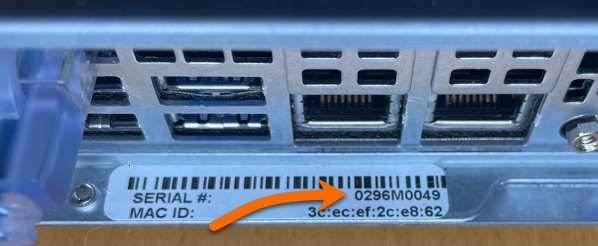
If your unit has no display, like this;

The login for your unit is specific to your unit serial number.
- Username: ADMIN
- Password: based on your serial number
Please contact Telos with your serial number. The password is a long string (like RK4H6#1x$d05fG) and can only be obtained by providing the serial number.
For units requiring passwords derived from the serial number, the serial number sticker is located on the back of the unit below the two network ports.
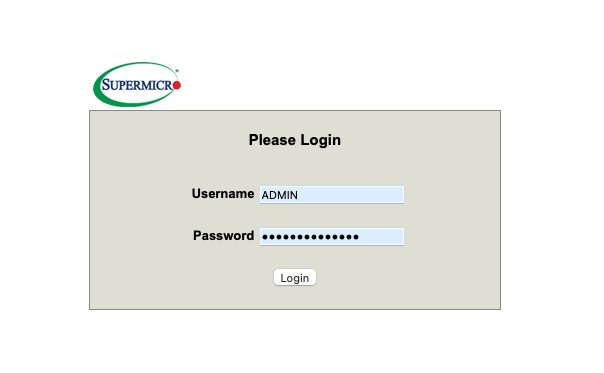
Logging in to the web page with your credentials
- Open a browser and enter the IPMI interface IP Address
- Enter your username and password
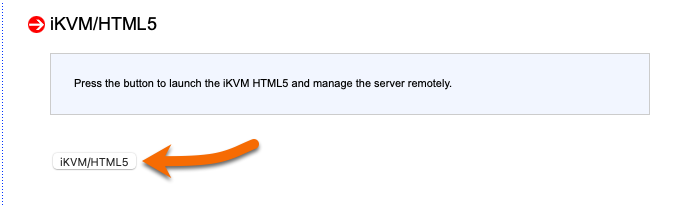
- From the Remote Control menu, select
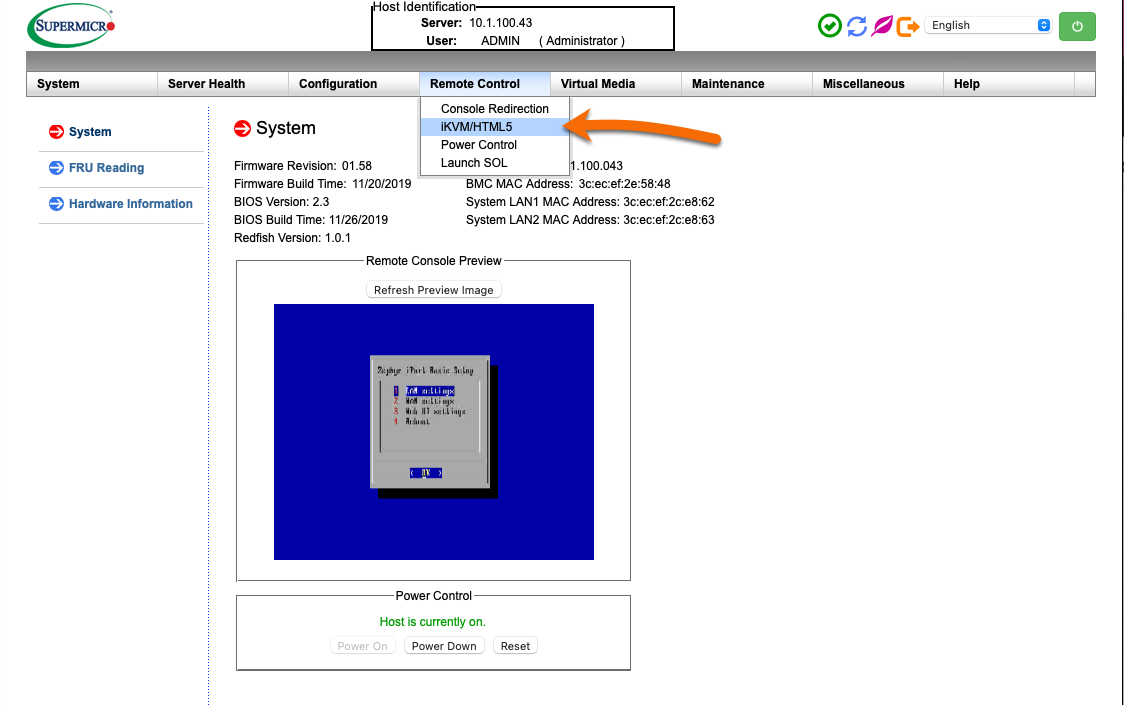
- Press the button to manage the server remotely.
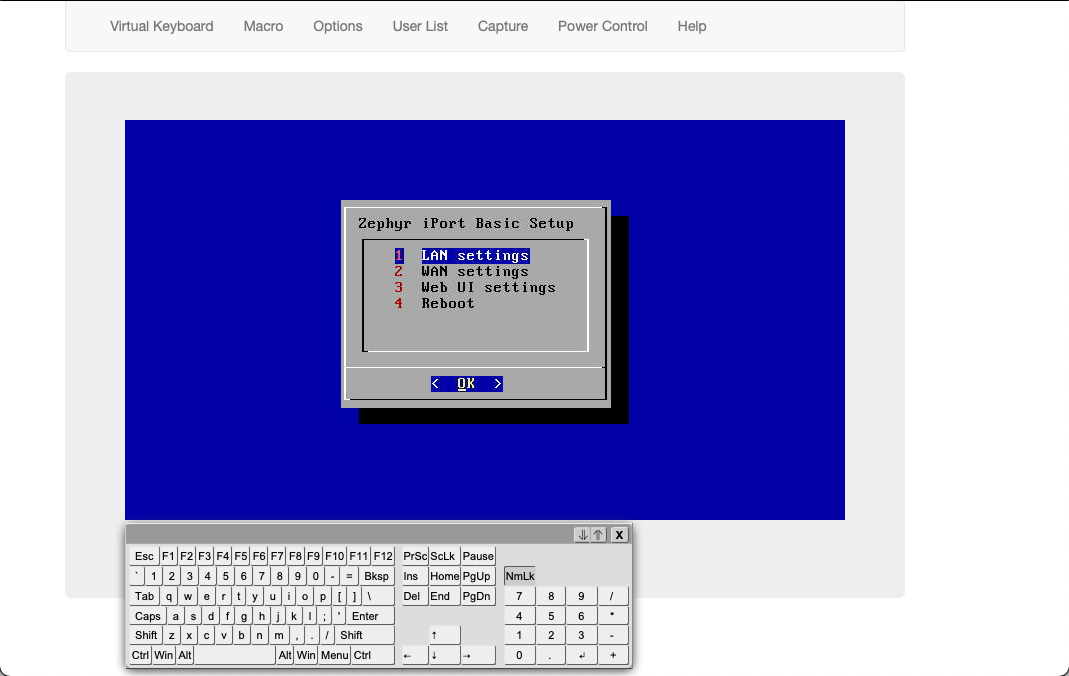
The same console is displayed as if you had directly connected a monitor and keyboard. In this example, the Basic Setup menu for the iPort High Density is shown.
Let us know how we can help
If you have further questions on this topic or have ideas about improving this document, please contact us.