Omnia VOLT Software update procedure
 Updated
by
Bryan Jones
Updated
by
Bryan Jones
Scope
This document covers the steps necessary to update the software version on your Omnia VOLT. Note this document is not version-specific and may reference versions other than what you might have installed or are updating to.
Description
Whether you want to update your current version of VOLT software for any DSP|Core (AM, FM, HD PRO or SG), or convert types, for instance, going from FM to AM, the procedure is the same and is outlined in this guide.
Updates are performed using a network-connected Web Browser, and a downloadable update file.
The Omnia VOLT contains two software banks; new software is always uploaded to the inactive bank. This allows you to upload new software without interrupting programming, then pick the time you want to switch banks. This dual bank system is a safeguard against the loss of power, file corruption, or other disruption during the update. In the event of a disruption, the Omnia VOLT should still boot into the active bank containing the “old” software (but it is best to avoid power or user interruptions in any case).
Updating (or Converting) Omnia VOLT Software
- You should already have your VOLT update file(.oup) obtained from the Omnia website, a direct email, or other provided links, and saved this file to a location on your computer.
- Open a standard Web Browser on your computer and connect to the Omnia VOLT by entering: http://xxx.xxx.x.xxx/ in the browser’s address bar where the x’s in the example above are replaced with the Omnia VOLT’s IP address.
Once connected, you should see the Login screen shown below.
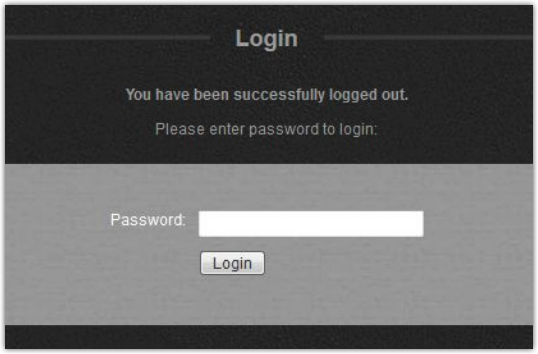
- Enter the Password (the default is “omnia” – all lower case) and click on the “Login” button. (Or simply press “Enter”)
The Remote metering and control page will appear
- Click on the “Update” link option at the top of the page.
The “Confirm Firmware Update” screen should appear with the following warning:
- If you would like to proceed after reading the warning message, click the “Continue” button and the “Firmware Update” dialog should appear:

- Click the “Browse” button
- Locate the appropriate .oup software update file downloaded and saved to your computer in Step 1, double-click it so that it appears in the “Update File:” box.
- Click the “Update” button.
The file will now be uploaded to the Omnia VOLT. This background process may take up to 5 minutes and will not affect audio. A progress bar may or may not appear, depending on the browser being used, but once the file is successfully uploaded to the Omnia VOLT, the following “Update Initiated” screen should appear:
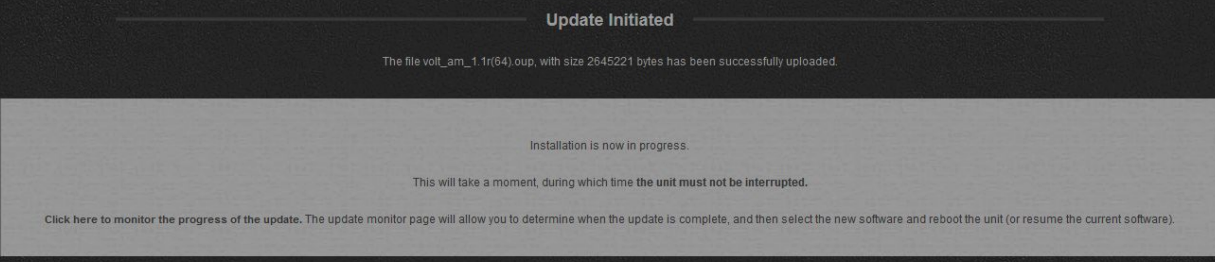
The software bank that is not currently in use will be updated with the new file. Read the “Update Initiated” screen and then click on the link: “Click here to monitor the progress of the update.”
The “Installation Progress Monitor” screen should appear:
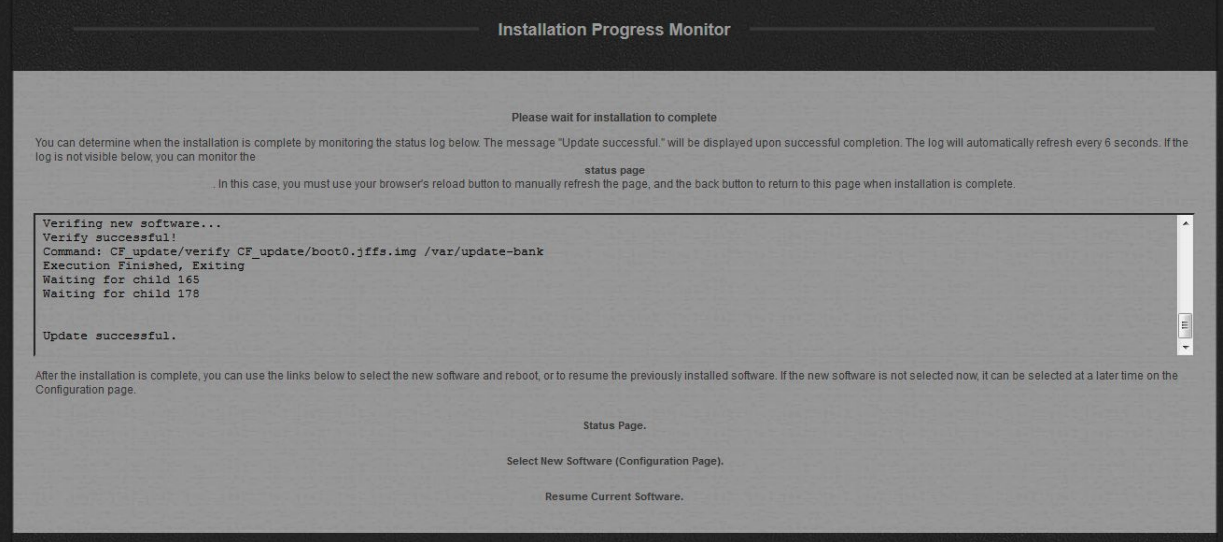
The log box on this screen automatically refreshes every 8 seconds. You will need to manually scroll down to view the latest messages using the scroll bar or scroll arrows on the right edge of the log window.
When “Update Successful” appears at the bottom of the log (as shown above), the update has been installed and is ready to be selected.
- Once the “Update Successful” message appears at the bottom of the log, click on the link: “Select New Software (Configuration Page)”
- Scroll down the Configuration page to find the “Select Software Bank:” section:
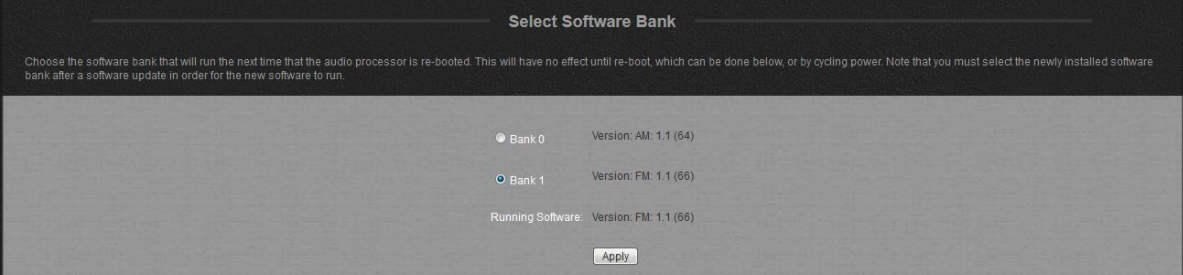
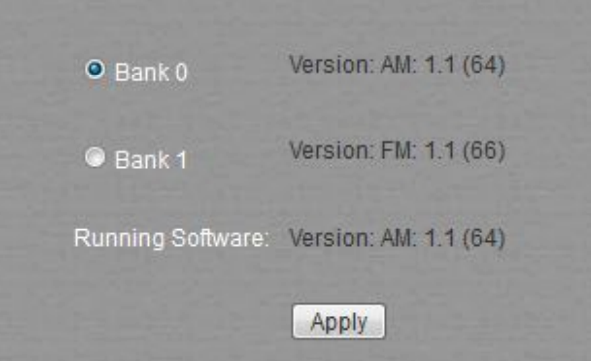
In this example, the new software (the VOLT AM software) has been uploaded to Bank 0. You will notice that the previous software (FM in Bank 1) is still selected and running. You can choose to change to the other bank to activate the new software or keep running the current software and use the Configuration page to change banks and reboot later.
- From the “Select Software Bank:” section, click the “radio button” of the Bank that contains the new software version
- Click the “Apply” button.
In this example, we decided to go ahead and activate the new software so we clicked on the “Bank 0” radio button and then clicked “Apply.”
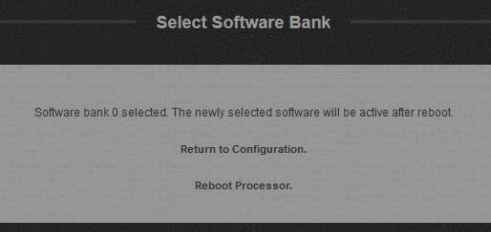
- To activate the selected bank now, click the “Reboot Processor” link option. The processor will reboot and the new software will be activated when the process completes.
To continue running the previous version, click the “Return to Configuration” link option instead. When you are ready to activate the new version, return to the Configuration page and repeat Steps 10 - 12.
Here, we chose to reboot:
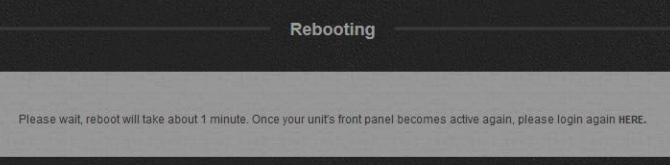
After a couple of minutes, click on the “HERE” link and login. Navigate to the Configuration page once again. Once activated, the new version should appear as the “Running Software:” version. In our example, this VOLT is now running the AM version 1.1(64):
You may now close your browser. The software update is complete.
Final thoughts when changing the DSP Cores
If you are using the update process to change DSP Cores from (for example) FM to AM, please remember to load fresh IO and processing preset defaults once you bring up the new Core type. These types of settings are specific to the IO and processing structures of each DSP Core, and should be re-evaluated in cases where you are repurposing your VOLT to operate in a different type of air chain.
Let us know how we can help
If you have further questions on this topic or have ideas about improving this document please contact us