Installing iPort High Density update version 3.1.0
 Updated
by
Bryan Jones
Updated
by
Bryan Jones

Scope
This document applies to the following Telos Alliance products;
- 2001-00605 - iPort High Density Multi-Codec Gateway
- 2001-00599 - iPort High Density Multi-Codec Gateway with optional Content Delay
Description
Telos provides updates to most of its products using update packages installed from a Web Browser. This allows for an easy way to revert back to a previous version should any problem arise. New software versions are always installed to Bank 1 and so your system must be running from Bank 0.
Software update procedure
Download the update file
Click here to download the version 3.1.0 update file. Save it to a location on your computer. You will need this later.
Verify you are running in software Bank 0
- From the main Web Page of your iPort High Density, click on the Software link on the left side menu under the System heading.
- Look under the Hardware and Firmware heading at the top of the Sofware page. If your system has the Bank 1 "bubble" selected, AND you have a Commit button, you need to commit this version to Bank 0. An example is shown here;
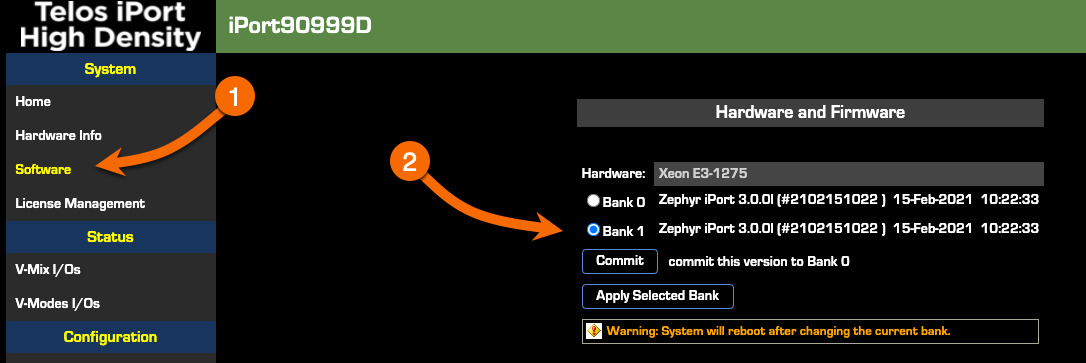
- If you do NOT have a Commit button and your system indicates Bank 0 is active, proceed to the next section. Otherwise;
- Click the Commit button.
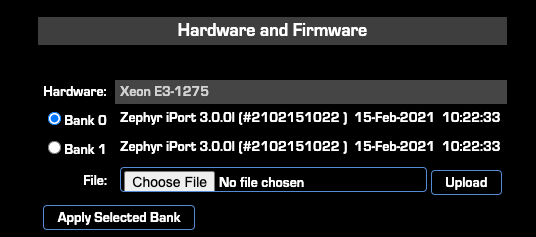 Note that the Commit button is gone and there is now a Choose File option.
Installing the update
- From the main Web Page of your iPort High Density, click on the Software link on the left side menu under the System heading.
- Under the Hardware and Firmware header, click on the Choose File button. (If you do not have a Choose File button, please refer to the prior section)
- Browse for and locate the update file you downloaded in the previous step. Once you choose the file, the box will change from "No file chosen" to the filename of the update.
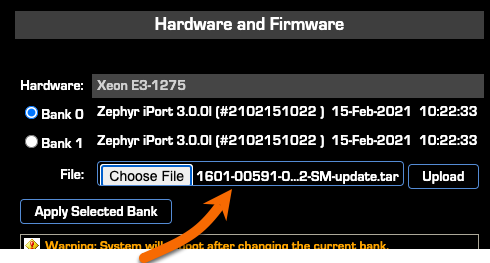
- Click the Upload button
The screen will display "System Upload in progress." After the file is uploaded, the screen will change to;

This process should take less than one minute.
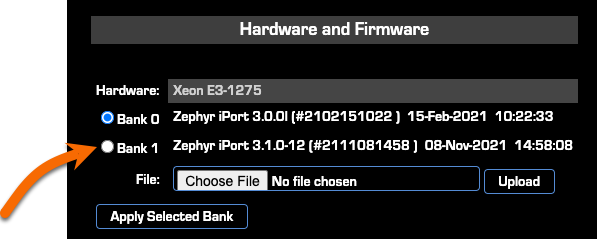
- Click the Refresh button on your Web Browser. Verify that Bank 1 shows the newly uploaded version.
Activating the update
Although we have uploaded the update to the iPort, it is not yet active.
- From the main Web Page of your iPort High Density, click on the Software link on the left side menu under the System heading.
- Click the small bubble to the Left of Bank 1 to select it.
- Click the Apply Selected Bank button.
The following confirmation prompt will appear. Clicking YES will reboot the iPort

- Click Yes on the confirmation prompt to activate your new update.
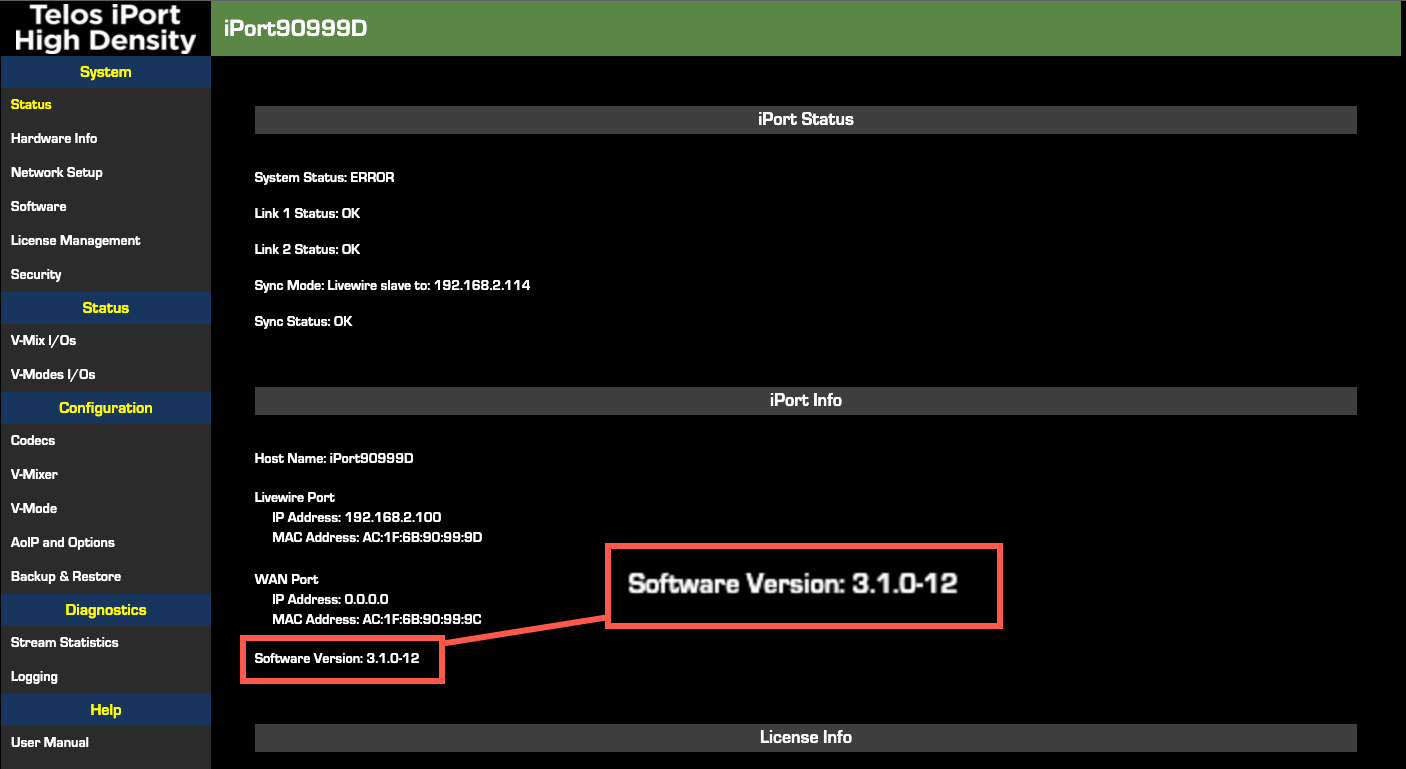
Confirming the update
Please verify the updated version by clicking Status under the System heading. The current version is shown under the iPort Info heading and for purposes of this update should show version 3.1.0-12.
Updates in this version
#16738: Fixed security vulnerabilities:
- Enable/Disable SNMP option
- introduced https support
- disabled TLSv1 and TLSV1.1 in httpd-ssl.conf
- disabled ciphers DES, 3DES, IDEA and RC2 in httpd-ssl.conf
- updated openssl to v1.0.2u
- updated httpd to v2.4.51
#15829: Update openssh to version 8.5p1
#16981: Web UI improvements
#16011: Web UI: Add paging buttons to VMIX and VMODE Settings pages
#16012: Web UI: Rename and move "Network" menu link
#16042: Web UI: If some function cannot be performed due to missing javascript, display an error message explaining the reason
#14937: Enable user to add static routes
#15819: SSH Server Public Key Too Small - Key length increased from 1024 bits to 2048 bits
#15282: Console interface: add an option to reset all config data to factory state
#15283: Web UI and console interface: add an option to remove the static routes added by the user
#15313: Allow receiving streams with ptime=1ms on all engine inputs
#15337: Changed Default network settings
#15339: Enable the user manual link, pointing to a Telos documentation site on Network (GitBook)
#16054: Static routes: sometimes, an error occurs when deleting a static route
#16706: On front-panel devices with base licence, only one GPIO port is working
#16722: Number of GPIO ports does not match the number of licensed codec slots
#16732: Sometimes vmode is not passing audio from backfeed
#16988: Web UI: "System" section text cleanup
#17164: Data channels stop working after multiple client connections
#17174: iPort application crash
#17189: Web UI: Restore cfg from backup: after pressing the No button, it returns to the wrong Web page
- added info about what is not restored from backup.
#15559: Offline deactivation does not work
#15614: Content delay - incorrect playback offset
- ntpd configuration change: tinker panic 0 (ntpd will not stop after repeated big time jumps)
- ntpd configuration change: iburst option (ntpd will reach the SYNC state faster)
- general cleanup: suppressed ntpd loging to RAM file
#14646: Changes of 802.1Q VLAN 0 Priority and DSCP Class of Service Tagging are not reflected in the returned LWRP SET message
#15250: iPort does not send IGMP join reports on startup
Let us know how we can help
If you have further questions on this topic or have ideas about improving this document, please contact us.