Creating SIP Unicast connections in xNode
 Updated
by
Bryan Jones
Updated
by
Bryan Jones
Scope
This document covers the configuration of unicast audio in the Telos Alliance xNodes running version 2.4.7 or higher.

Description
Sometimes you may need to send audio from one xNode to another over a link that does not support multicast. In this case, AES67 SIP Unicast links are preferred. For best results, please make sure your xNodes are running version 2.4.7 or higher.
Enable the SIP Options
SIP connections are disabled as a security feature in version 2.4.7 xNode software and must be enabled.
- Using a web browser, click on the Synchronization and QoS link on the left side menu of your xNode
- Under the SIP: heading set the Enable SIP Disclosure to Enabled as shown below
- Set the SIP Server Port (if required)
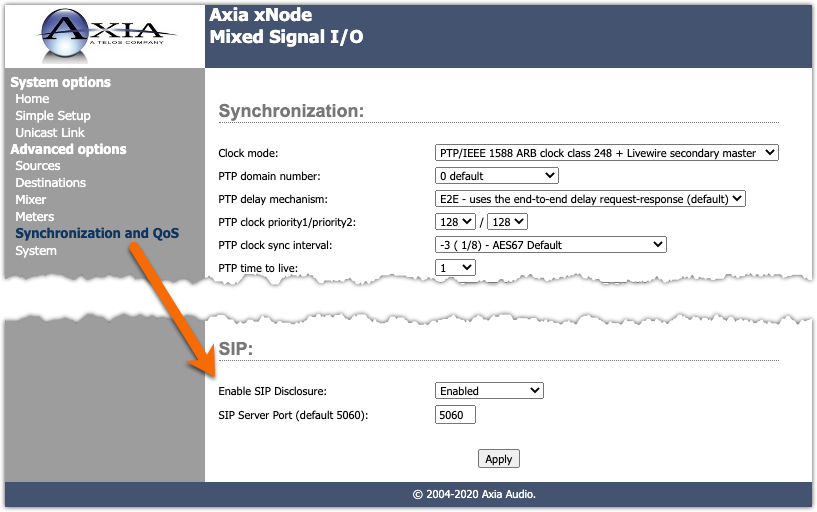
- Click the Apply button
Configuring Sources (the SENDER)
Sources in the xNodes must be configured properly for Unicast. Sources are configured in the SENDING xNode. We will configure the receiver xNode in the next step.
- Click on the Sources link on the main web page of your xNode that will be SENDING the audio.
- Enter a descriptive name to help you keep the input straight. The name here is unimportant. It's only used for you to see what the source is used for.
- Leave the Channel/Address field blank.
- Set the Stream Mode to Stereo 1ms (AES67) (Standard Stereo can also be used if you are connecting from xNode to xNode).
- Click Apply.
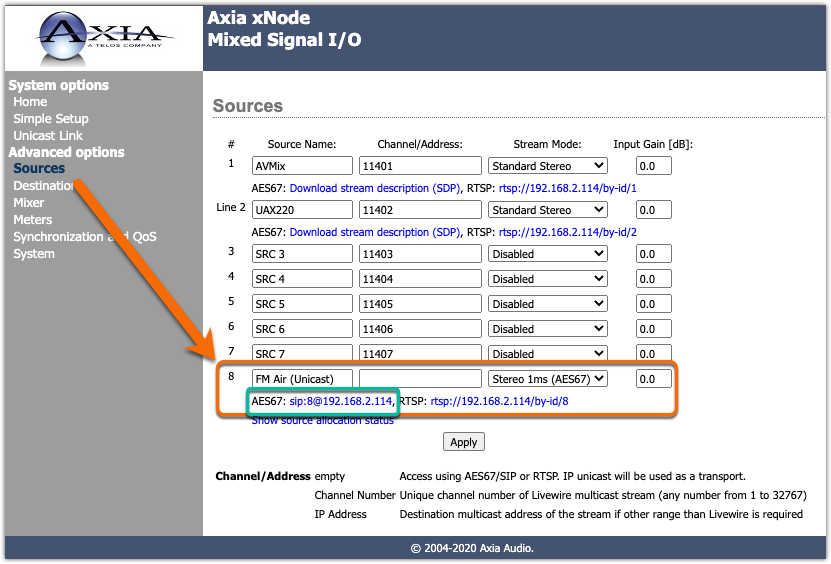
- The blank Channel/Address is what triggers the xNode to know this is a Unicast connection. Take note of the AES67: link (shown here in green). This will be needed in the next step.
Configure Destinations (the RECEIVER)
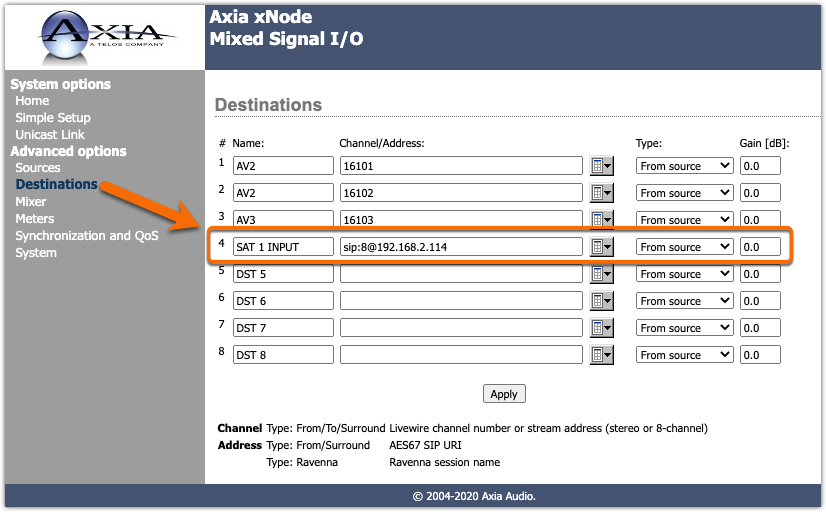
- Click on the Destinations link on the main web page of your xNode that will be RECEIVING the audio.
- Enter a descriptive name to help you keep the input straight. The name here is unimportant. It's only used for you to see what the destination is used for.
- Enter the AES67 link information from the previous screen in the Channel/Address filed. In this case, it's
sip:8@192.168.2.114.
- Click the Apply button.
Does it work?
If the network between the two devices is configured property and a connection is allowed you should be receiving audio. You can verify this by observing the meters on the sending xNode.

And then observing the meters on the Receiving xNode.
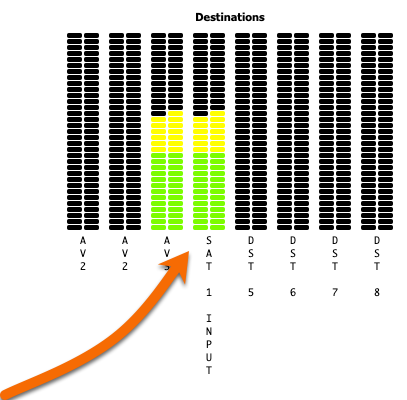
If they don't work the most likely issue is a network issue between the two devices.
Let us know how we can help
If you have further questions on this topic or have ideas about improving this document, please contact us.