Converting MPX Nodes between Encoder and Decoder
 Updated
by
Johnny Goldsmith
Updated
by
Johnny Goldsmith
Scope
This document explains how to turn an MPX Encoder into a Decoder and vice-versa.
The Process
In order to convert an MPX Node, you will need to gain access to one of the DIP-switch banks inside the Node. You have to remove the top cover for this access.
To gain switch access:
- Disconnect power and all external cables.
- Remove the 16 screws on the top of the unit with a Phillips screwdriver.
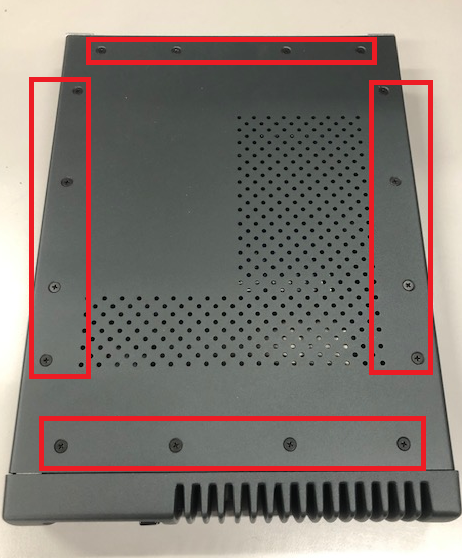
- Pull the lid up and away from the chassis.
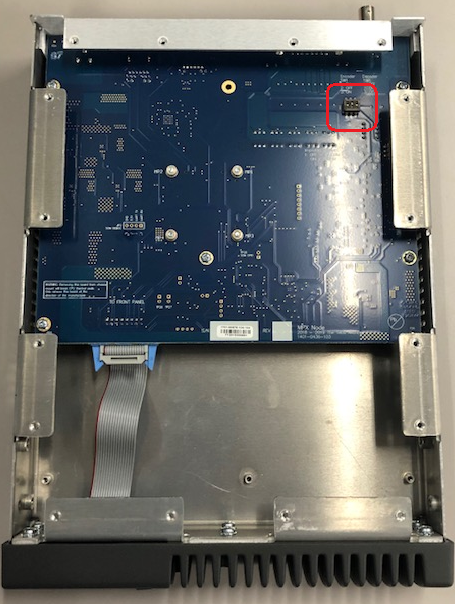
- Find the switch bank closest to the composite connector:
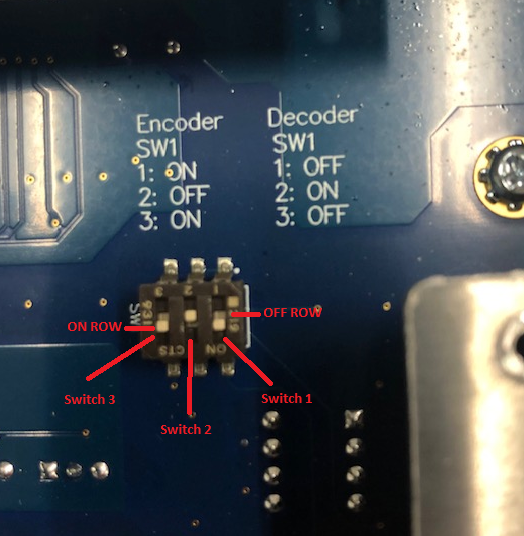
- Looking closely at the mainboard of the Node, you can see for Encoder, the orientation of the switches is to be set to 1: ON, 2: OFF, 3: ON. For Decoder, the orientation is to be set to 1: OFF, 2: ON, 3: OFF.
In the below example, the MPX Node is set to Encoder:
- We recommend using a small flat screwdriver to adjust the switches to the desired position.
- Re-attached the lid to the top of the unit with the 16 screws.
Check Your Work
After powering on the unit, it should say ENCODER on the upper left of the OLED if you set it to Encoder:
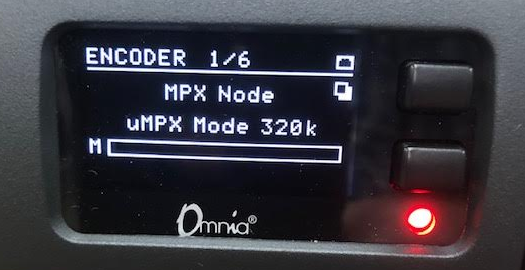
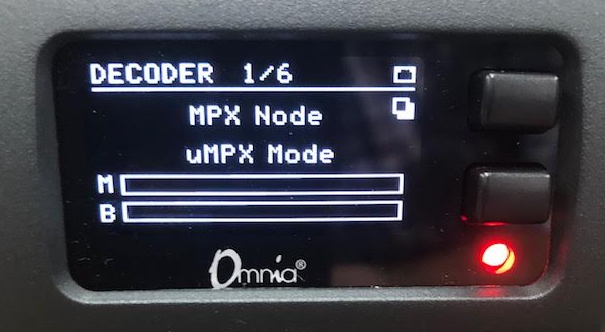
If the MPX Node is set to Decoder, you will see DECODER on the OLED:
Let us know how we can help
If you have further questions on this topic or have ideas about improving this document, please contact us.