How to configure a Partyline
 Updated
by
Tim Chimes
Updated
by
Tim Chimes
Scope
A Partyline gives users the ability to talk with and listen to anyone else in a given Partyline. We will cover how to set this up.
Configuration
Open Dashboard, and you will see the Partyline settings in the lower right quadrant, by Groups and IFBs. Make sure to select the Partylines tab, and click on the blue ADD button on the right.

When you click ADD, you will be given a chance to name your Partyline and change the colors for how it will be shown on the panel. You can always change these settings later by double-clicking on the Partyline. For now, enter a name, and either press Enter, or scroll down and select CREATE. You should now see the following configuration window:
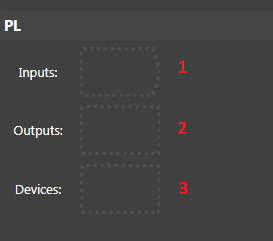
- Inputs are any inputs that you would like to be included in a Partyline. Keep in mind that this input would always be active, and anyone in the Partyline would always be able to listen to this input.
- Outputs are any output that you might want to route the mix of the Partyline to. For example, this might be a small speaker on a producer's desk.
- Devices are where you will configure any Infinity panels or beltpacks that you would like to be included in the Partyline. You can also do Virtual Ports. Putting a Virtual Port would be helpful if you are using Link to connect two Infinity locations together over the internet (more information about this can be found here: How to configure a connection using Link)
You can now drag and drop this Partyline to any key on any panel that you would like to be included on the Partyline.
Let us know how we can help
If you have further questions on this topic or have ideas about improving this document, please contact us.