Using Pathfinder Core PRO to configure console user buttons
 Updated
by
Bryan Jones
Updated
by
Bryan Jones
SCOPE
This document will show you a few easy steps to use Pathfinder Core PRO to program User Buttons on Quasar, Fusion or Element Consoles.
DESCRIPTION
In this example, we will use Pathfinder Core PRO to program a User Button on a Fusion console to perform some task. The final task is unimportant as it could be many different things. For this example, we will program a button to make a route. This button might change the route to the transmitter, or change the audio source that your computer records from, etc.
IDENTIFYING YOUR DEVICES
For this example, we want to change an output on an xNode. This xNode IP is 192.168.2.114.
We will use User module #5 and Button #5 on our Fusion console.
STEPS
The simplest way to program user buttons is to first create a software User Panel in Pathfinder Core PRO with all of the functionality that you want and then "map" that software button to whichever hardware button you want to control.
The more complicated way would be to build Logic Flows to control each step along the way. In more complicated scenarios this may be required.
As a matter of teaching fundamentals, we'll start with the easy ones first.
There are three basic steps;
- Create a new User Panel with at least one button
- Assign a function to the button
- Assign the button to your hardware
Create a new User Panel and Button
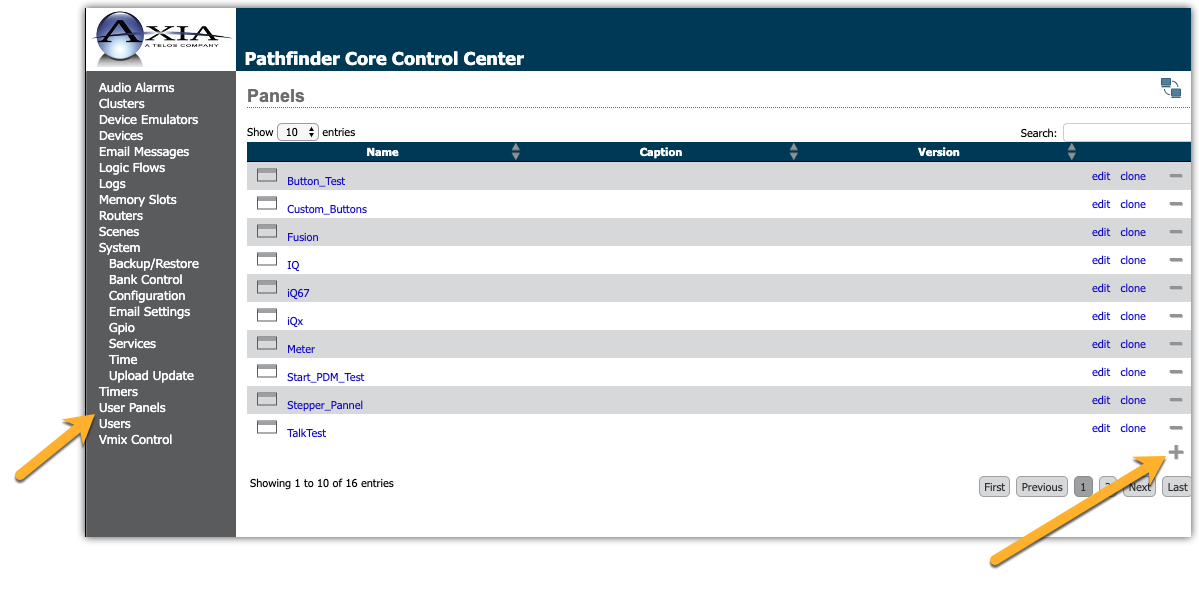
- From the main web page of your Pathfinder Core PRO, click on User Panels from the left-side menu, then click the + sign in the bottom-right corner.
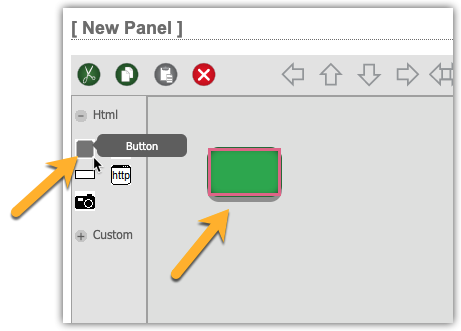
- From the New Panel page, expand the +HTML header. Click on the HTML button and drag it over on to your page.
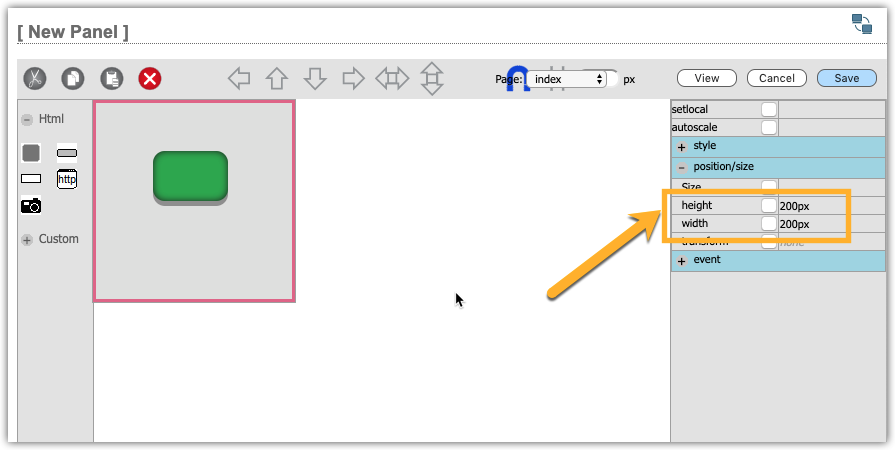
Let's adjust the size of our panel. It defaults to 800 X 600 which is too big for what we need here.
- Click on the blank, grey background of the panel. It will highlight with a red line around it. Click the + next to position/size and set the height and width to 200 and 200.
- Set our default button properties. Click on the HTML Button added in the previous step. The Properties for that button will be displayed. Here you can set each property by clicking in the open space to the right of each property. Set the caption, backcoloroff and backcoloron properties to whatever you want them to show on your User Button.
For LCD buttons, try to stick with primary colors. The LCD user buttons do not have the ability to display thousands of colors like the button on the screen might. "True" colors are best. Red, Green, Blue, Cyan, Magenta, Yellow, etc.
If your button panel is only going to be used on a computer screen then use any color you like.
- Now that we have the basics of the button complete, let's save our work. Click Save in the upper-right corner and give it a name.
Assign some functions to the button
- With the button selected, expand the +event property on the right side. You will see "mousedown" and "mouseup".
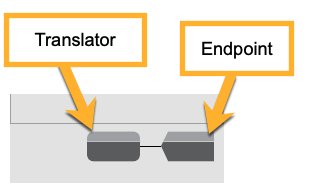
- Click the white box just to the left of the mousedown property so that it's selected. It should turn light blue as shown, and a Translator and Endpoint box will appear below.
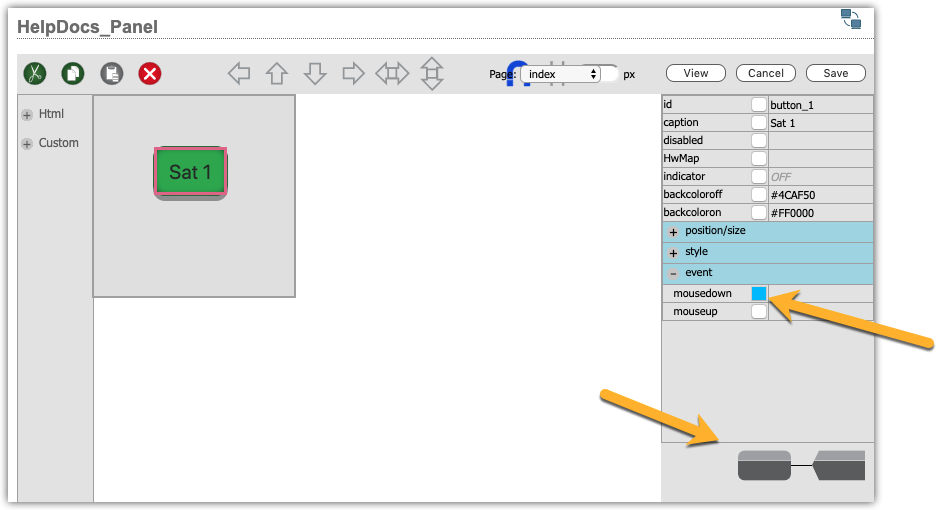
The selection of "mousedown" says, when the button is pressed, what do you want to do? The Endpoint and Translator block is where we define that. The endpoint, in this case, is our Node output. The Translator is what we will use to "translate" mousedown to some Livewire channel.
- Double-click on the Endpoint block. (Endpoint block is the one on the far right)
- From the Property Selector, we need to select the output of the node we want to control
- Expand Routers.
- Expand your main audio router.
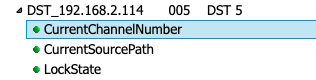
- Locate and expand the DST (destination) you want to control.
- Select CurrentChannelNumber
- Click Select at the bottom of the Property Selector.
- The Translator Properties will automatically open.
- Click to select the *=* entry at the top.
- Select True from the drop-down list
- Enter the Livewire channel you want to route when the button is pressed. (In this example, 12345)
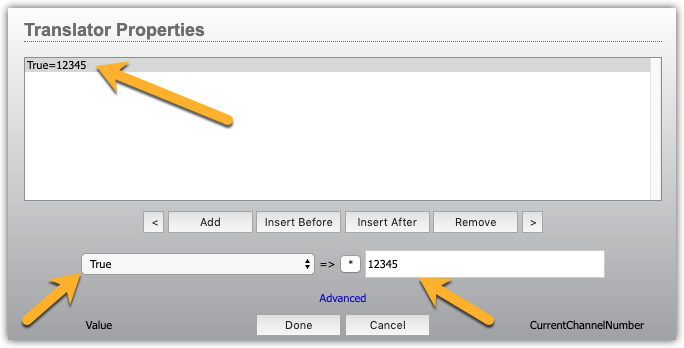
- Click Done
What we have just done is said, when mouse down value (button down) is true, set the CurrentChannelNumber of our node to 12345.
When you click Done, you will get a box that says this.
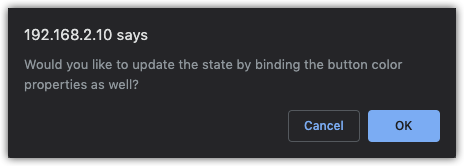
What it is really asking is, would you like to automatically set the state of the button so when the route is made the button will turn on. We want to say OK here.
- Click OK
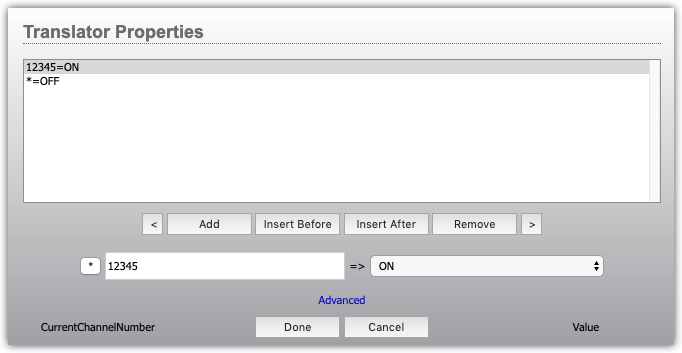
- A new Translator Properties box will open and it should be automatically populated for you, where;
- 12345=On
- * = OFF
This says, if the CurrentChannelNumber is 12345 the set the button state to ON, if it's anything else set the button to OFF.
This is useful as a confirmation that the route actually happened. In other words, we don't want to turn the button ON just because you pressed the button. We want it to turn no as a confirmation of what we told it to do.
- Just click at this point.
- Click Save and save your Panel.
At this point, we have a functioning Panel and Button. If you click the View button (next to Save and Cancel) it will RUN the Panel in a new browser window.
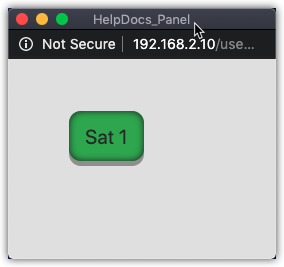
If you click the button, it should make the route to the node and the button will turn ON and turn whatever color you set.
To confirm this you can manually set the destination on your node to some random channel. The button will turn OFF. Click the button and it will route 12345 to your node (or whatever channel you assign) and the button will turn ON.
Map the software button to the hardware button
- Back in the Panel editor, click on your HTML Button.
- Click on the HwMap property in the Property Editor on the right of the screen
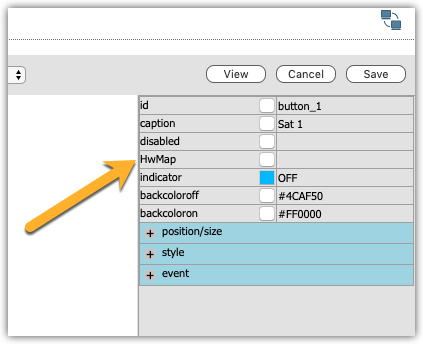
- The Select Hardware Button dialog appears.
In a large system, you could have many devices with many hardware buttons so the Search box is your friend. I know that my buttons are in my console with an IP address of 192.168.2.60 so that is what I will type in the search box. You can see that we still have 105 buttons on that console. You can use the page buttons, or the "Show" entries box to see more or, you can type something different in the search to help narrow it down.
In this case, we're just going to scroll down until we find our User buttons. Here I have Button 5, on User#5 (module number 5) on my FUSION-PS console.
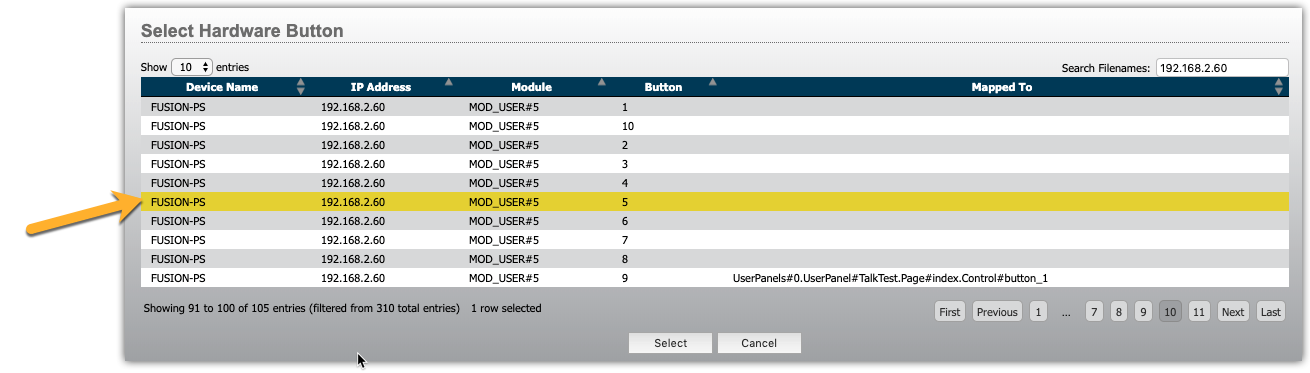
- Click Select.
- Save your Panel.
VERIFY YOUR WORK
If everything is done right, you should now have a Hardware button that is a direct duplicate of the software button. The text, colors, and on/off states will follow. Pressing the hardware button or pressing the software button accomplished the same thing.
If you have any questions about this please feel free to contact us.