Do I need an AoIP switch if I only have one xNode?
Scope
For small VX installations including VX Prime Plus, Legacy VX Prime, and Original VX. This can apply to VX Enterprise, but the system may be too large to consider this article.
Description
If a VX Setup is small (2 or fewer studios with 4 or fewer hybrids), and only one xNode is needed for the project, it is possible to get away with having no switch for the AoIP network. In small configurations where the entire audio network can be a single cable, there is no need for an IGMP snooping querier or QOS, since there is no switching needed on a single cable. Here, we'll show you how to do it.
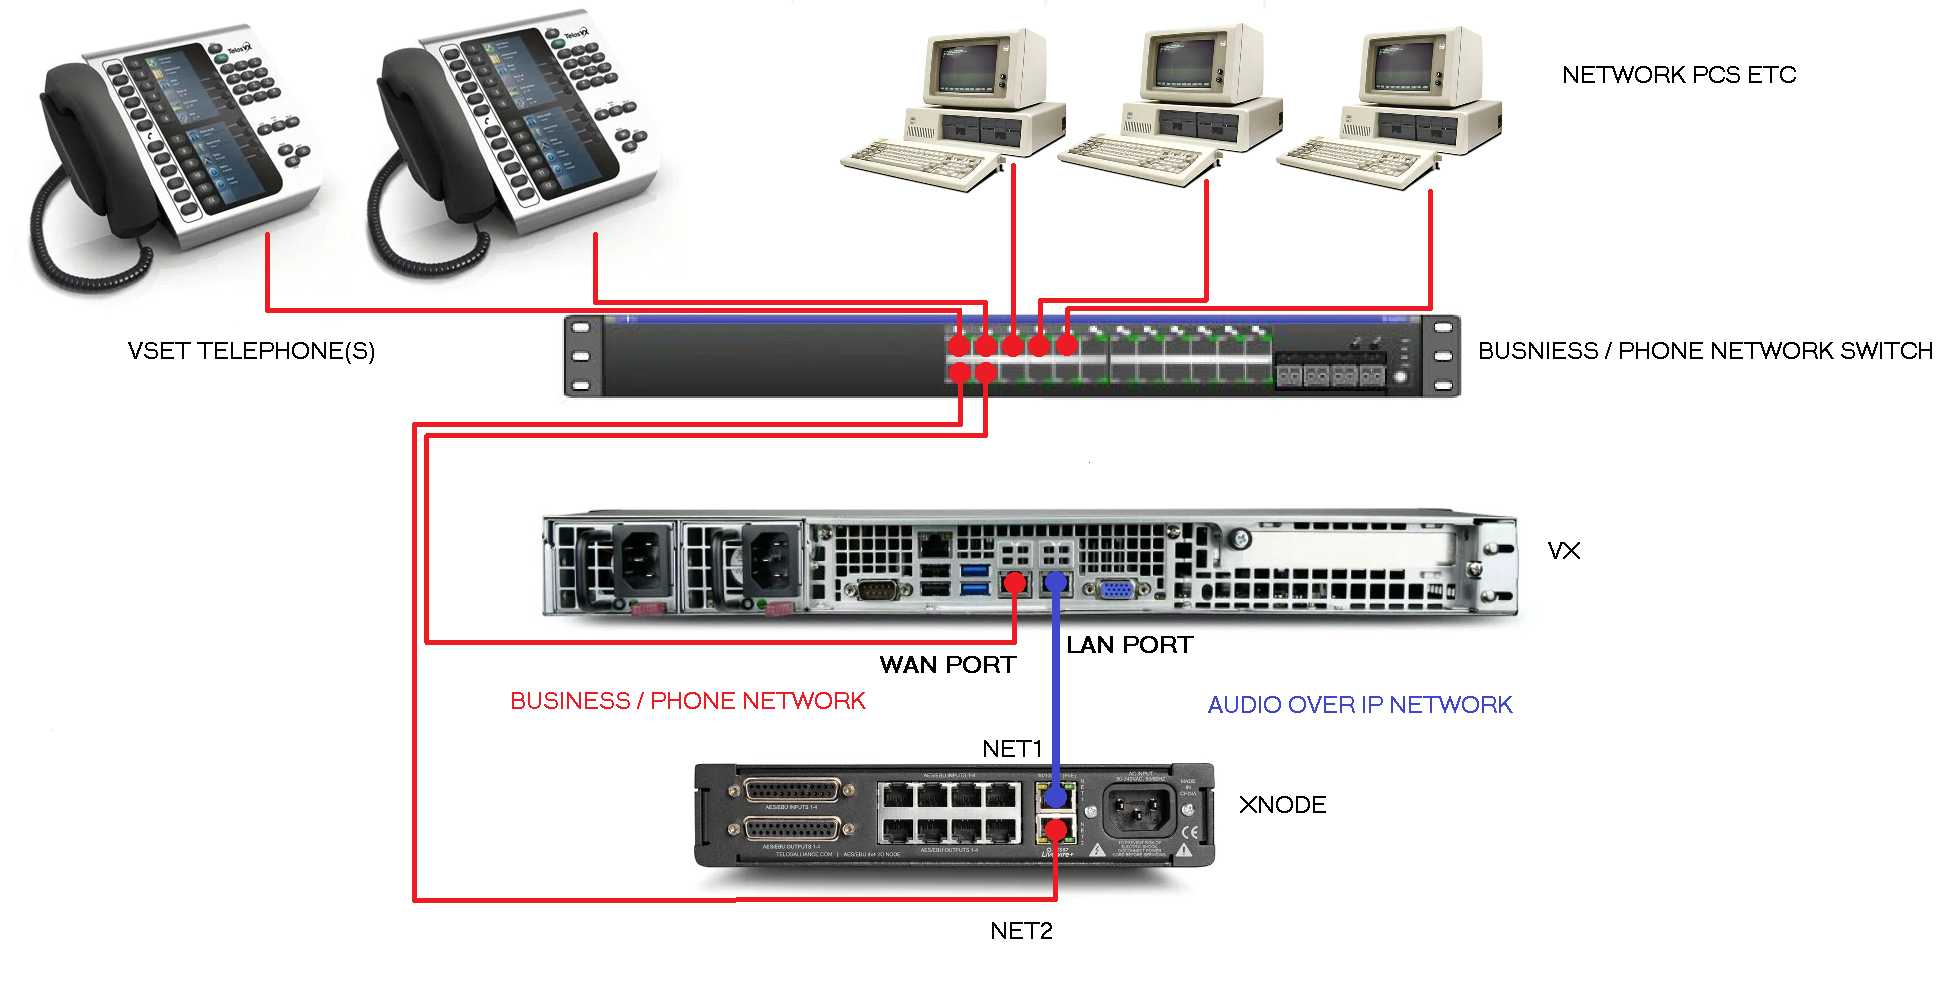
In the diagram above, the VX's WAN port, the xNode's NET2 port, the VSets, and the rest of your office's equipment can live on your regular office infrastructure using available IP addresses on your regular subnet. Since the VSets only use RTP audio just like all other SIP telephone equipment, there are no worries about multicast audio packets creating a problem. The multicast audio packets travel between the VX's LAN port and the xNode's NET1 port.
Step 1) Configure VX's WAN Services
- First, connect a PC to the VX's LAN port and use a browser to connect to the web interface using the IP address you've configured.
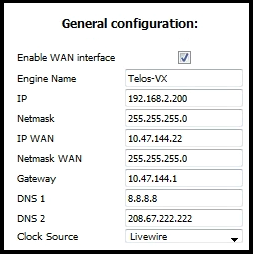
- Then go to the VX's Main Configuration page and confirm that the WAN port is enabled and is configured to a good IP address for your business network.
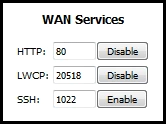
- Then, scroll to WAN Services, change the HTTP port to 80 and enable it. This allows configuration access from the WAN port.
- Then Enable LWCP on port 20518. This allows communication with the VSet telephones and controllers over the WAN port.
Step 2) Configure xNode network interfaces
- Unplug your PC's network cable from the VX's LAN port and connect to the xNode's NET1 port.
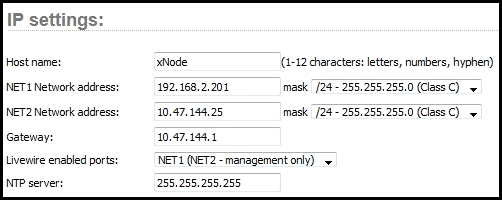
- From the front panel, set the IP address for NET1 to be compatible with the VX's LAN port (and subsequently, your PC's network interface). For example 192.168.2.201.
- Use a browser to access the xNode's web interface using the new IP address you've configured.
- Navigate to the System page and set Livewire enabled ports to NET1(NET2 - management only)
- Set the NET2 network address to a compatible IP address for your business network.
- Confirm that the NET1 address is compatible with the VX's LAN port.
- Apply your changes.
Step 3) Finish Up
At this point, you can unplug the xNode's NET1 port from your PC and connect it directly to the VX's LAN port so that they are joined by a single cable as shown above.
Connect the xNode's NET2 port and the VX's WAN port to your regular network.
You can now configure and maintain your xNode and your VX using the network interfaces living on your business network.
Let us know how we can help
If you have further questions on this topic or have ideas about improving this document, please contact us.