SoftSurface: Connect to a FANNED Studio Engine

Scope
This document explains how to connect your SoftSurface program to a standalone Studio Engine, fanned model.
Description
SoftSurface has the ability to connect to a PowerStation with an Element connected to it. This feature is useful if you have a need to remotely control your Element. However, the SoftSurface application can also be used with a standalone Studio Engine that has no physical console connected to it. You may find this feature useful for production suites, or other areas where space is limited.
Before We Get Started
Setup the Fanned Studio Engine
- Open up a web browser and type in the IP address of the Studio Engine you will be using
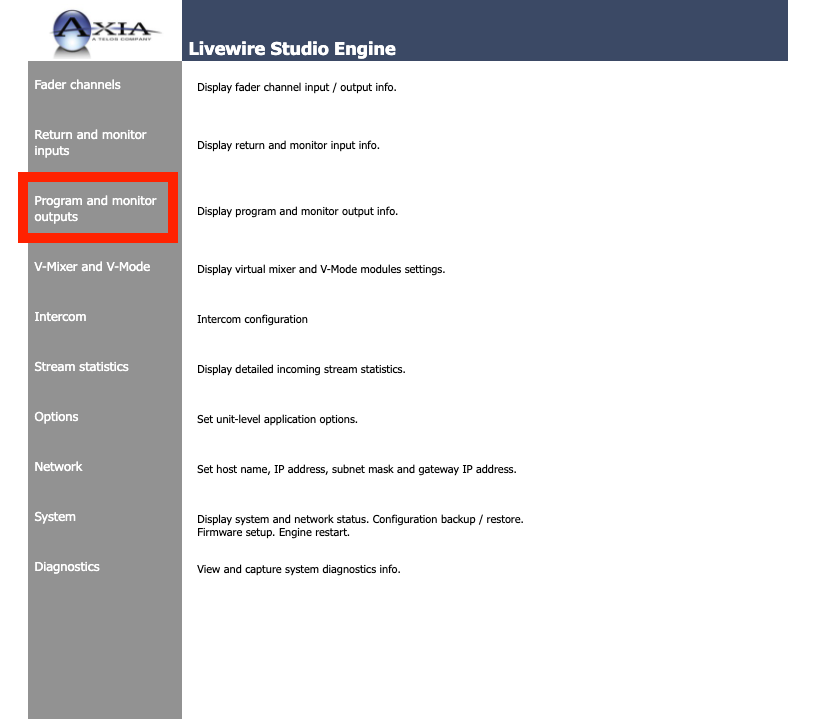
- Navigate over to the left side and click on "Program and monitor outputs." Type in "user" for the username when prompted (enter password if you have set one up, otherwise leave this empty)
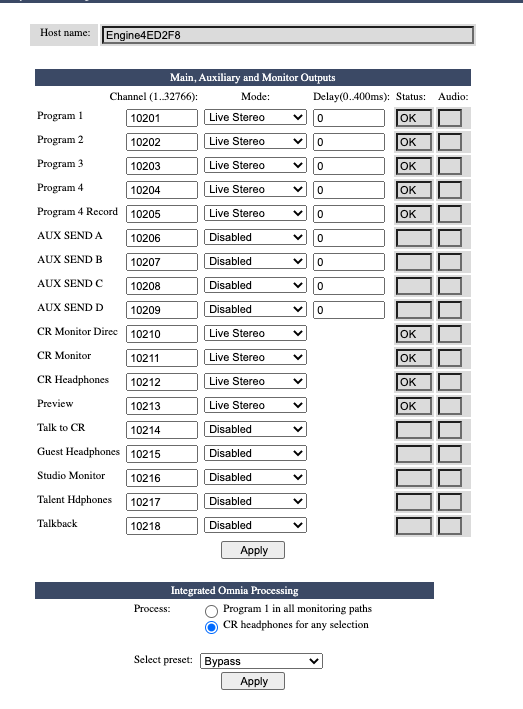
- You will be brought to the following screen where you must define the Livewire channel numbers for the Studio Engine's audio outputs. The channels in the picture below are for example purposes only. Your channel numbers will likely be different. These channels must be unique on your network, not used as a source in any other device. More information about how to number the Livewire channels on your network can be found here
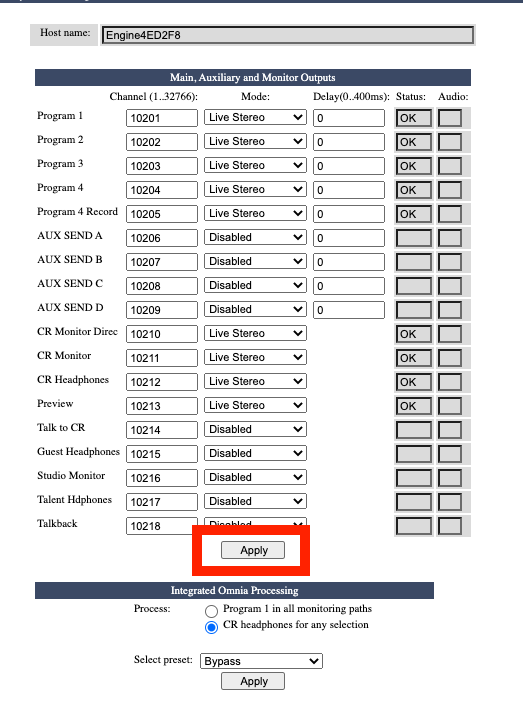
- Be sure to click the first "Apply" button at the bottom, directly below the "Talkback" line
Connect SoftSurface to the Studio Engine
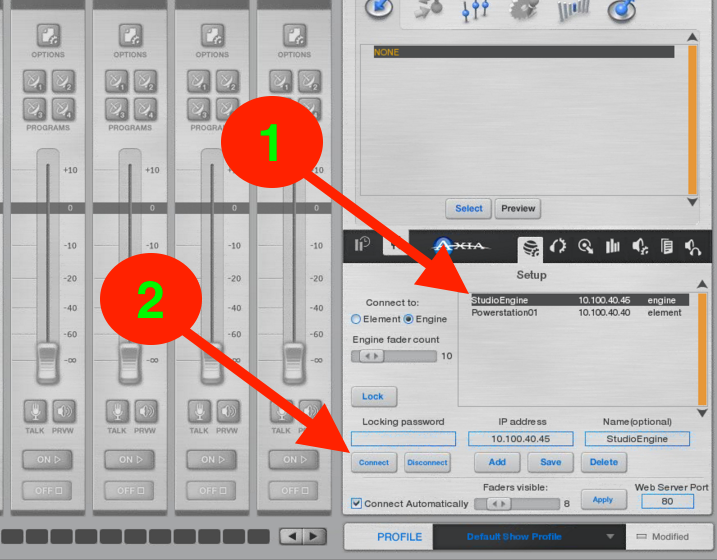
- Open SoftSurface and navigate to the Setup area on the bottom right-hand side of the program
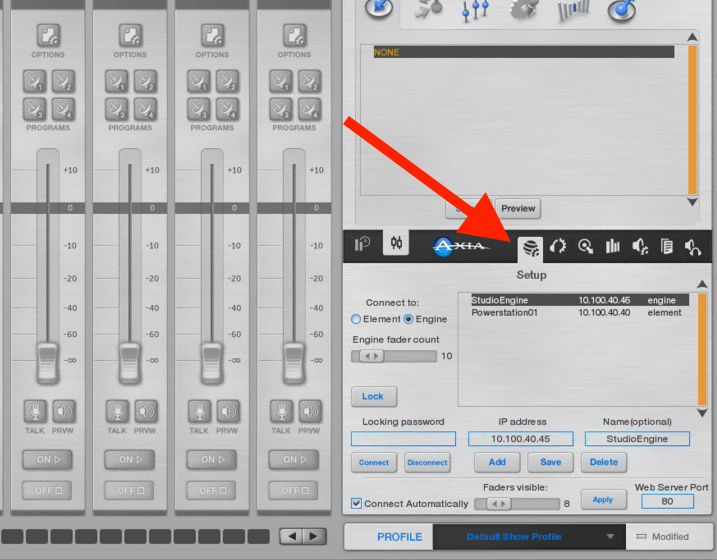
- To the left you will see an option to "Connect To" an "Element" or an "Engine". For the fanned version of Studio Engines, we will choose "Engine." Adjust the fader count to suit your specific needs
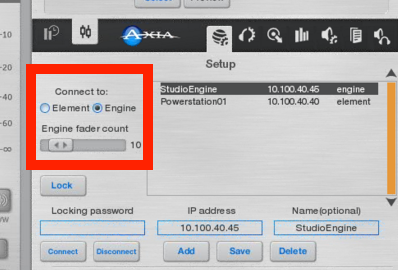
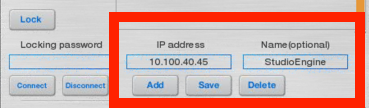
- At the bottom, type in the IP address of your Studio Engine and name it. Be sure to click "Add" when you are finished
- Select the Engine you added to the list and click "Connect" at the bottom
 You may see a command-line screen pop after clicking the connect button. Do not close this screen, but just minimize it
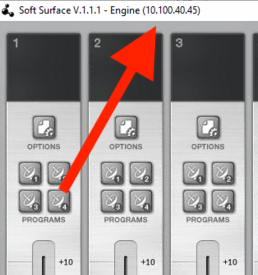
 - At the top of the SoftSurface screen you will see the word "Engine" and the IP address next to it if you have successfully connected
If you are still not able to connect, disable your firewall and any anti-virus programs you have running that may be interfering with the software or its connectivity.
Configuring Sources and Shows
After you have successfully connected to your Studio Engine, you must configure sources and shows to use with the software. This is NOT done within the software directly. Instead, you will configure these sources and shows in a web browser.
- Open a web browser on the SoftSurface computer and type in:
http://localhost
- You will be navigated to the configuration page for the SoftSurface. Click on the "Configuration" link on the left
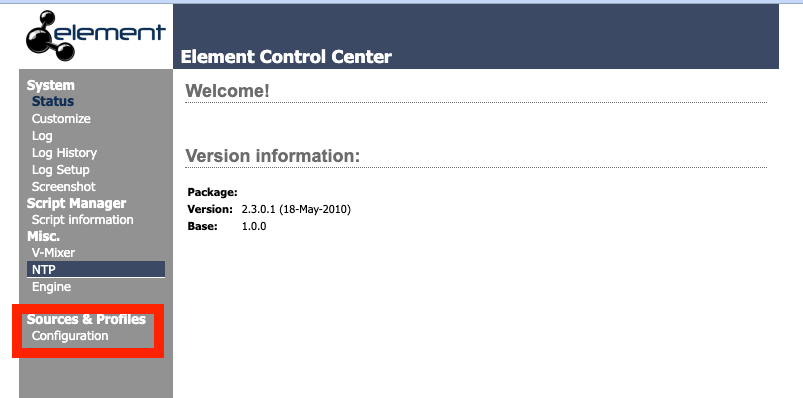 Don't be surprised when you see "Element Control Center" at the top of the screen. The SoftSurface is "acting" like an Element surface, so it uses the same web interface to be configured like one.
 - Follow the links on the left to configure sources and shows for the SoftSurface
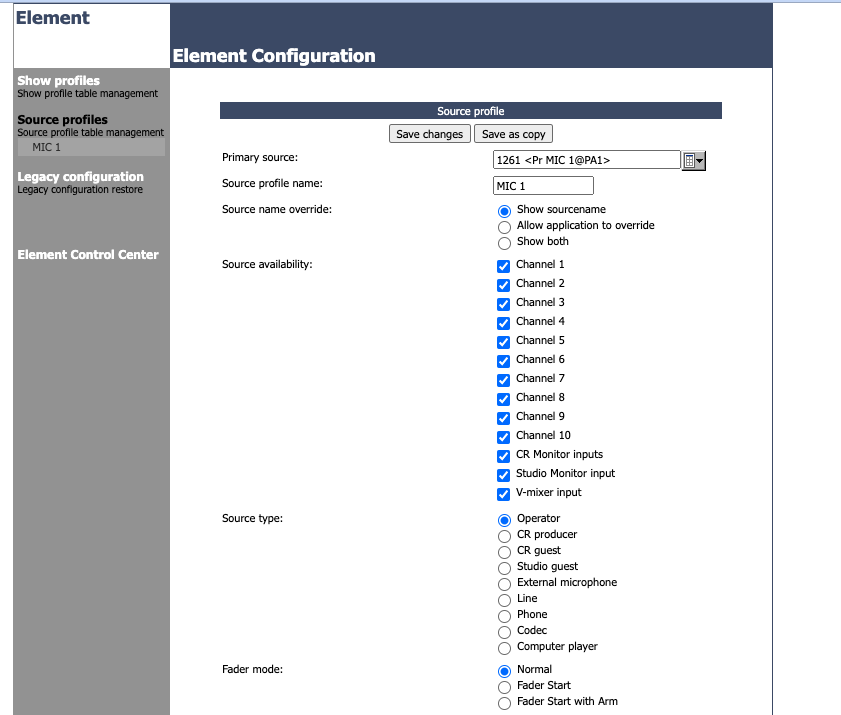 Remember: There are no physical connections on the Studio Engine or the Soft Surface that you can use for sources. You will need to either use another device for your inputs and outputs on the network
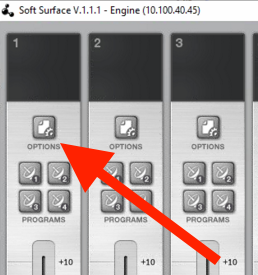
 - Navigate back to your SoftSurface application and click on the options button just above the channel you want to insert a source on
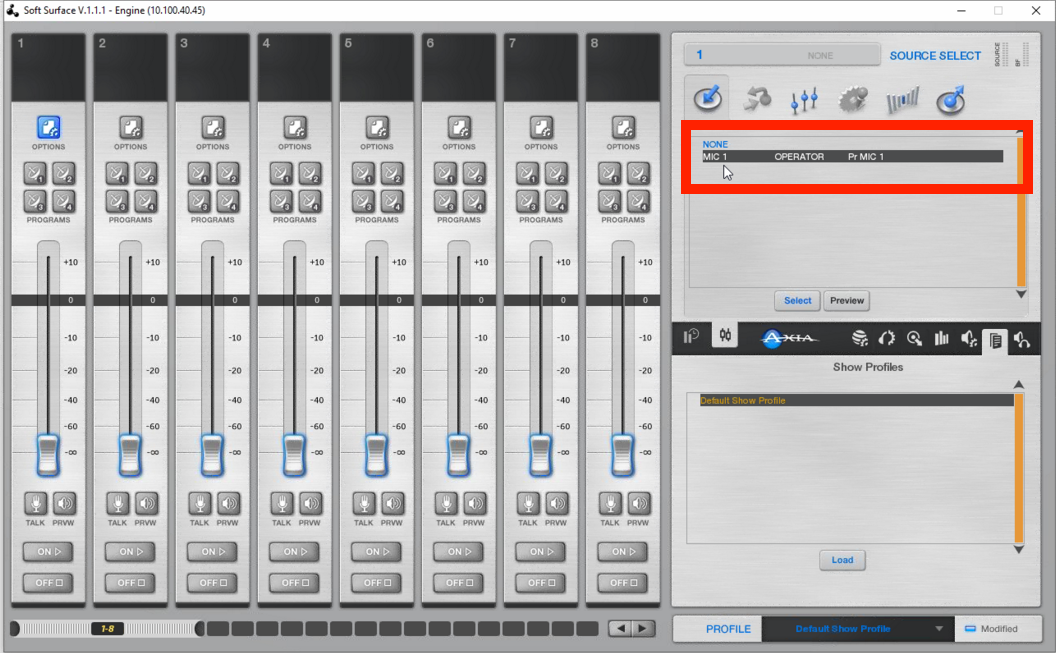
- Then select the source from the list on the right and click "Select"
That's it! Your SoftSurface is ready to use!
Let us know how we can help
If you have further questions on this topic or have ideas about improving this document, please contact us.