Quasar Surface Physical Connections
 Updated
by
Bryan Jones
Updated
by
Bryan Jones
- Connect one Ethernet cable to the primary network port labeled “PORT #0”(A on the picture below) on the Quasar Console Rear I/O board, connect the other end to a configured Gigabit Ethernet switch.
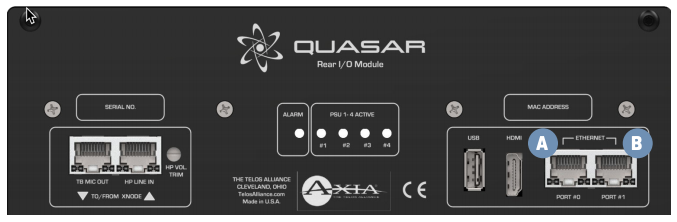
Optionally, it is possible to also use the secondary ethernet port, labeled “PORT #1” (B on the picture above) to create a redundant connection link. This will require a specific configuration of the switch ports. Please refer to the user manual for details about this option.
- Connect the Quasar surface Power Supply Unit (or Units, if you have more than one installed in your frame) to AC Mains (C) using the Axia Power Supply power cable (or cables) provided.
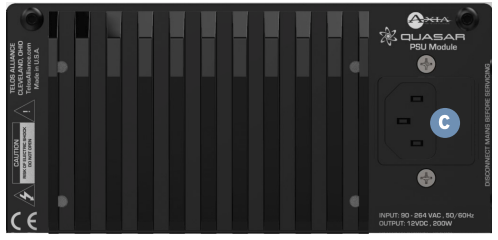
If you have more than one power supply installed and choice of standard and uninterrupted mains (UPS) in your studio, it is a good idea to connect each PSU to a different type of Mains supply. For example, don't connect both supplies to the same UPS.
Make Sure your AC Mains are properly grounded! The Quasar (like every other professional device) is grounded through the AC Mains cables, and does not require a separate chassis ground.
- Continue to Quasar Surface Network Configuration or you can go back to the Quasar Surface Quick-Start Guide.