How to Decode Dolby E to PCM in Adobe Premiere Pro CC
Decoding Dolby E to PCM in Adobe Premiere Pro CC
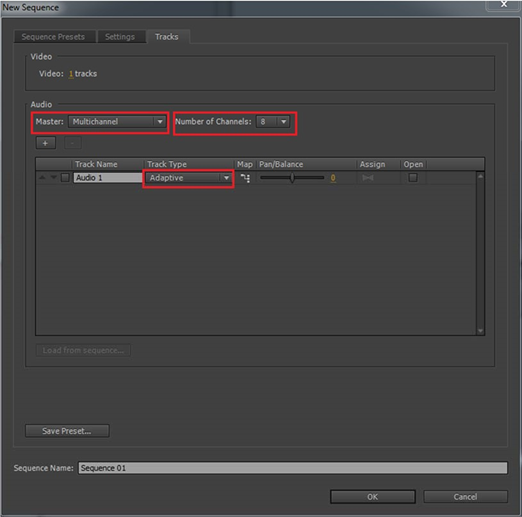
- Launch Adobe Premiere Pro CC, and Create a New Sequence. Under the Tracks tab:
a. Create a Multichannel Master
b. Specify the Number of Channels in your Dolby E‐encoded file(s)
c. Create an Adaptive audio track for your Dolby E‐encoded file(s)
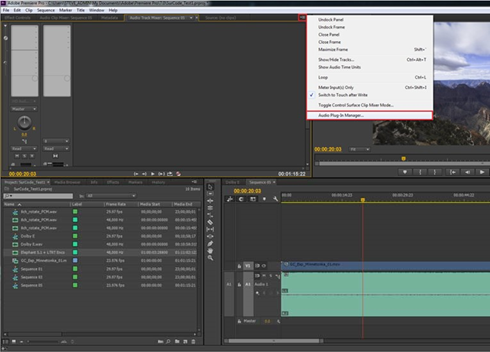
- Import a Dolby E‐encoded asset into your Project bin and timeline. Next, launch the Audio Plug‐ In Manager…
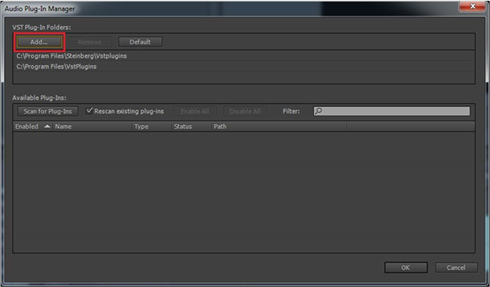
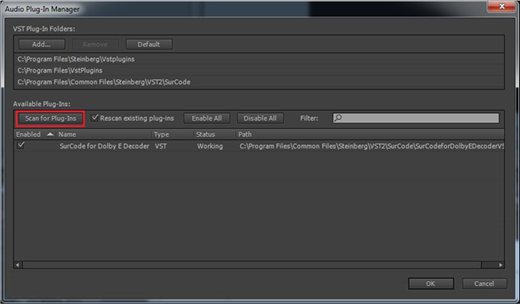
- Click Add… located in the top left‐hand corner of the Audio Plug‐In Manager.
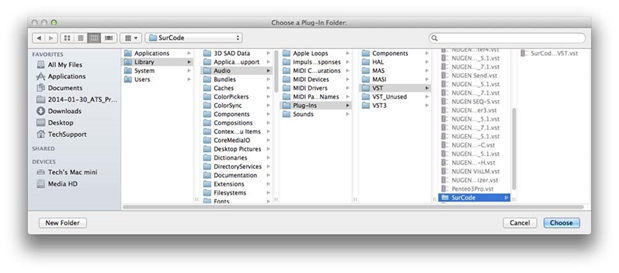
- Browse to the SurCode VST Plug‐In folder:
a. Windows ‐ [C:\Program Files\Common Files\Steinberg\VST2\SurCode]
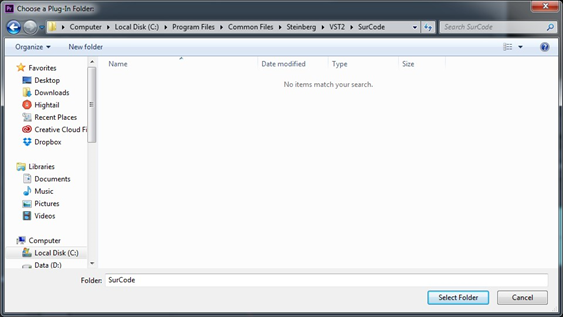
b. Mac ‐ [Machintosh HD > Library > Audio > Plug‐Ins > VST > SurCode]
- Click Scan for Plug‐Ins, and make sure that SurCode for Dolby Decoder is set to Enabled.
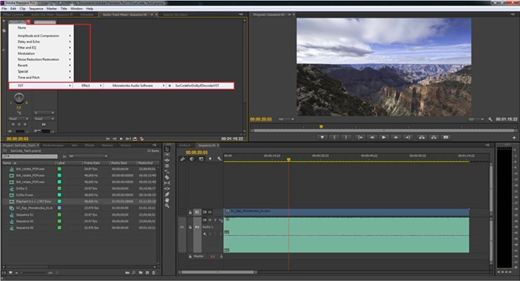
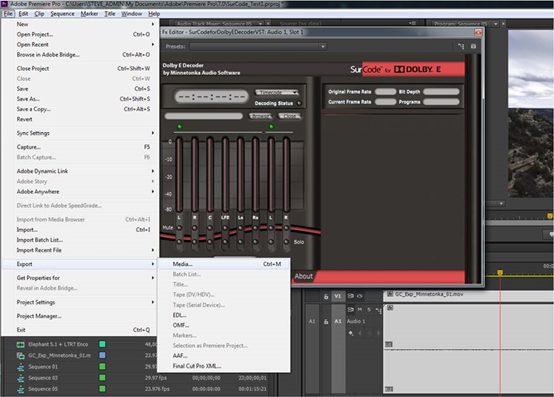
- To Instantiate SurCode for Dolby E Decoder, click on the inserts menu of the Audio Track, containing Dolby E, in your Audio Track Mixer. Go: [VST > Effect > Minnetonka Audio Software > SurCodeforDolbyEDecoderVST]
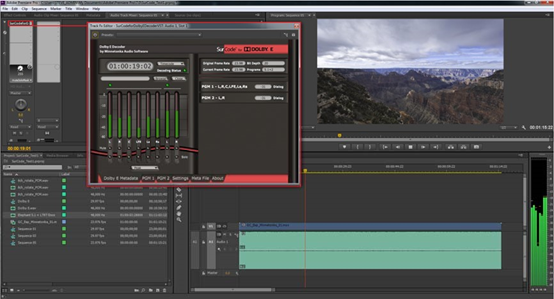
- Double‐click on the SurCode for Dolby E Decoder insert to open the User interface. Click play to monitor in real‐time.
- To Decode to PCM, select the Dolby E file in your timeline, and Go: [File > Export > Media…]
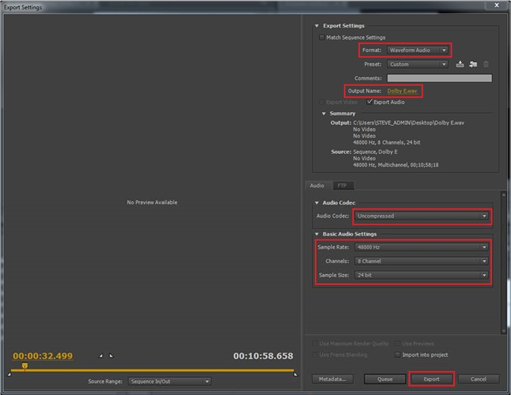
- Next, use the following Export Settings:
a. Set the Format to Waveform Audio
b. Specify an Output Name and directory for your decoded file
c. Set the Audio Codec to Uncompressed
d. Set the Sample Rate to 48000 Hz
e. Specify the number of Channels, contained in the Dolby E file
f. Set the Sample Size to 24 bit
g. Click Export to decode to PCM
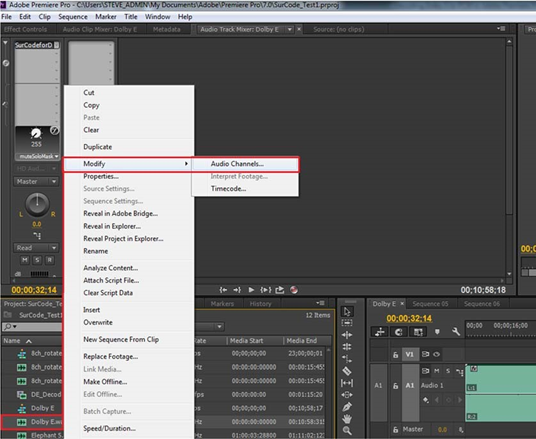
- Once the file has finished exporting, browse to the directory you specified in step 9b. and import the decoded file into your Project bin. Right‐click on this file, and Go: [Modify > Audio Channels…].
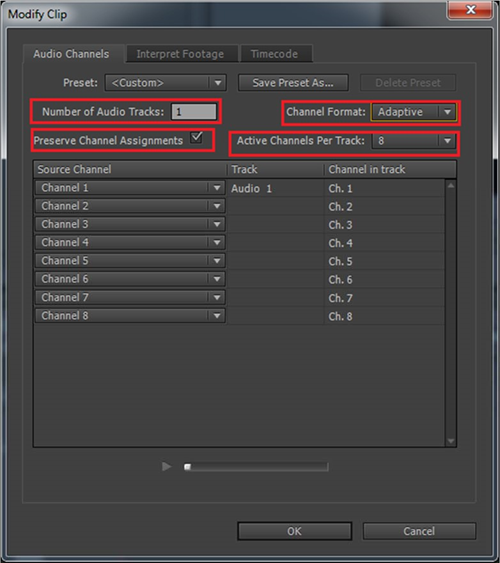
- Under the Audio Channels tab, use the following settings:
a. Set the Number of Audio Tracks to 1
b. Make sure that the Preserve Channel Assignments option is ticked
c. Set the Channel Format to Adaptive
d. Specify the number of Active Channels Per Track
e. Click OK
- You can now drag the mutichannel decoded PCM onto an Adaptive audio track in your Premiere Pro timeline.

If you have any questions, please reach out to us at techsupport@telosalliance.com.