Mounting Two Telos Alliance xNodes in One RU Space
 Updated
by
Johnny Goldsmith
Updated
by
Johnny Goldsmith
Scope
This document covers the process of mounting two xNodes (including Omnia MPX Nodes and xSwitches) in one RU.
If you are looking for directions on how to rack a single xNode, click here.
Determining Which Method
There are two possible methods to mounting two xNodes together. The method will depend on the revision of the chassis you have.
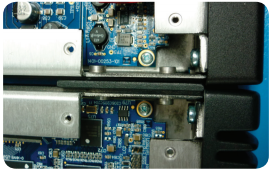
The easy indicator in identifying the revision of your unit is to see if there are keyholes on the right side of the unit, as in the photograph below:
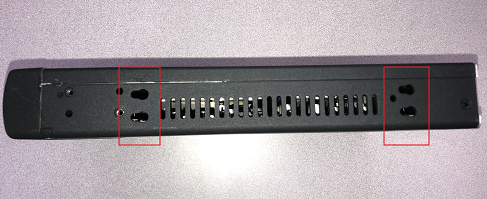
If the right side of the node has the keyholes, proceed to the Revision Two section of this document.
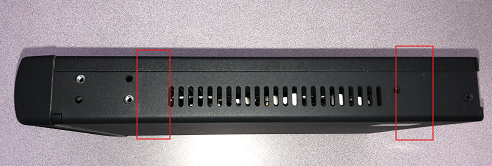
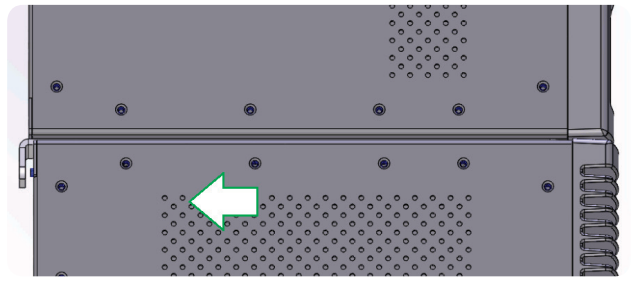
If the right side of the unit does not have the keyholes, as in the photograph below, go to the Revision One section of this document.
Revision Two
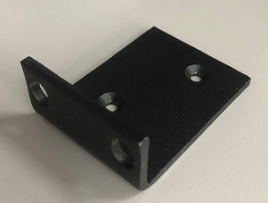
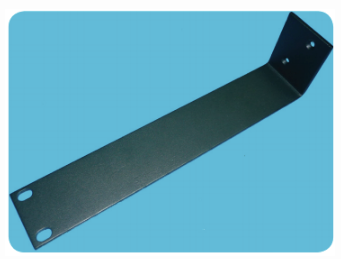
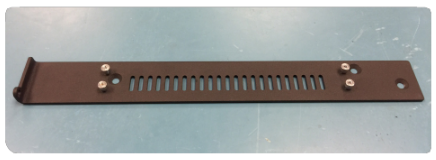
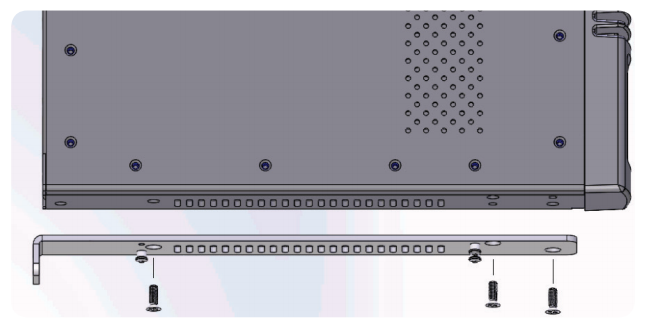
If your node has the keyholes, the unit was shipped with one short rack ear, one long rack ear and one "L" bracket, as shown in the photos below:
If you are in need of any of these pieces of hardware, please contact us for prices and availability using the following part numbers:
- Short Rack Ear - 1451-00671
- Long Rack Ear - 1451-00670
- "L" Bracket (with screws) - 1771-00128 (four 1301-00209 and one 1301-00077)
The Revision Two Process
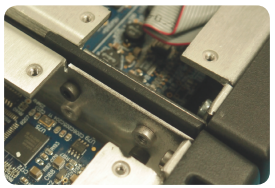
- Secure the "L" bracket to the xNode's left side as shown:
- Place the second xNode, so that the shoulder screws of the bracket fit into the keyholes. Slide the xNode into place.
- Lock the xNode in place with a screw (part #1301-00077) secured to the back.
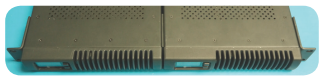
- Use two short ear brackets to securely mount the two attached nodes.
Revision One
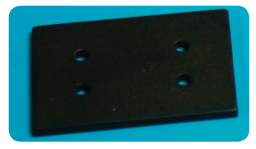
If your node does not have keyholes, the unit was originally shipped with one short rack ear (photo above), one long rack ear (photo above) and one "spacer" (photo below).
If you are in need of a spacer, please contact us for the price and availability of part number 1451-00673.
The Revision One Process:
- Remove the top lid from both nodes, placing the spacer between the side-by-side units.
- Use the four screws (part #1301-00224) provided to secure the two nodes together.
- Replace the lids on the xNodes and secure the short rack ears to either side of the two xNodes. Mount the two attached nodes to the equipment rack.
Let us know how we can help
If you have further questions on this topic or have ideas about improving this document, please contact us.