How to Set up the VOCO 8 For Livewire I/O

Scope
This document describes the setup of a VOCO 8 for use with Livewire I/O.
Description
If you would like to use the existing unprocessed microphone audio on your existing Livewire network (such as from Mic xNode) you can use the Livewire I/O on the VOCO 8, bypassing its onboard mic preamps, and then output the processed mic audio back to the Livewire network.
Setup
- First, I would recommend updating it to release candidate beta version 1.44. (Update Procedure)
- Make sure you have both Ethernet ports configured. One is for control only and the other will be for the Livewire audio. So, yes, on a Livewire network, you'll need to have 2 separate IPs for the VOCO 8. Once you have the IP's setup, log in using the "Telos Alliance Remote Gateway" app as "Studio" and click "Setup" at the top of the screen.
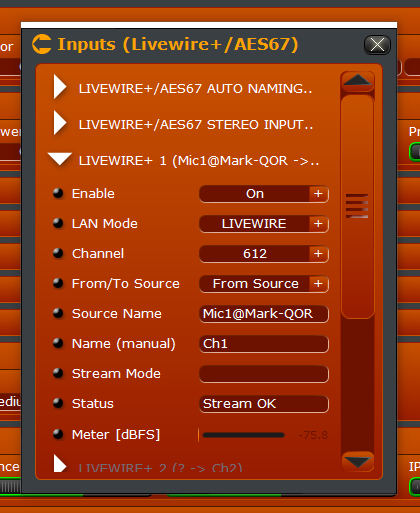
- Click the "+" next to "Inputs (Livewire+ / AES67).You should see that Livewire+ channel 1 is open but everything is grayed out. Once you turn the channel on, it will become active. I suggest doing that first. Set "Lan Mode" to "Livewire" and select or type in the channel number of the desired mic source. Here I have Input 1 set to Mic1 out of my QOR:
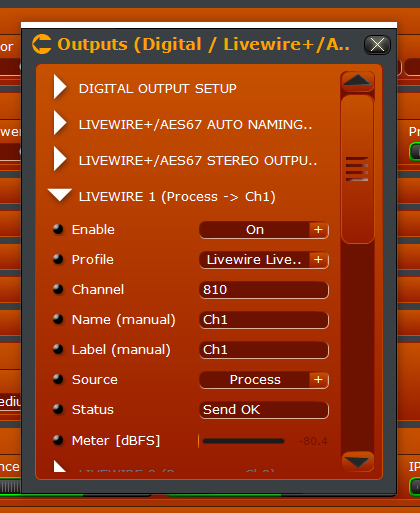
Then scroll down and continue with the other licensed channels. - Similarly, configure the output channels in "Outputs (digital / Livewire+ / AES67)." Here I have set the Livewire 1 output to Channel 810 (as the IP address of my VOCO is 192.168.2.81):
- "Thanks! That was a big help and we are now able to get the VOCO 8 on the Livewire network. We can see the audio on the input of the VOCO 8, but fail to get any audio out of it. We must be missing a simple step now since we can't get audio through it."
You can assign the output of a process channel directly (Independent) or to one of 4 output busses: 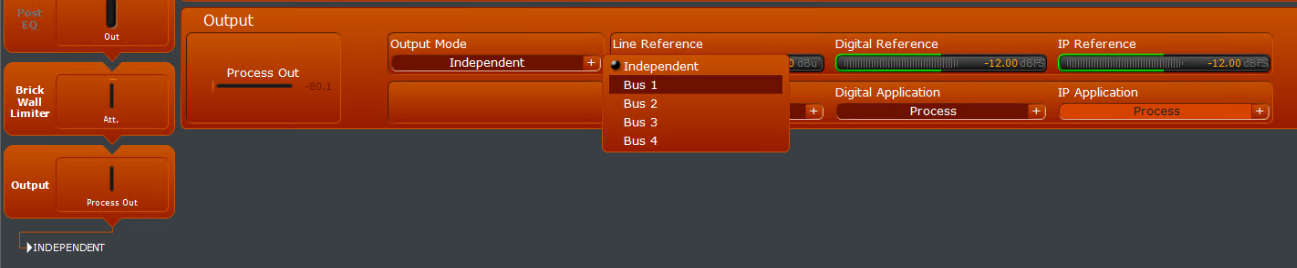
Let us know how we can help
If you have further questions on this topic or have ideas about how we can improve this document, please contact us.