Quasar User button to trigger Delay Dump in PF Core Pro
 Updated
by
Tony Dimsdale
Updated
by
Tony Dimsdale
Scope
Pathfinder Core PRO can use User Panels to trigger features in other devices. For this document we will specifically go over using a Quasar User button on the console, to trigger a PDM Dump for Audio Delay.
Creating a New User Panel button
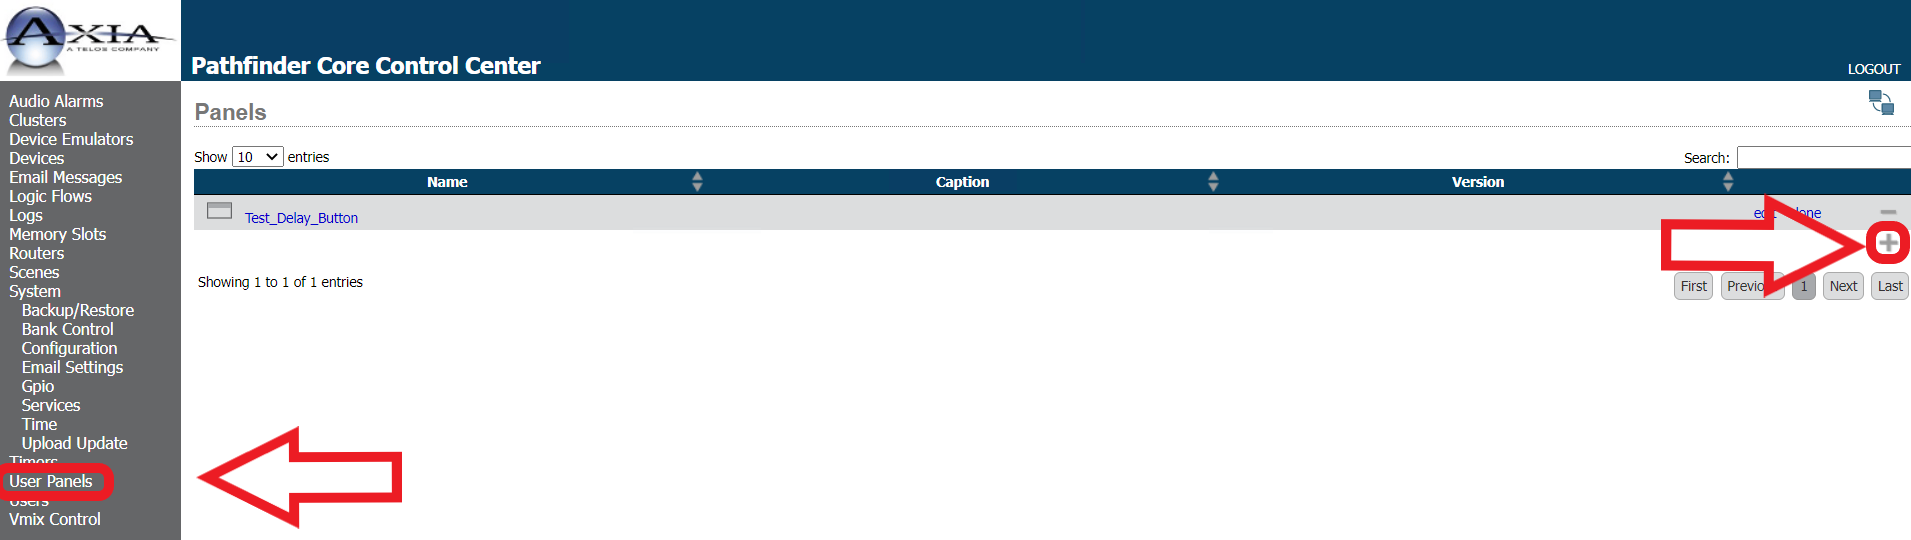
Once you are in the User Panels page, it is recommended that you create a new Panel. To do so, Choose the User Panel tab in Pathfinder Core Pro and Click the Add button here:
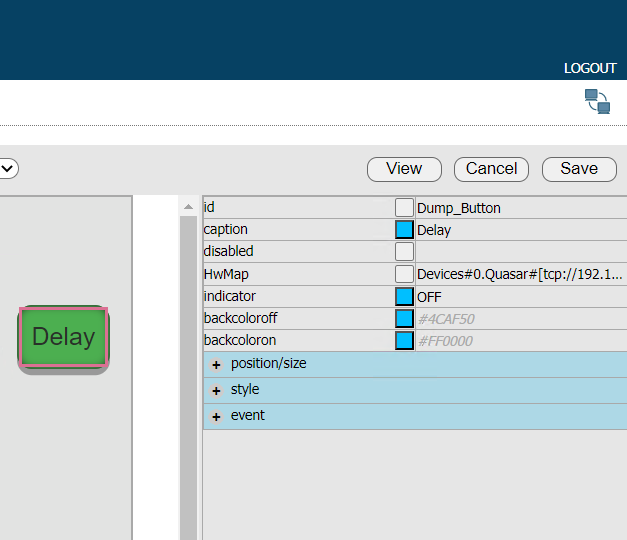
Once the User Panel is created, drag a button from the HTML section of the web page onto the editor template.

Now you have access to the button's features and programming, we will need to fill in a few of the properties to make the button work the way we would like. Start with the name of the button, then the caption.
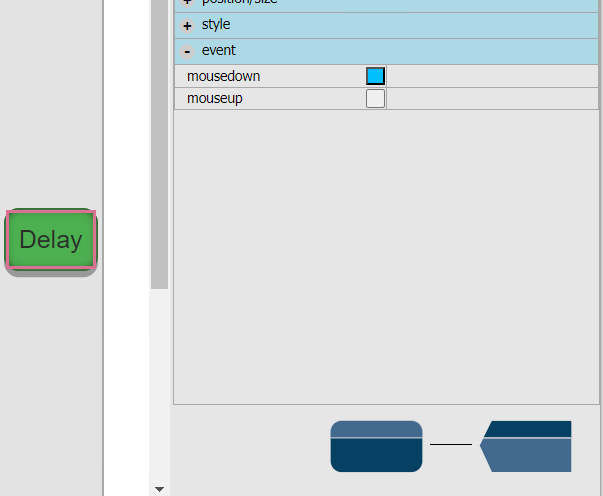
Let's make our way down to the Event Tab, here we will choose the mousedown property, the indicator should turn blue. Meaning the property is tied to a Logic Flow, the Logic Flow will show up below the Event Tab. You can see the Output and Translator here in the picture for the Delay button.
Creating your Logic Flow
We will now create a simple button press for a GPO trigger that when pressed, the delay will Dump its built-up audio. A Logic Flow typically consists of three parts: the start point, the translator, and the endpoint (moving from left to right). We would normally start with the start point (highlighted in orange).

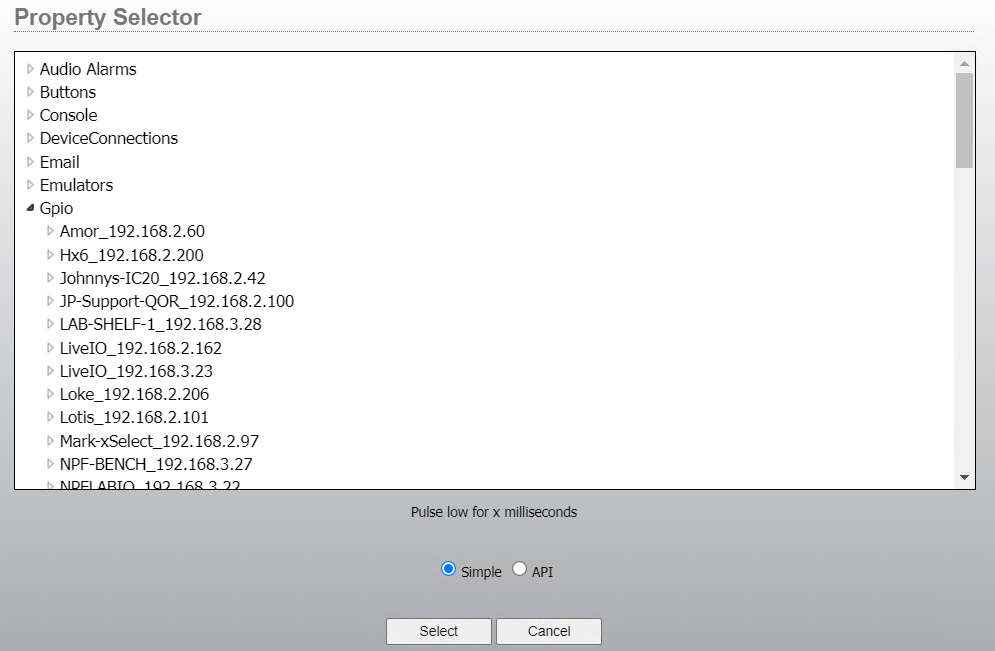
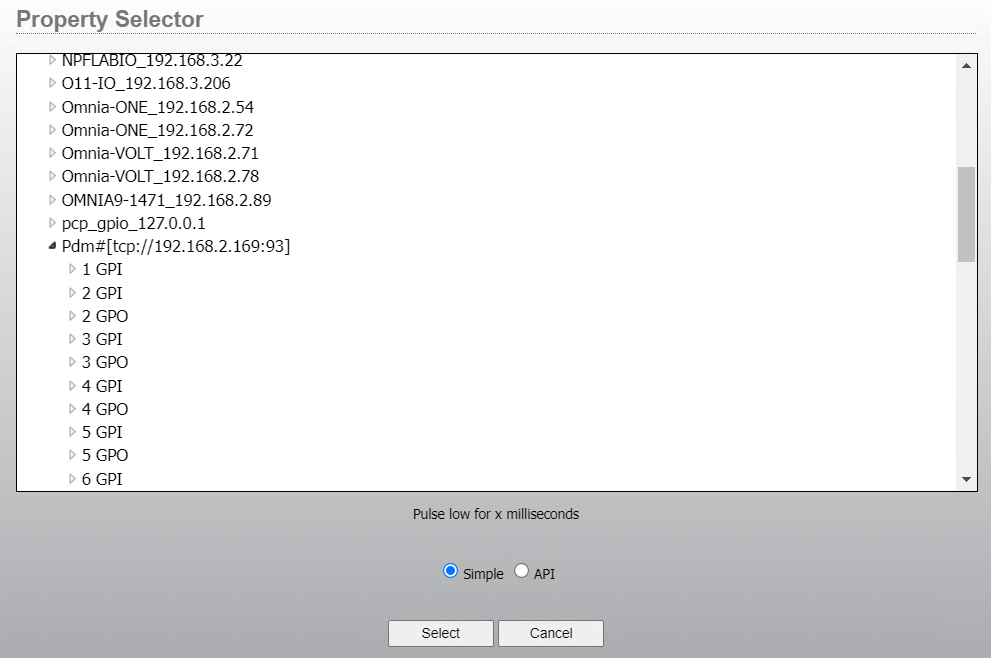
But for this example, we will start with the Output, double-click on the output point to bring up the Property Selector:

We are going to find the GPIO Tab, and find the GPIO device. Once you click on it, you will see a list of GPI and GPO ports:
Navigate to the Device you are looking to control or initiate the trigger on, in this example we are triggering the Delay button of a PDM device to delay audio.
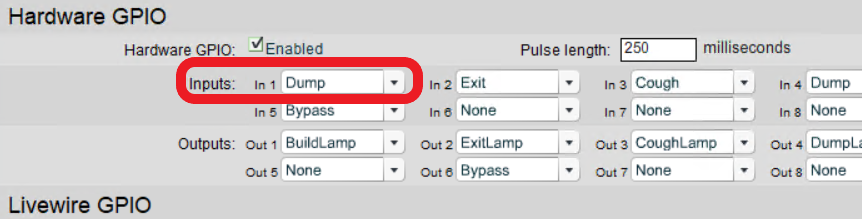
On this particular device, there are GPIO options for which pins will be used to trigger the Dump. In this example, we have set up Pin 1 to trigger the Dump feature for the PDM. This can be changed in the PDM.
Once the PDM is setup, we will need to ensure the Pathfinder Core Pro is looking for the same Pin1, except the PDM GPO will be used from the Pathfinder end of the trigger flow. Choose PulseLow, Low is the polarity we will be using to trigger the Dump button.

Save your output and we will move onto the translator portion of the Logic Flow. Here we will need a time value that will meet the required length set in the PDM. By default this is 250ms, so we will set our translator to True=250ms. True for the mousedown click, 250ms being the pulse value for the Dump trigger length.
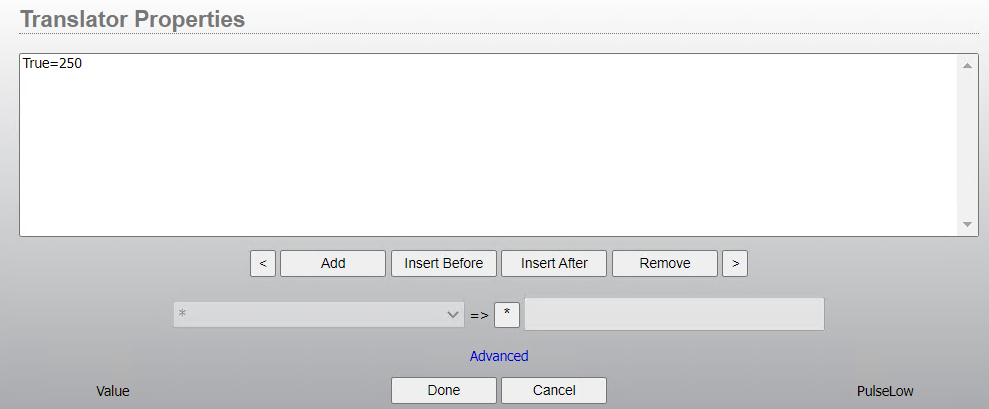
At this point, you can save your work and test your User Panel button for proper action from the User Panel to the Dump button on the PDM.
Hardware Mapping
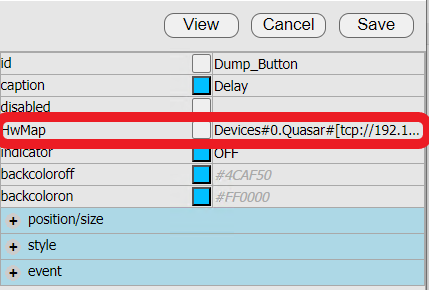
To take this setup all the way, we still need to tie the Quasar Console User button to the User Panel button previously built. This will require going back into the previously built User Panel and editing the button's hardware map property.
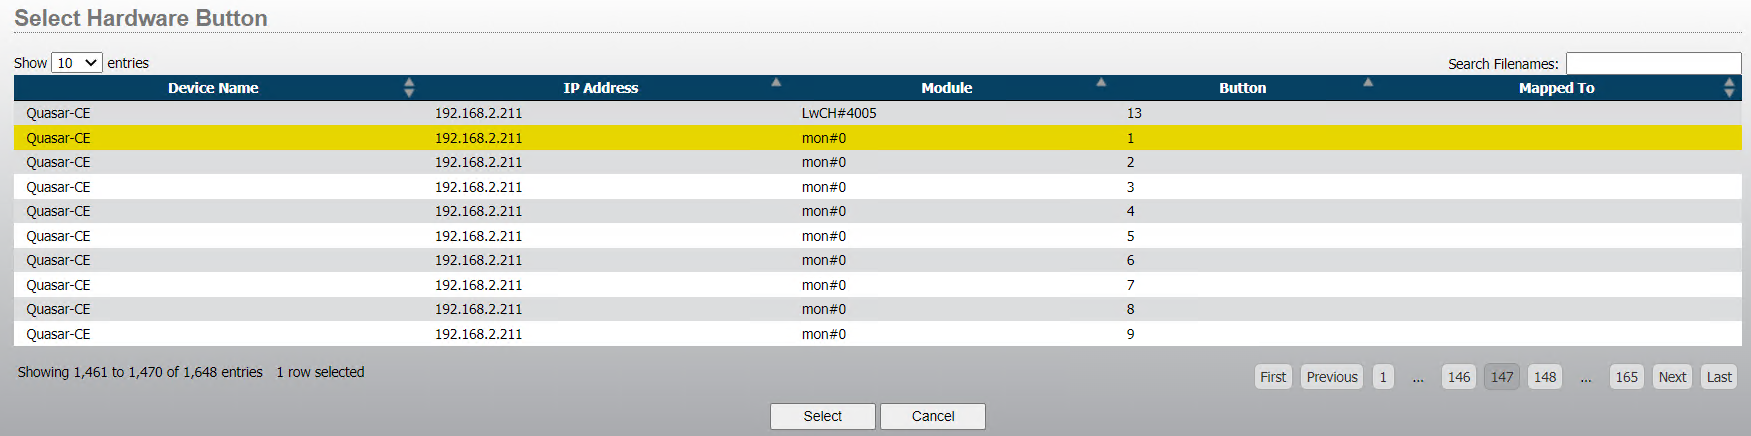
Once this selection is choosen, you will find a list of button that this User Panel button can be tied to. For this example, we will use the User-1 button on the Quasar Console. This will be the Top button on the MTS-MON module.
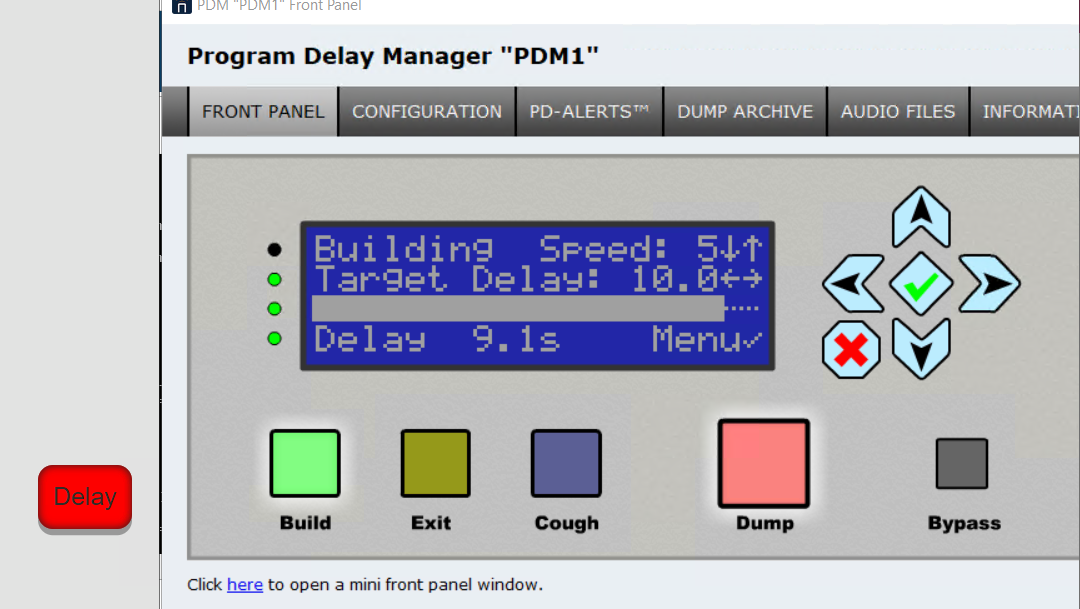
Save your User Panel again, now you can choose to Dump the Delay on the PDM device from your Quasar Console, from the User Panel button created or from the front panel of the PDM itself.
All three are now ready to use!
For more information about Logic Flows, see the section about Logic Flows in the Pathfinder Core Pro manual, found here.
Let us know how we can help
If you have further questions on this topic or have ideas about improving this document, please contact us.