Enable or Disable the SNMP service on iPort High Density
 Updated
by
Bryan Jones
Updated
by
Bryan Jones
Scope
This document covers steps to enable or disable the SNMP service on the iPort High Density or iPort High Density + Content Delay.
Description
Some users may choose to disable the SNMP service on the iPort High Density. Most often, this is for security reasons when the service is not required or does not meet certain other criteria.
Additionally, a minimum version of 3.1.0-12 is required. Please follow this link if your unit requires an update.
The SNMP service in iPort High Density is ENABLED by default.
Disabling the SNMP Service
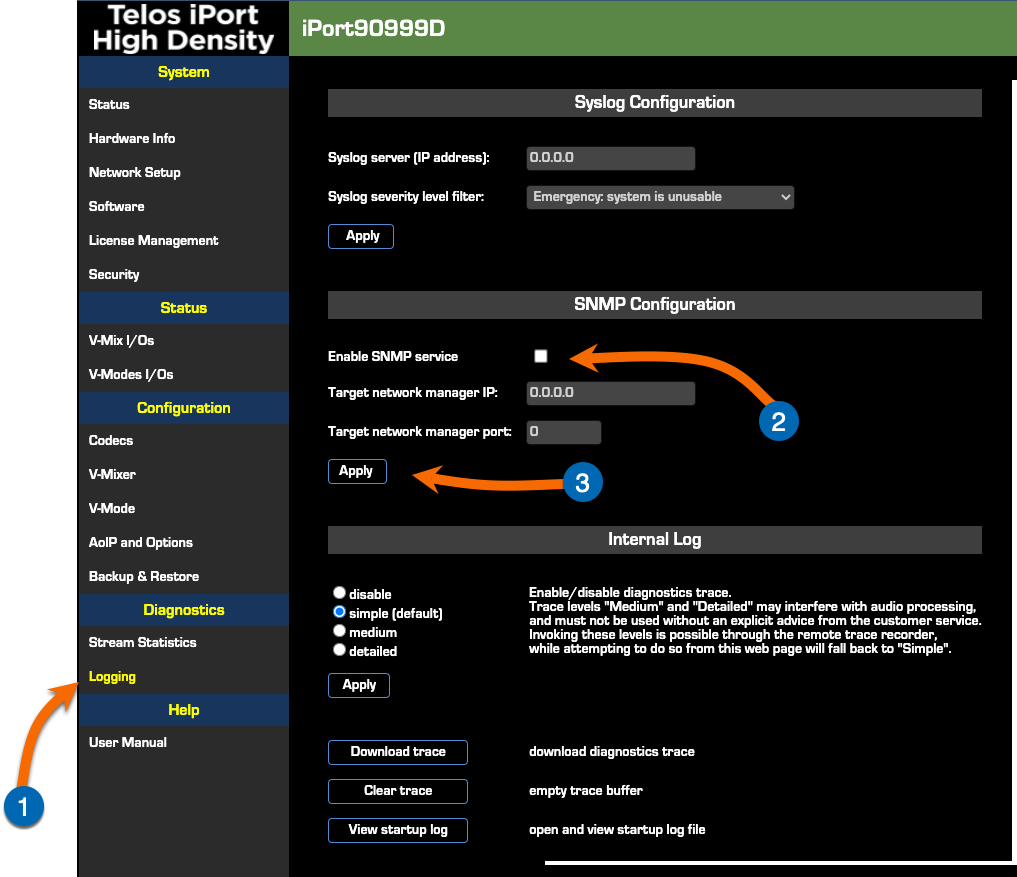
- From the main Web Page of your iPort High Density, click on the Logging link found under the Diagnostics heading on the left side menu.
- Under the SNMP Configuration heading, click and REMOVE the check box next to the Enable SNMP Service.
- Click the Apply button. Take care to click the Apply button in the SNMP Configuration section. Clicking Apply in a different section will discard any changes you have made to the SNMP Configuration.
Enabling the SNMP Service
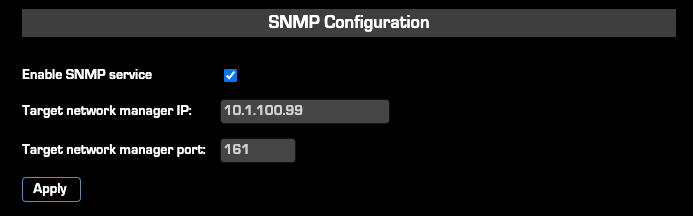
The SNMP Service on the iPort High Density is enabled by default. If you have disabled the service and need to enable it, repeat the steps above and make sure the Enable SNMP Service box is checked.
With the SNMP service enabled, you can specify the SNMP Manager IP address and port.
Let us know how we can help
If you have further questions or have ideas about improving this document, please contact us.