xNode Self Test Procedure
Scope
This document covers testing the input and outputs of an xNode using the built-in self-test.
This usually requires a factory restore and disconnection from audio devices, so make sure you take note of its configuration before starting.
Equipment Needed
- Device Under Test (DUT): xNode
- CAT5-6 Cables with RJ45 connectors at both sides for audio loopback test. (4 required)
- PC Computer: Running any telnet terminal (PuTTy, HyperTerminal, etc)
NOTE: If you are testing a mic xNode, you will need to make special loopback cables for the self-test. Click here to learn how to make them.
Connect with Telnet
On more recent versions of xNode, Telnet is disabled by default. Be sure to enable Telnet on your xNode, otherwise, you will not be able to connect. If you don't know how to do this, follow the steps found here.
- Connect via telnet (port 23) to the IP address of the xNode. If you are using PuTTy, your connection might look like this;
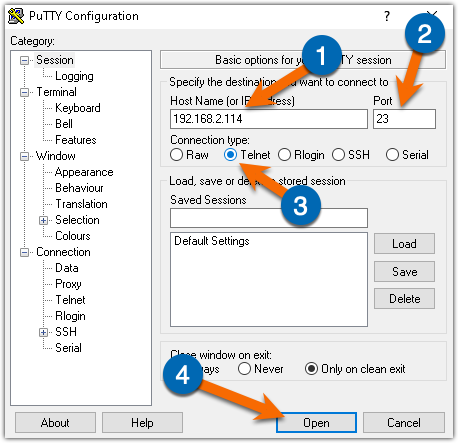
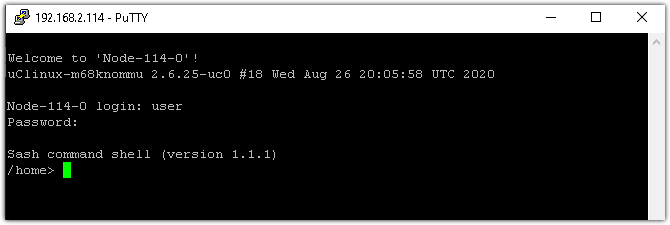
- The login username is “user” and there is no default password.
- You should now see a “/home>” prompt.
Connect Loopback Test Cables
On the Analog, AES/EBU and Mic xNodes, connect the inputs of the xNode to the outputs in this manner:
Inputs Outputs
1 <-----> 1
2 <-----> 2
3 <-----> 3
4 <-----> 4
Run Livewire Self Test
Enter the following command into your telnet session and press enter. The -c tells the test to continue even if one of the tests fails.
LWTest -c
- The first thing tested is a nonvolatile memory. You’ll see a PASS or FAIL.
- Instructions will appear during the session telling you what to do next.
- If this is Analog or AES xNode, you’ll see instructions to connect loopback cables as we've discussed above.
- The test will run while echoing data. When complete, it will show you a PASS or FAIL at the end.
Let us know how we can help
If you have further questions on this topic or have ideas about how we can improve this document, please contact us.