Adding and Configuring Metadata Filters in Z/IPStream R/2 and 9R/2
 Updated
by
Bryan Jones
Updated
by
Bryan Jones
Scope
Configuring and adding metadata filters to the Z/IPStream R/2 or 9R/2
Description
The Telos Z/IPStream receives metadata from any source that can send it in some consistent textual format. XML or plain text data is acceptable.
Here is an example of what some Plain Text data might look like;
^42084~SRO_MUS~Find Your Grail~Sara Ramirez, Company~3:25
Here is an example of what some XML Text data might look like;
<audio ID="id_1820459224_30447609">
  <type>Song</type>
  <status>Playing</status>
  <artist>Big Daddy Kane</artist>
  <title>Set It Off</title>
</audio>
Regardless of what format the metadata is sent in, it needs to be filtered (or translated) into a format understood by common streaming audio servers like SHOUTcast and Icecast. This filtering is done by a simple but powerful programming language, LUA, that is included with most all Telos streaming products.
Adding new Filters to Z/IPStream R/2 and 9R/2
- Click the Metadata link in the main menu

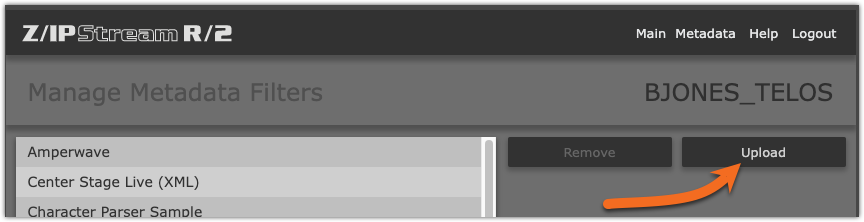
- Click on Manage Filters
- From the Manage Metadata Filters page, click Upload
- When the file picker dialog appears (this will vary depending on your operating system), browse for and upload the new metadata filter. All filters will end with the .lua extension.
Once uploaded the new filter will appear in the filters list on the left side of the screen.
Many common filters are already included in the Z/IPStream install. If your system is not listed, please use this tool, or send us a metadata sample. If we do not have one already written, we will create one for you.

Setting up to receive Metadata
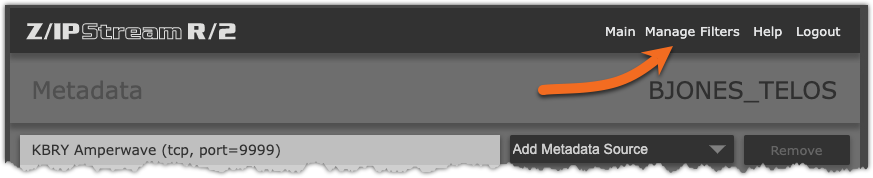
- On the main Control Panel Web Page, click on the Metadata link in the top menu.

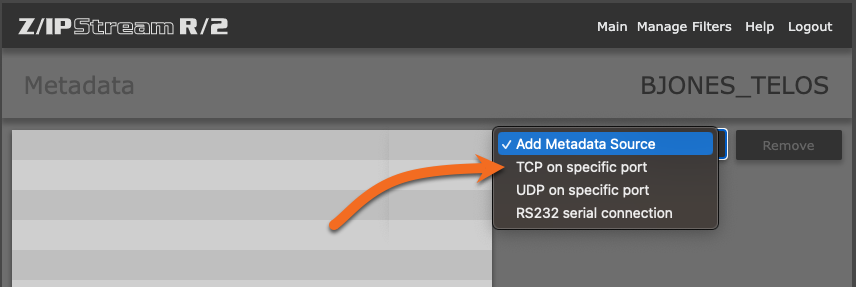
- In the drop-down list that says "Add Metadata Source," pick the connection type your Automation system uses. For this example, we'll pick TCP on a specific port.
- Assign a friendly name (My Metadata), a local TCP port that your Automation system will connect to (4545 in this example), and a Metadata filter to use (XML-WideOrbit).
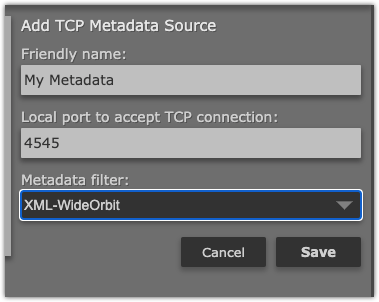
- Click Save.
Assigning Metadata to Your Stream
When creating or editing a stream instance, you will see a Metadata source: option in the configuration.
- Click the drop-down list and select the Metadata source created in the previous step.
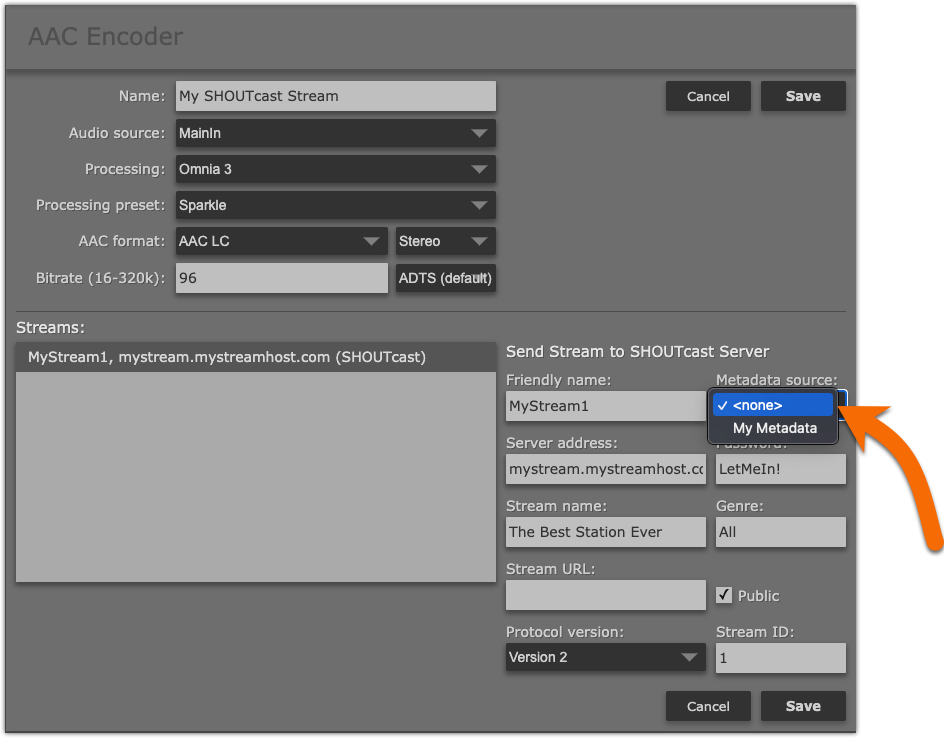
- Click Save
What can go wrong?
The two most common reasons why metadata does not work are;
- The output format of the automation system does not meet the expected input format of the chosen LUA filter.
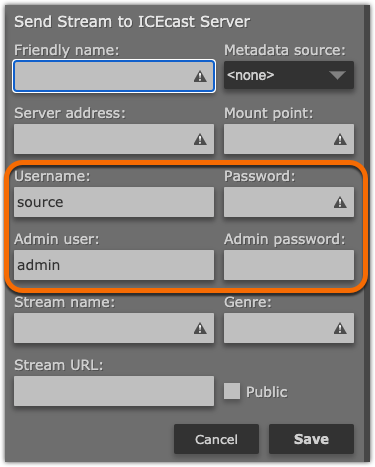
- (For Icecast) the proper Admin User and Admin Password are not provided. Most of the time, the Admin User is "admin," and the Admin Password is the same as the User Password. Occasionally the Admin user could be "source" like the regular Username.
In either case, the log files are your first place to look. Logs are in plain text format and are easily read using notepad or other text editors. For the Z/IPStream R/2 the logs are found clicking on Status and then Logs from the menu on the top. There are many log "sections" in the Z/IPStream R/2. The logs for this example are found under the Media Encoder heading.
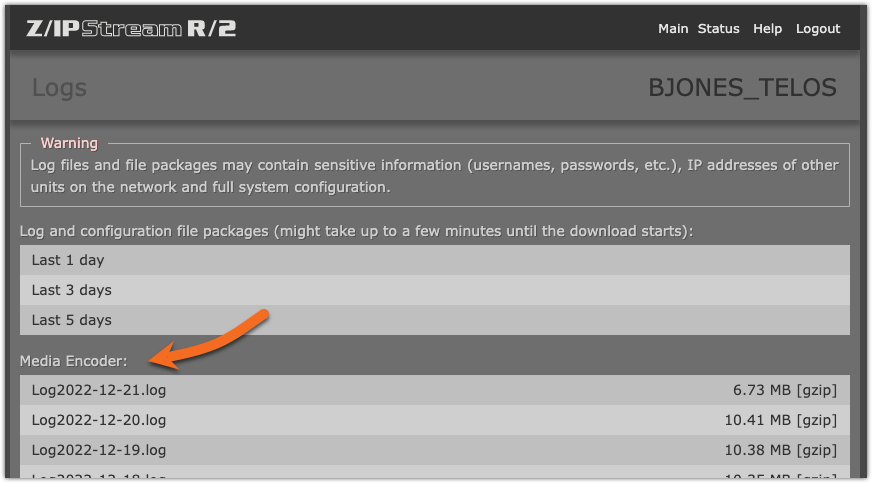
Click on the Log file name to view the log in the browser. Click the [gzip] link to download the log to your computer.
Let us know how we can help
If you have further questions on this topic or have ideas about improving this document, please contact us.