Updating Label or Button titles with Pathfinder Core Pro Memory Slot values
 Updated
by
Bryan Jones
Updated
by
Bryan Jones
Scope
This document describes the steps to update a label or button text on a user panel with the value of a memory slot.
Description
Sometimes Pathfinder Core Pro Memory slots can be elusive, at least concerning their current value. One way to see the present value of a Memory Slot is to update a Label on a User Panel automatically. There are two ways to do this;
- directly in the user panel editor
- using a Logic Flow
Both methods are acceptable. The User Panel editor only allows for a single condition. You'll need to use the Logic Flow method if you have more complicated logic.
User Panel Method
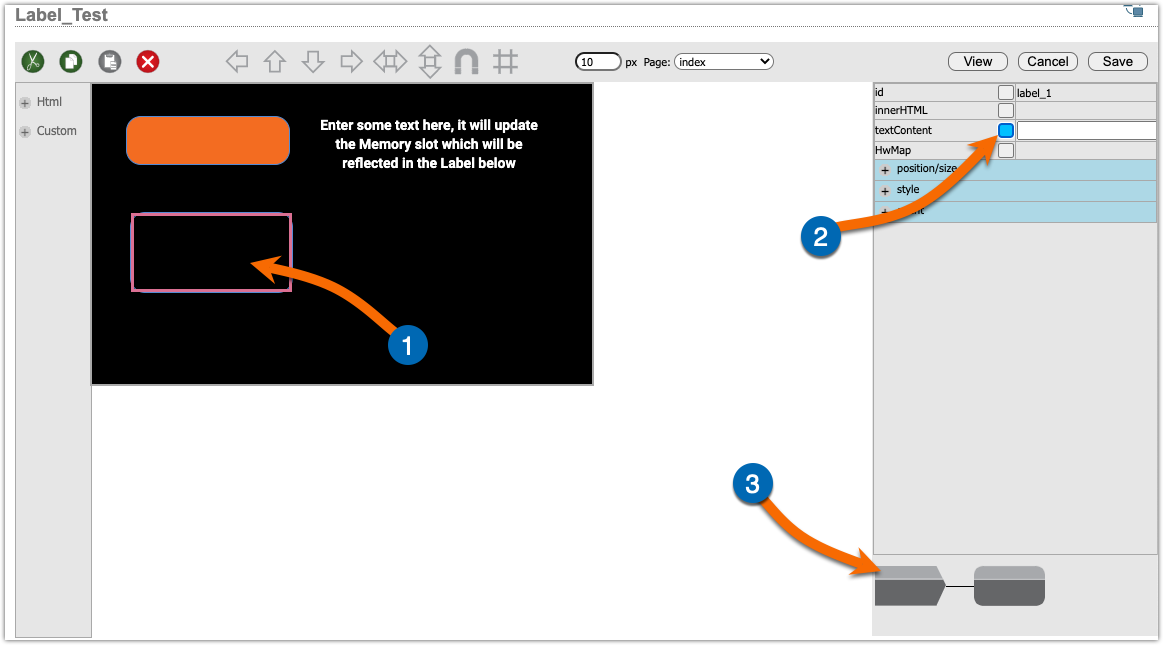
The User Panel method is by far the simplest. We will map the SlotValue of the Memory Slot to the textContent property of the Label on the User Panel.
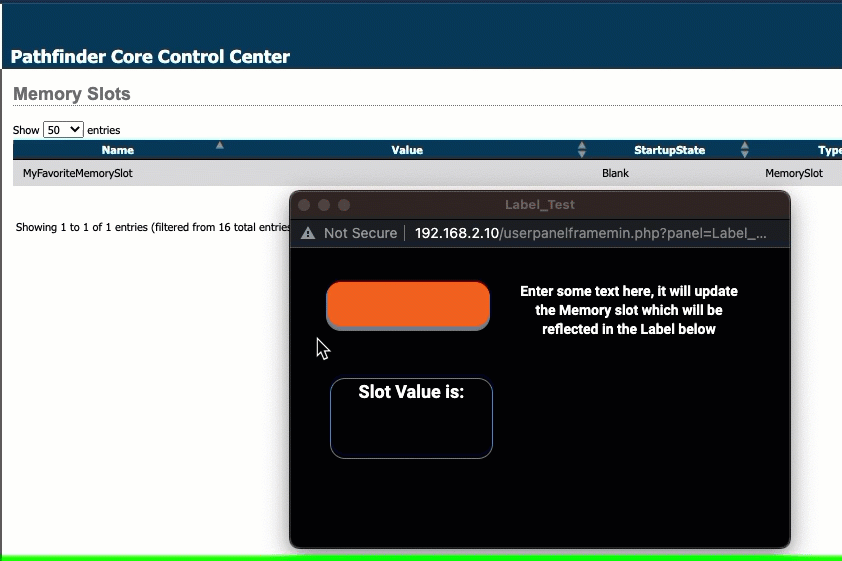
For demonstration purposes, this is a reasonably simple panel. The Label we will update is the bottom left with the blue border. The orange box is a text input box, so we can easily update the Memory Slot. What updates the Memory Slot is irrelevant, just that our label updates automatically when the slot value changes.
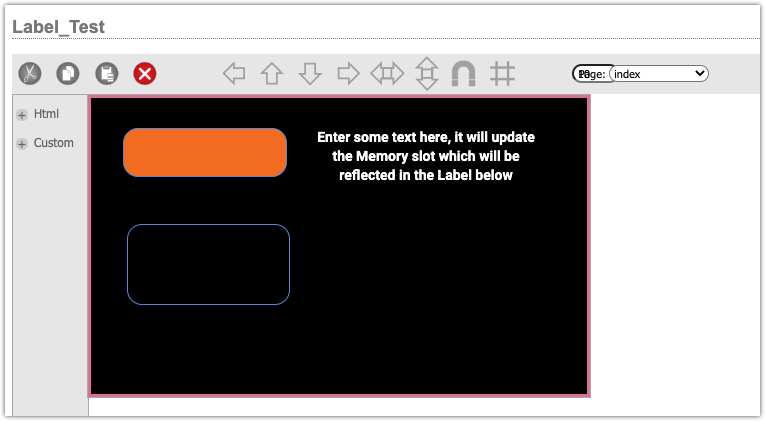
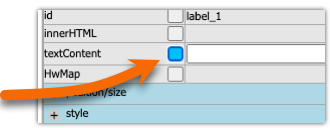
- Click on the label to select it. When selected it with have the pink highlight.
- Click the square selection box next to the textContent property. The box will turn blue when selected.
Part of a logic flow appears at the bottom right of the page. Only "part" of the Logic Flow appears here because we defined the output when we selected the textContent property. In the following steps, we'll finish this logic to define the input that controls the textContent.
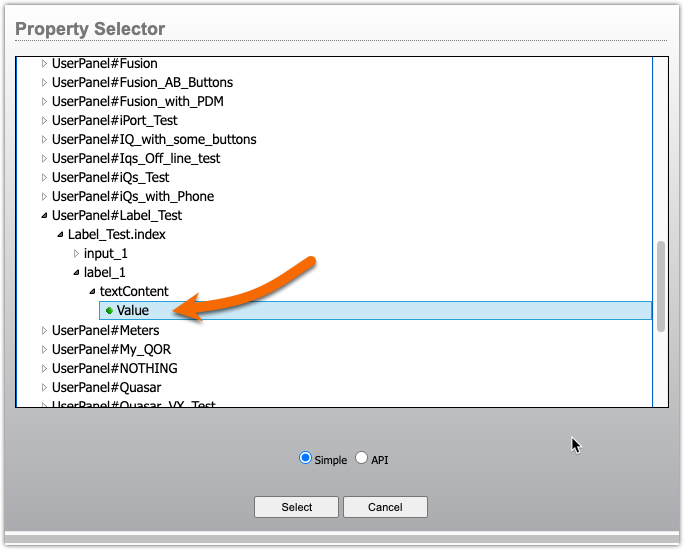
- Double-click the input block of the Logic Flow.
- The Property Selector will open. Pick the SlotValue property of your Memory Slot. In our example, the Memory Slot is called MyFavoriteMemorySlot
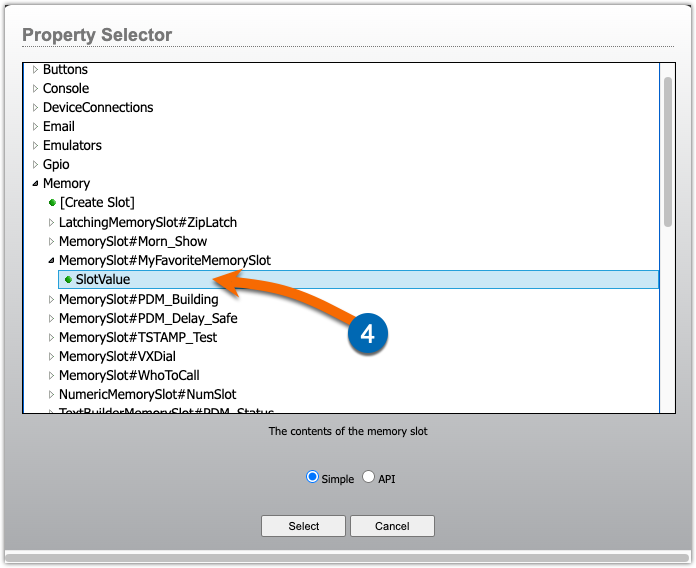
- Click Select, and the Translator Properties will automatically open.
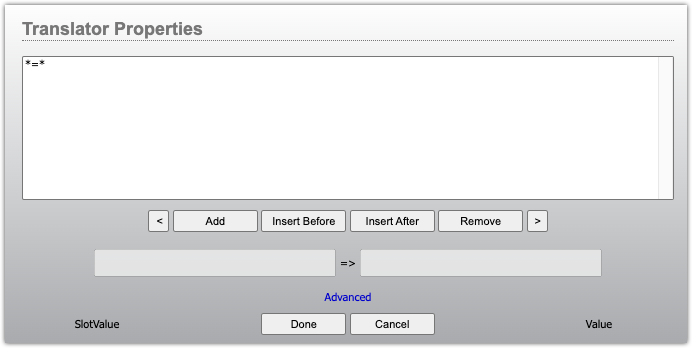
The default of *=* is good enough for what we need, and we can click Done from here. However, let's ADD some additional text.
- Click on the *=* at the top of the box to select it.
- Replace what's on the output side of the Translator Property with
Slot Value is: *
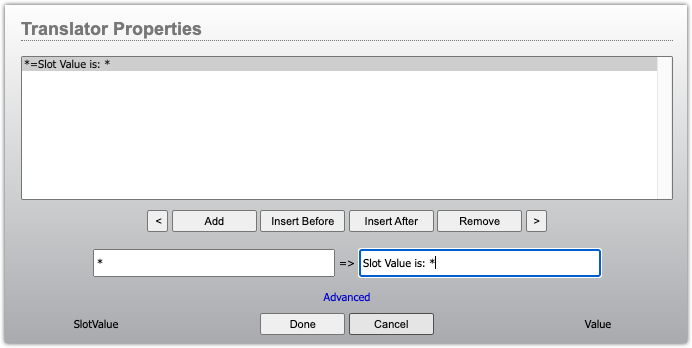
- Click Done.
- Click Save on your panel. You must specify a name if you haven't previously saved the panel.
- Click View to run the panel.
Our graphic shows that each time we type some text in the orange box, it updates the Memory Slot in Pathfinder (shown on the webpage) and then updates the Label along with the additional text we added.
The Logic Flow Method
You'll need to build your own logic flows if you need more complicated logic. The steps here are the same as steps 1 and 2 above. You must click the box next to the property you want to make active and available to the Logic Flows.
When creating your own Logic Flow, you must manually pick the textContent value from the property selector.
Once you have picked your Logic Flow OUTPUT, the rest of the steps are the same starting from Step 3.
Let us know how we can help
If you have further questions on this topic or have ideas about improving this document, please contact us.