Removing the cover from your Axia PowerStation Integrated Console Engine
 Updated
by
Bryan Jones
Updated
by
Bryan Jones
Scope
This document applies to the Axia PowerStation Integrated Console engine with part number 2001-00251
Tools Required
The tools required for removal of the cover are;
- #1 Phillips screwdriver
- 3.0mm Allen wrench - minimum length of 3 inches is required to reach all screws.
Removing the top cover
The cover of the PowerStation is held in place by twelve Phillips-head screws accessed from the top of the cover and a total of ten Allen head screws accessed from the side.
Remove the cover using the following steps
Remove the twelve Phillips head screws from the top of the cover as indicated
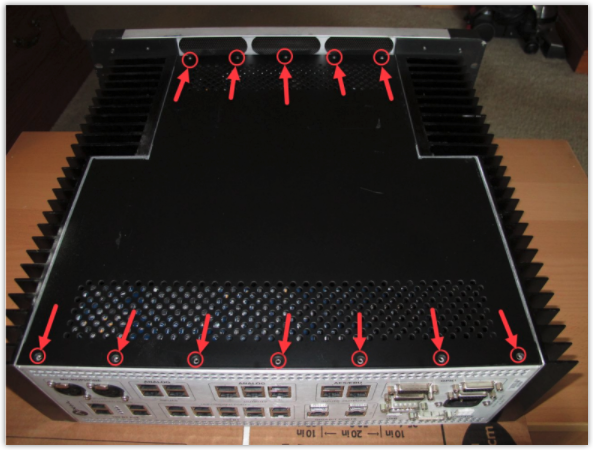
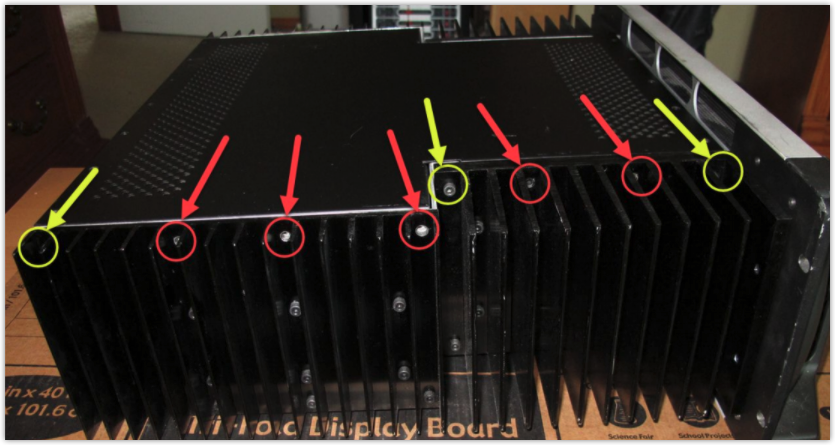
Remove the ten Allen-head screws (5 on each side) using a 3.0mm Allen wrench.
Once all screws are removed the lid can be lifted off to gain access to the inside of the PowerStation. The following picture shows the PowerStation with the top removed.

Reinstalling the Cover
Reassembly of the cover is done in reverse order paying attention to the length of the screws in the side. As a reminder, the two side screws toward the front of the unit are longer than the three others.
Let us know how we can help
If you have further questions on this topic or have ideas about improving this document, please contact us.