Checking the network settings for Dashboard
 Updated
by
Tim Chimes
Updated
by
Tim Chimes
Scope
This document covers the process of manually checking and setting the network settings that Dashboard uses to access your devices.
Changing the network settings
These settings (for Dashboard Application and Server) are changed by editing the settings.jasonfile in the C:\ProgramData\Telos\Infinity directory.
What are JSON files?
A couple of warnings before we start
- On the computer where Dashboard is installed, open Windows Explorer and navigate to the C:\ProgramData\Telos\Infinity directory and locate the settings.json file as shown here.
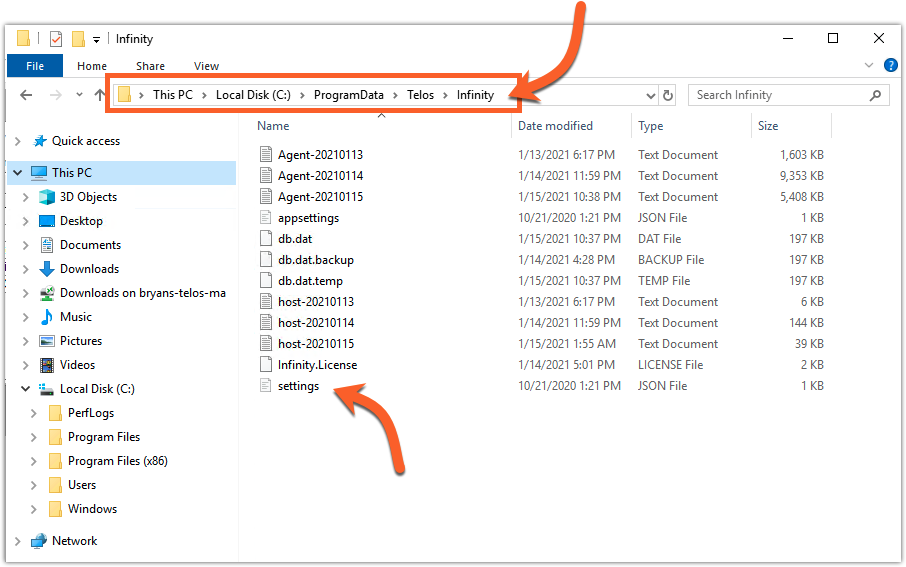
The ProgramData directory is likely a HIDDEN directory on your computer, and you will need to type this location into the address bar.
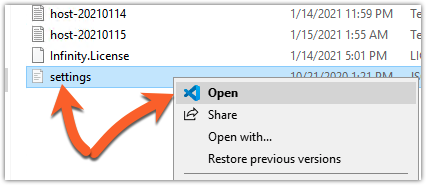
- Right-click on the settings file and chose Open
The following images may look slightly different. In this example, Visual Studio Code is used as our text editor. Your editor may differ, but the steps are the same.
Some or all of these settings may exist in your file depending on what you chose at setup.
{
  "TcpListenPort": "49352",
  "AgentNIC": "192.168.2.20",
  "LivewireNIC": "192.168.2.20",
  "NodePassword": "user",
  "LowerRendererChannel": "29000",
  "UpperRendererChannel": "30000",
  "AddressRange": "192.168.2.0-192.168.2.255,192.168.3.0-192.168.3.50"
}- We want to check for the AgentNIC and LivewireNIC fields. If you do not see them, you can add them.
- To add the either the "AgentNIC" of "LivewireNIC" parameters, you must first add a comma after the last line and create a new line before the close curly brace symbol.
- We advise making sure that both AgentNIC and LivewireNIC are both listed. That can be set to the same IP address.

- Save your file.
If you are running the Application version (not the Server version) of Dashboard, you are done. The next time you open the application, the new settings are applied. If you are using the server version of Dashboard (where you access it via a Web Browser), you need to restart the Dashboard services.
Restating Dashboard Services (server version only)
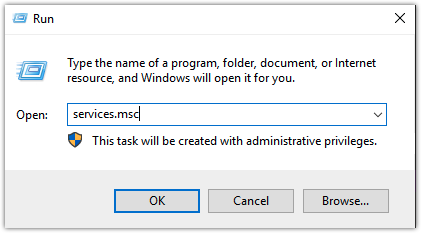
- Press the Windows Key + R (or select run) from the Start menu.
- In the Open: box, type services.msc and click OK.
- When the Services window appears, scroll down and locate the Infinity.Agent and Infinity.Host services
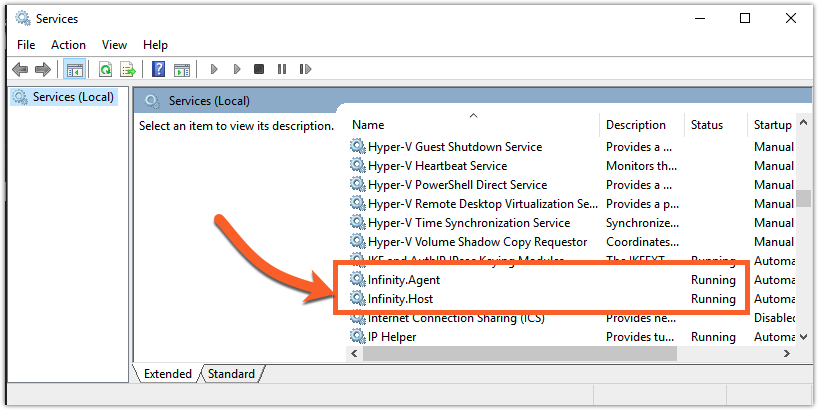
- Right-click on each service and choose Restart.
Let us know how we can help
If you have further questions on this topic or have ideas about improving this document, please contact us.