Axia Quasar Family Software v2.1.2 and Firmware v2.0.0 Release Notes & Update Instructions
 Updated
by
Bryan Jones
Updated
by
Bryan Jones

Update Components
Important Note: Quasar is a system-wide software package. To receive the full benefits, please ensure your components are ALL running the correct versions.
- NEW IN THIS VERSION - Quasar Master Module (MTS-MON), software v2.1.2 Field Update.
- Previously Released - Quasar XR 4-Fader Module (XR-4FAD motorized), software v2.1.0 Field Update
- Previously Released - Quasar Accessory Modules (MF1-ACC and MPC-AAC), software v2.1.0 Field Update
- Previously Released - Firmware v2.0.0 Field Update for Quasar XR-4FAD and MTS-MON Surface Modules.
- Previously Released - Quasar Engine, software v.2.0.1 Field Update
- Previously Released - Quasar SR 4-Fader Module (SR-4FAD non-motorized) Click here for the update if you are not running version 2.0.2 module firmware
Items 4, 5, and 6 are provided here for reference. There is no need to update if you are already running the version noted for the module firmware or Quasar Engine software. Please complete the update if you are NOT already running the versions noted.
Updating Quasar Software
Updating the MTS-MON Master Module

Clicking the link will open a new window and download the file from Google Drive.
- Connect a PC to your Quasar's network.
- Open the MTS-MON Web UI at the unit's base IP address (standard HTTP port 80). For example, http://192.168.2.90
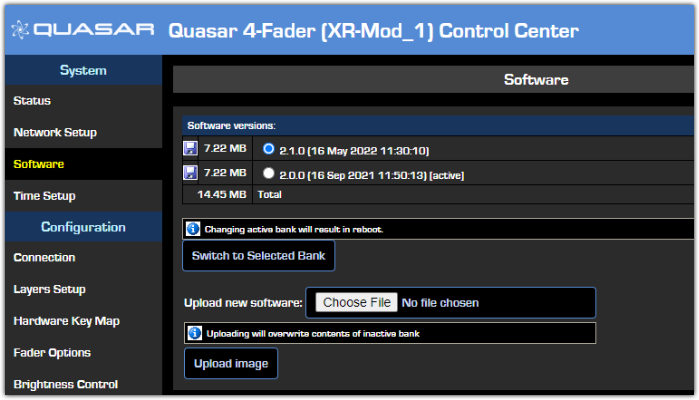
- Under the System heading, select Software. You may be asked to log in with the name user and your password.
- Click on “Choose File." Navigate to the location where you saved the update file and select it.
- Press the "Upload Software" button. The new version will load into the inactive software bank and overwrite its content.
The page will refresh automatically once the upload is complete, showing the new version in the inactive bank.
- Select the new bank and press the “Switch to Selected Bank” button.
WARNING: the console will reboot once you press the button. The system takes approximately 15 seconds to reboot. Audio will be interrupted for about 1 second.
Updating XR-4FAD Fader Module
Each XR-4FAD Module must be individually updated. NOTE: XR-style faders are identified by motorized faders and individual meters next to each fader. If you do not have motorized faders or fader meters, you have SR-style modules, and you can skip this step.
Clicking the link will open a new window and download the file from Google Drive.
- Connect a PC to your Quasar's network.
- Open the XR-4FAD Web UI at the unit's base IP address (standard HTTP port 80). For example, http://192.168.2.91
- Under the System heading, select Software.
- Click on “Choose File." Navigate to the location where you saved the update file and select it.
- Press the "Upload Software" button. The new version will load into the inactive software bank and overwrite its content.
The page will refresh automatically once the upload is complete, showing the new version in the inactive bank.
- Select the new bank and press the “Switch to Selected Bank” button
WARNING: the module will reboot once you press the button. It takes approximately 15 seconds to reboot. No audio interruption will occur.
Updating MF1-ACC and MPC-AAC Accessory Module Software
NOTE that each Accessory Module must be updated separately
Clicking the link will open a new window and download the file from Google Drive.
- Connect a PC to your Quasar's network.
- Open the Accessory Module Web UI at the unit's base IP address (standard HTTP port 80). For example, http://192.168.2.91
- Under the System heading, select Software.
- Click on “Choose File." Navigate to the location where you saved the update file and select it.
- Press the "Upload Software" button. The new version will load into the inactive software bank and overwrite its content.
The page will refresh automatically once the upload is complete, showing the new version in the inactive bank.
- Select the new bank and press the “Switch to Selected Bank” button
WARNING: the module will reboot once you press the button. It takes less than 15 seconds to reboot. No audio interruption will occur.
Updating Quasar Module Firmware
MTS-MON and XR-4FDR Modules use the same firmware update file. Firmware on all modules can be updated before or after the software update.
Updating Firmware on the MTS-MON Module:
- Open the MTS Web UI at the following address: IP address/debug/mcu. For example http://192.168.2.90/debug/mcu
The MCU Operations page will appear
- Click on “Choose File.” Navigate to the location where you saved the update file and select it
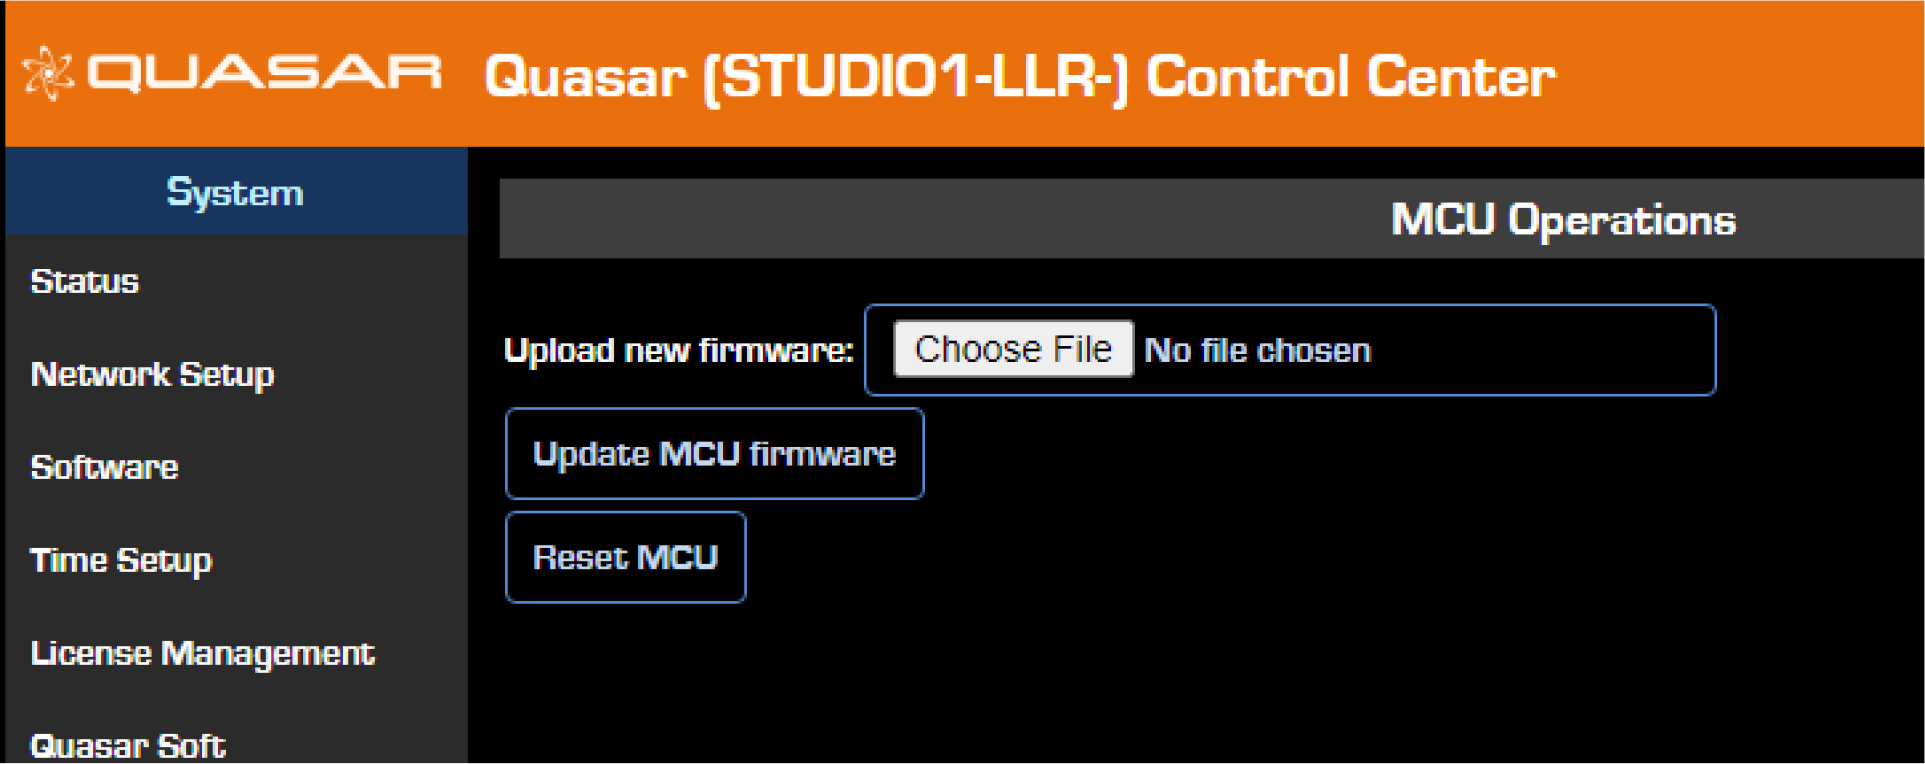
- Press the "Update MCU firmware" button. The new version will load into the firmware bank and overwrite its content.
The page will refresh automatically once the upload is complete, showing the above picture. This is normal.
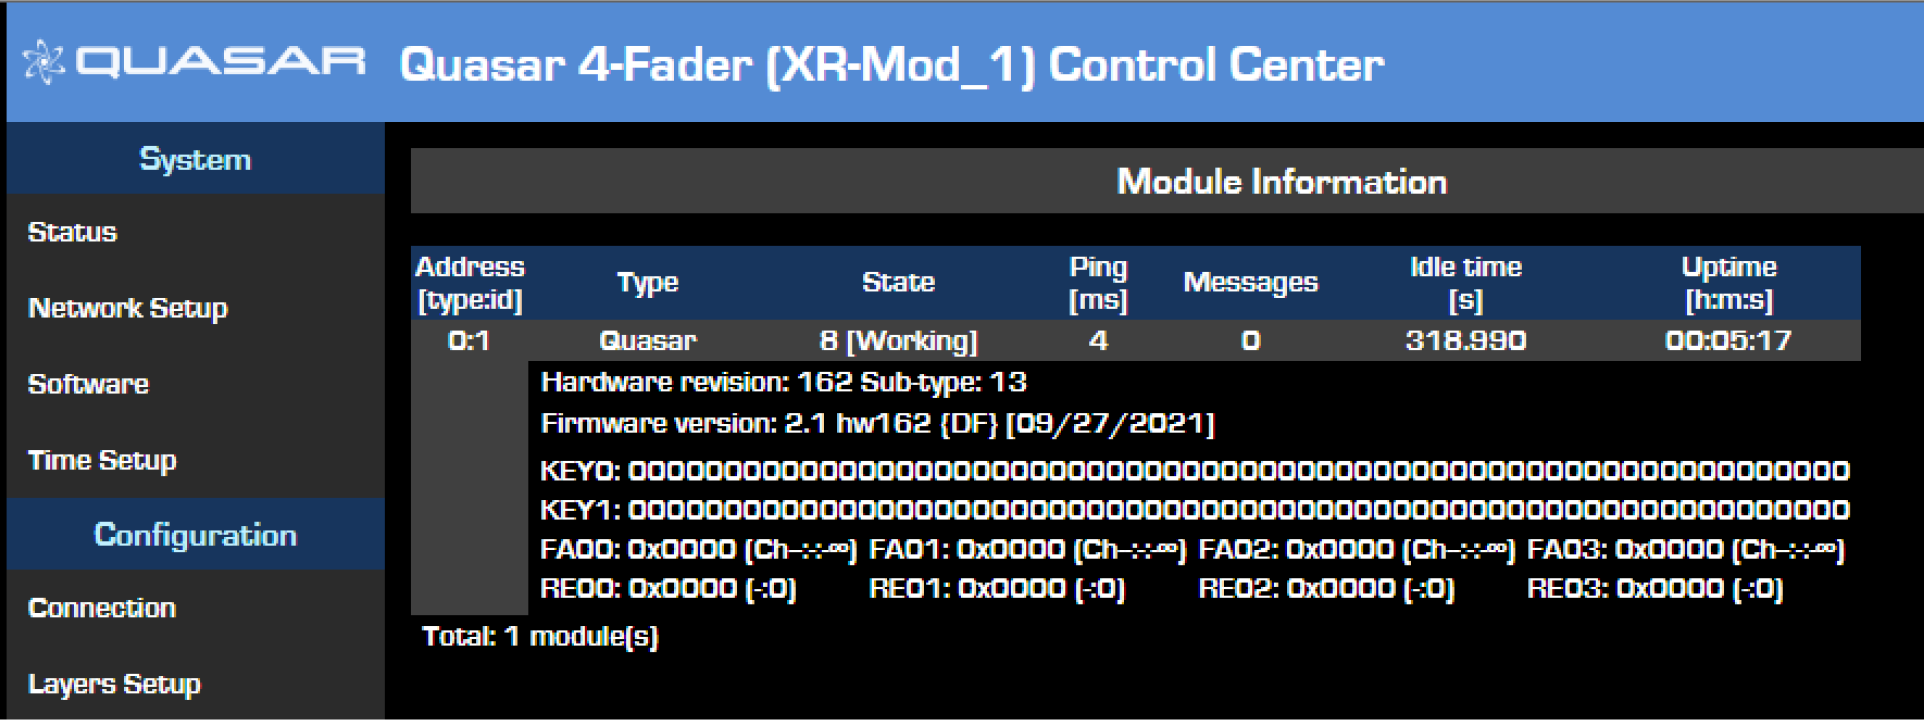
Verifying the MTS-MON firmware update
- From the main menu, select the Module Information link. The following page will appear:
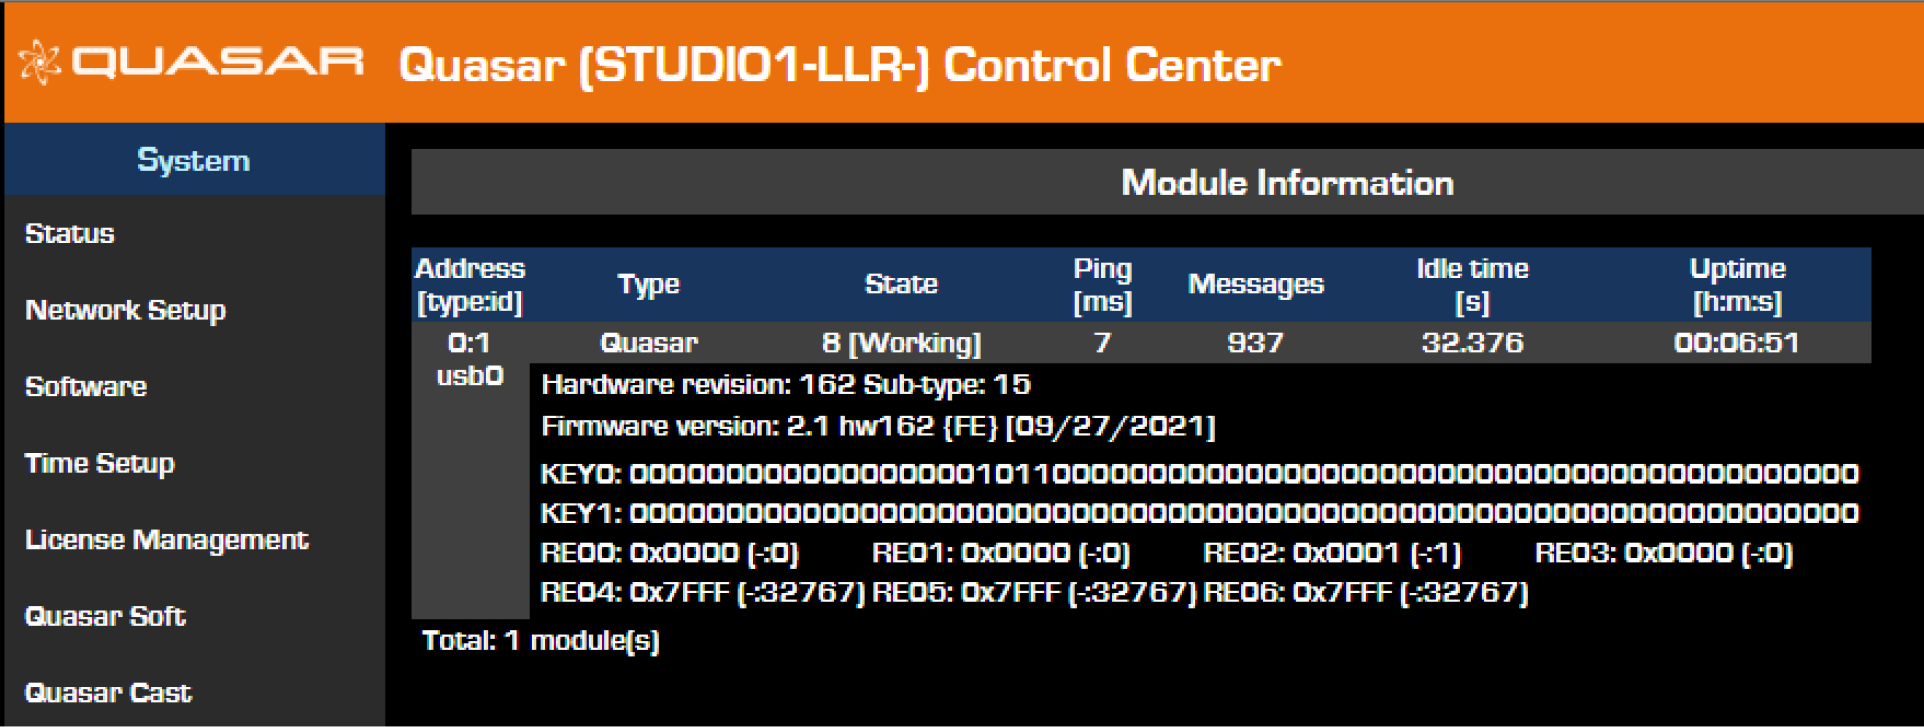
- Double-check that the new Firmware version is correctly reported as 2.1 hw162.
Updating Firmware on the XR-4FAD Module:
Each XR-4FAD Module must be individually updated. NOTE: XR-style faders are identified by motorized faders and individual meters next to each fader. If you do not have motorized faders or fader meters, you have SR-style modules, and you can skip this step.
MTS-MON and XR-4FDR Modules use the same firmware update file. Firmware on all modules can be updated before or after the software update.
MTS-MON and XR-4FDR Modules use the same firmware update file. Firmware on all modules can be updated before or after the software update.
- Open the XR-4FAD Web UI at the following address: IP address/debug/mcu. For example http://192.168.2.90/debug/mcu
The MCU Operations page will appear.
- Click on “Choose File.” Navigate to the location where you saved the update file and select it.
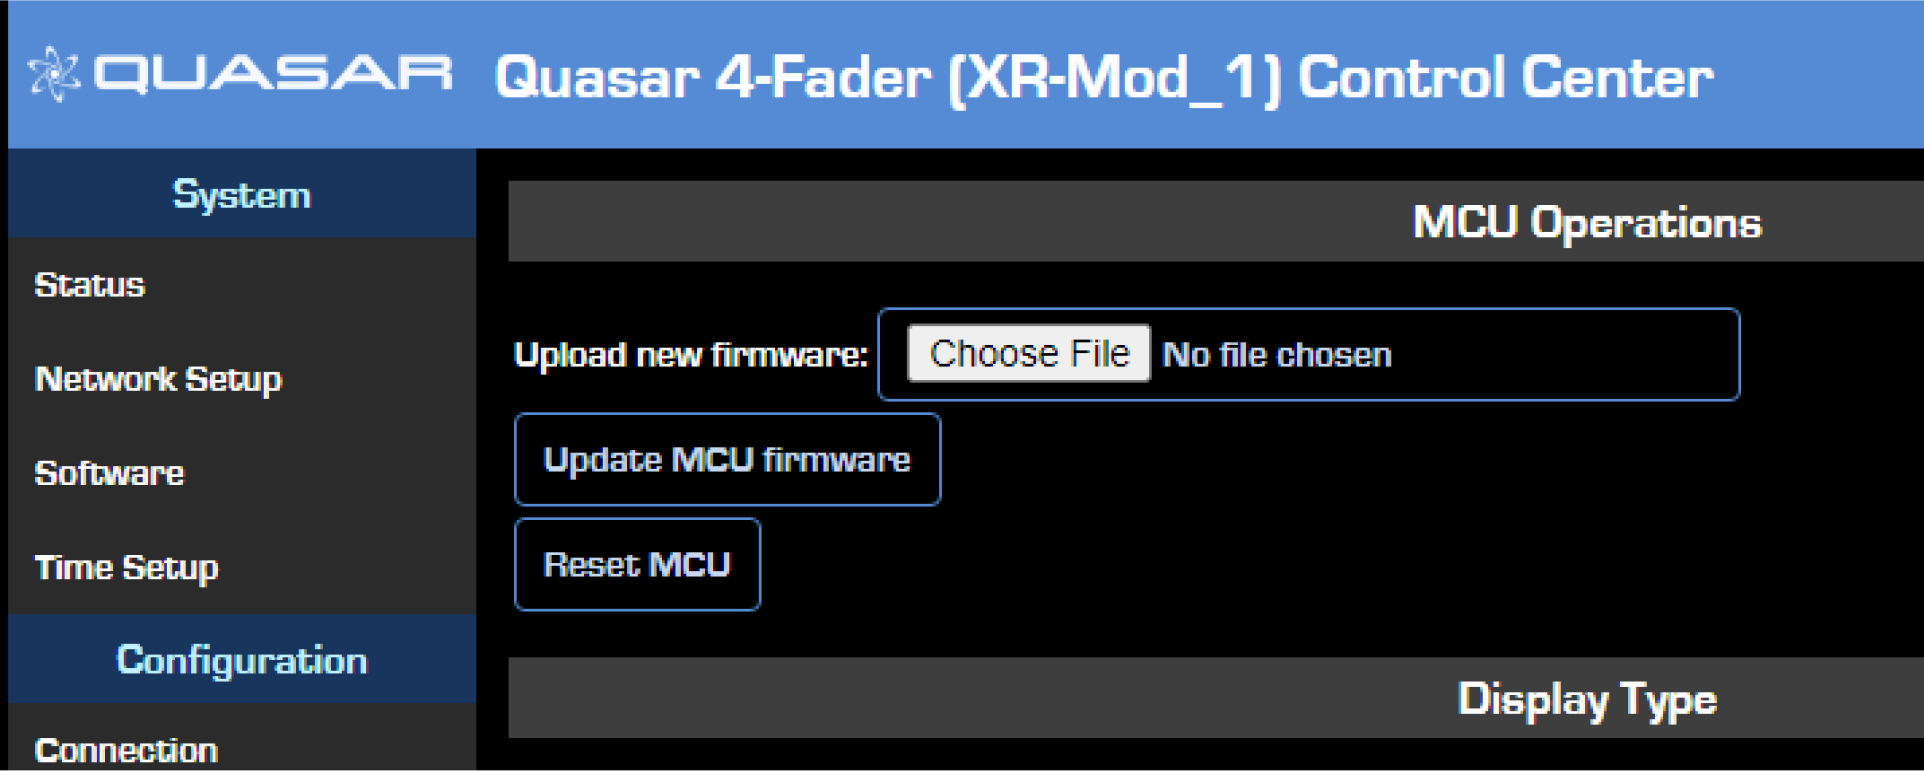
- Press the "Update MCU firmware" button. The new version will load into the firmware bank and overwrite its content.
The page will refresh automatically once the upload is complete, showing the above picture. This is normal.
Verify the XR-4FAD Firmware update
- From the main menu, select the Module Information link. The following page will appear:
- Double-check that the new Firmware version is correctly reported as 2.1 hw162.
Updating the Quasar Engine Software
- Connect a PC to your console network.
- Open the Quasar Engine Web UI at the unit's base IP address (standard HTTP port 80).
- Under the System heading, select Software.
If both of the Engine’s software banks are used, and the “Choose File” option is not displayed here, select the bank currently in use and click the Commit button. Otherwise, skip this step.
- Click on “Choose File.” Navigate to the location where you saved the update file and select it
Wait while the software uploads and the package name appears in the field next to the button.
- Click on the Upload button. A message will appear to inform you that the file is being uploaded. Once complete, you will receive a confirmation message.
- After you receive the confirmation message, refresh the page.
- Select the new software bank by clicking on the radio button.
- Click the Apply Selected Bank button.
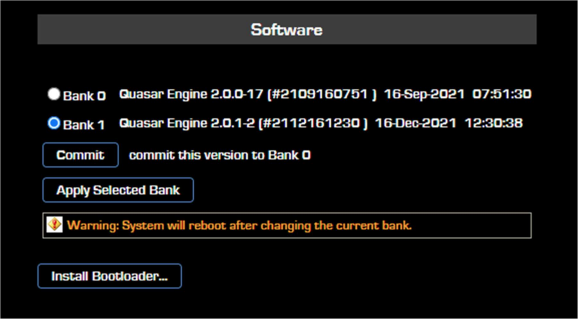
- A dialog will appear asking for confirmation, and the system will be restarted.
WARNING: The Engine will reboot after selecting a new software bank, connections to the surface will be reset, and audio will be interrupted for more than one minute.
Release notes
Software release notes for all versions are moved to their own document. Click here for that document.
Let us know how we can help
If you have further questions on this topic or have ideas about improving this document please contact us