Quasar Engine Software Update - Version 1.2
 Updated
by
Bryan Jones
Updated
by
Bryan Jones
Scope
This document applies to the Axia Quasar engine only. Telos Alliance part number 2001-00583-000
Engines for Fusion or Element consoles are out of the scope of this document. Do not attempt to apply this update to any other engines.
Instructions
The specific instructions may be slightly different depending on your current version of engine software. Although the menus may be located in a somewhat different location, the steps are the same. We will note the alternate locations where they are different.
After the update, all versions will have a unified interface.
Backup your configuration
- Using your Web Browser, navigate to the Quasar Engine Web Page.
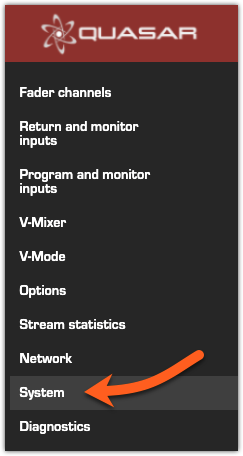
- Click on the System link.
- Click on the Backup button under the Configuration Management heading.

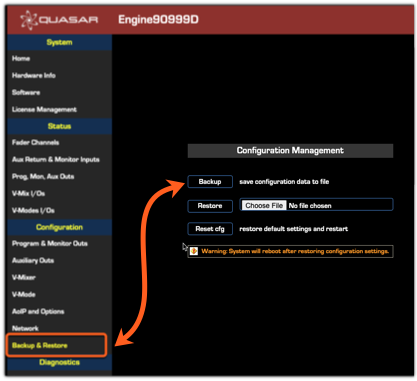
- Save the backup file to your computer for later use if required.
Update your Engine software
Please save it to a location on your computer for use in the following steps. Note, this will download a .tar file.
The software upload procedure does NOT require a reboot.
Engine update instructions for version 1.0.0.60 are shown here. Alternate versions are noted below.
- Click on the System link in the menu on the left.
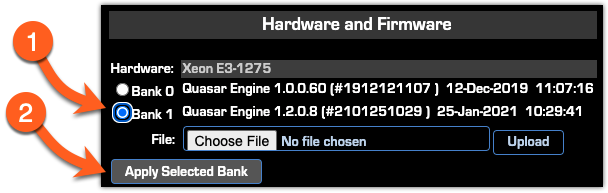
- Locate the Hardware and Firmware section in the bottom right of the System page.
- If your system indicates Bank 1 is the active bank (indicated by the blue dot), click Commit. This will NOT reboot the engine but will free Bank 1 to upload the software update. Otherwise, proceed to Step 3

- If your system indicates Bank 1 is the active bank (indicated by the blue dot), click Commit. This will NOT reboot the engine but will free Bank 1 to upload the software update. Otherwise, proceed to Step 3
- Click the Choose File button.
- Browse for and select the update file you downloaded at the beginning of this section. Once the file is chosen, the "No file chosen" message will display the name of the file that you uploaded.
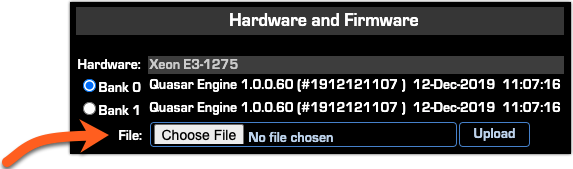
- Click Upload.
Your browser will show System Upload in progress. After a short period, the browser will display "Info: Firmware upload finished successfully.Press <Refresh> to continue."
- Click the refresh button on your browser.
The Bank 1 information will show Quasar Engine 1.2.0.8 as shown here.


Activate the updated software bank
The activation of the updated bank of software DOES require a reboot. The engine will require approximately two minutes to reboot. During this, time the engine will not process any audio. Plan accordingly. The Quasar console will reconnect automatically.
- Under the Hardware and Firmware heading where you previously uploaded the software, click Bank 1 to select it.
- Click the Apply Selected Bank Button.
- Answer YES to the confirmation screen to reboot the engine and activate this new bank. If you wish to reboot later, answer NO.
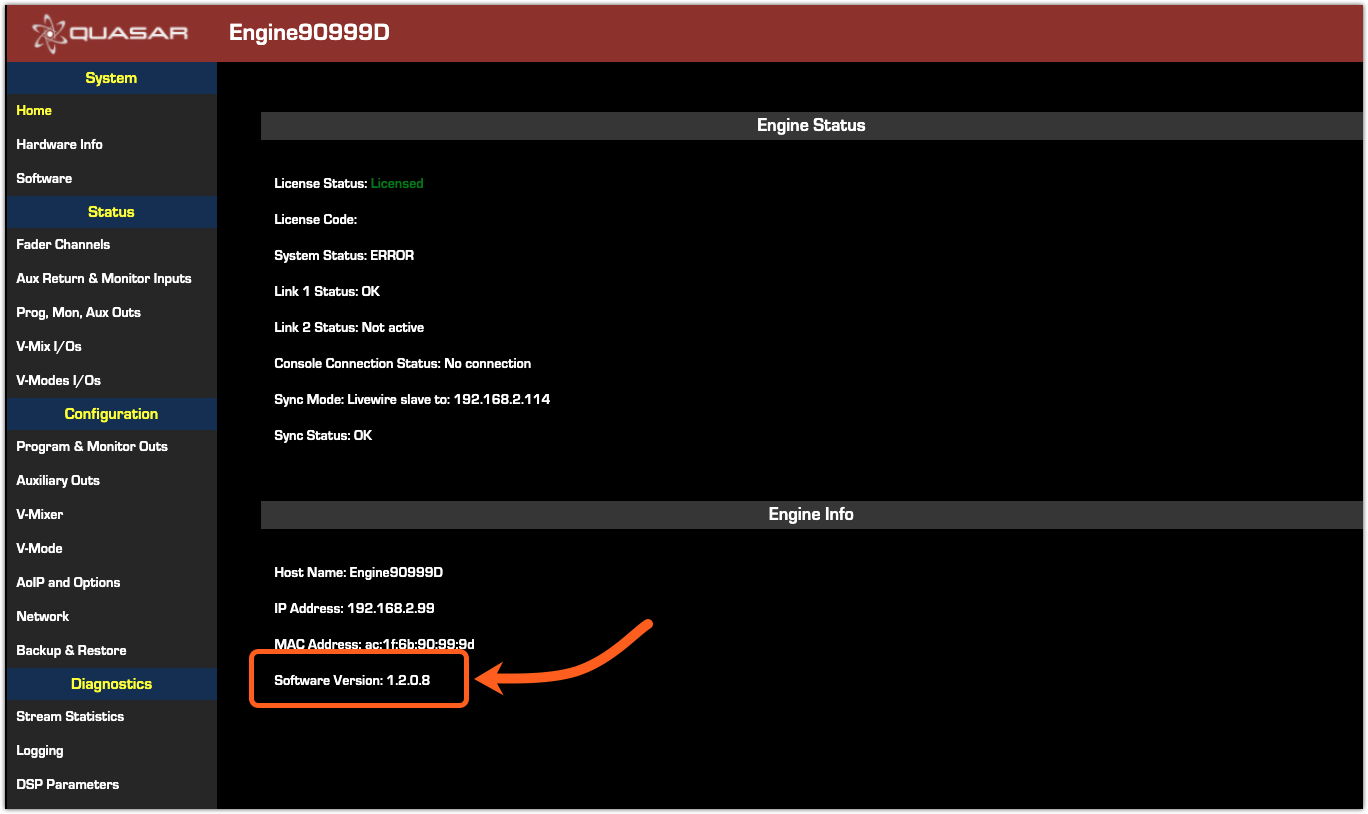
Confirm the new version is running
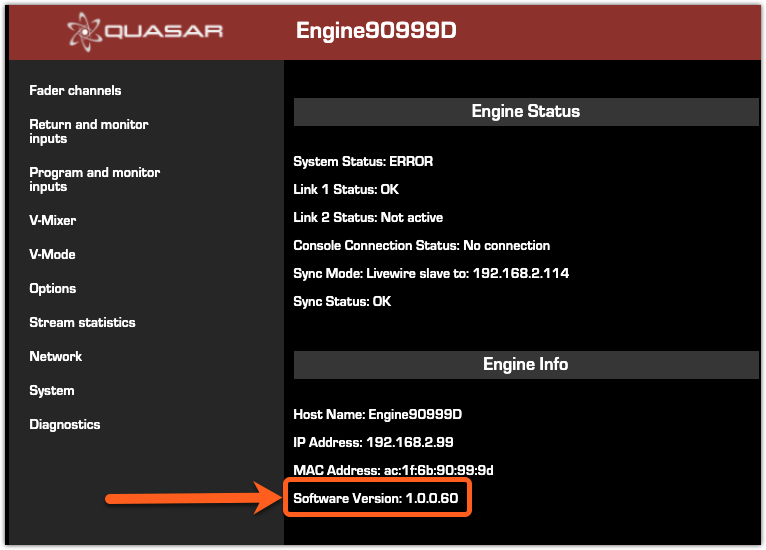
From the Home link on the main Web Page, make sure Software Version 1.2.0.8 is shown under Engine Info.
Updates and fixes in this version
Main improvements
- Web UI rework
- Setting for preview level in CR headphones (Requires update MON-MTS module software)
Most visible defects fixed
- Meter flow no longer stops after a console connection timeout
- Custom backfeed indications for AUX 5-8 now shown on the channel strip
- Channel AUX SEND Meter now tracks AutoMixer activity when an AUX Send is set to post-fader
- Fixed incorrect behavior of the "Auto CH" function
- Web UI: Fixed issue where you could not change the source name for the VMIX MAIN output
- VMIX fade In and Out times were swapped when apply was pressed on the Web interface
- Fixed an issue where the fader channel status page might incorrectly show feed to source status as: "OK"
- WEB UI: Fixed issue where SDP import might assign an invalid Packet Time value
- Fixed issue where Custom Backfeed Selector behaved incorrectly when L and R selections are different
Let us know how we can help
If you have further questions on this topic or have ideas about improving this document, please contact us.